This the perfect non-picnic picnic cake. It’s light with a cloudy vanilla sponge, and laced with fresh cherries which burst in your mouth and whose astringency perfectly cut through the smooth rich vanilla-cream. I keep the cherries fresh and unadulterated so as to keep the cake not too sweet, with a hint of cherry jam just to counter too much acidity.
Viewing entries tagged
syrup
'Oats: a grain, which in England is generally given to horses, but in Scotland supports the people’ Samuel Johnson, The Dictionary of the English Language, 1755
If I were the type of person that leafed (ironically) through Cosmo, and stumbled across one of those lazy, page-filling content, tree diagrams which happened to ask “what is your spirit animal?”, I know what mine would be. A horse. Well, at least that’s what it would have been during the second year of my time at university in terms of comestibles…
Essay crises necessitate fuel in order to feed the adrenaline and, for me, that fuel came in the form of oats.
When you have a 9 am deadline approaching, and there is only one hour remaining, every minute is precious - so there is no time to spare for cooking oats over the hob until they break down into a creamy mulch.
That’s the excuse I gave myself. Instead, I developed the rather grotesque habit of eating oats straight from the packet, raw and desiccated. In my maddened and pressured state, I savoured the clagginess of the oats, where you can’t quite conjure up enough saliva to swallow them. Ideal.
I have since moved on from this stage (with the very occasional relapse) to a more acceptable way of dealing with my love of oats: Bircher muesli, invented by Bircher Benner, a pioneer of raw foodism, in the late 19th century as a way of curing his jaundice. It worked.
I feel, somewhat justifiably, that it runs in my blood (thick & creamy): my great-great-uncle was a frequent patient at Benner’s rather avant garde Swiss raw food clinic and, one sunny day, he stepped down from a plane on an impromptu visit from Scotland to South Africa with no clothes besides the ones on his back, a vegetable juicing contraption which he trailed behind him on a rickety little cart, and a proselytising passion for Bircher muesli.
I have tried many a Bircher muesli, from Swiss versions to Vietnamese attempts, but I feel I have concocted the ultimate version (excuse my arrogance). Creamy, healthy, juicy, and exotic, it’s effectively manna, and I would happily have it for every meal of the day (jaundiced or not).
The Best Bircher Muesli (Serves 5)
Ingredients
2 Braeburn apples, grated
Juice of 1/2 lemon
200ml orange juice
200g natural yogurt
200g almond and coconut milk (can be substituted with dairy or non-dairy alternatives)
3 tbsp maple syrup
1 tsp vanilla bean paste (if you can’t get hold of this, omit it, or substitute with ½ tsp vanilla extract)
50g desiccated coconut, lightly toasted in a pan on a low heat until pale gold)
200g porridge oats
Pinch of salt
200g of fresh fruit of your choice (blueberries, strawberries, raspberries, figs, sliced banana work well)
40g coconut chips (optional but adds great texture)
Method
- In a large bowl mix together all the ingredients apart from the fresh fruit and optional coconut chips. If you are making this the night before, cover the bowl with cling film and place in the fridge overnight to let the oats soak up the flavours. If you are serving the muesli immediately, stir the mixture for a couple of minutes to break down the oats until they are creamy.
- If you are leaving the muesli overnight, allow it to come to room temperature before serving. Scatter mixed berries and fruits and coconut chips over the top and serve.
How to bake and stay (reasonably) in shape.
I am often asked how it is that I am not obese. I am by no means super skinny, but people wonder how I avoid rolling around the place when I am seemingly baking the whole time and have little resistance to delicious things. So, here’s my secret. Have a go.
What I need: a running machine; a radio; an oven; a timer
What I do:
Pour the batter into the cake tin, lovingly smooth the surface over with a spatula. One lick of the spatula before it goes in the sink (just a little indulgence). Carefully open the oven door, and bend down slowly so that the batter remains level. Place the cake tin tenderly on the rack. Set the oven timer. 22 minutes. Then GO.
Run up the stairs, two at a time. That’s one minute either side to rush back down. Turn up the radio. Leap on to the treadmill, and run. 10 mph minimum. 20 mins to go. Sweat, pound, sweat. 15 mins. Beyoncé’s screaming. Oven beeps. Run back down (Beyoncé’s mumbling). Open oven door, skewer the cake. Damn - not cooked. Rip out a sheet of tin foil. Cover the cake. Burn hand. Set timer: 7 mins more. Repeat process until skewer comes out clean. Place cake on rack and allow to cool.
Stretch and shower.
Hover over the cake with a knife.
You can make the cake sans-icing by simply halving the recipe and, before serving, dusting with a little icing sugar.
Ingredients
Cake
200g butter, at room temperature
170g caster sugar
30g light brown muscovado sugar
2 tbsp ground coffee
¼ tsp salt
70g toasted walnuts, ground to a fine sand
4 large eggs, beaten
1 tsp vanilla extract
1 ½ tsp instant coffee, dissolved in as little hot water as possible to make a smooth paste
240g self-rising flour, sieved
2 x 8 inch cake tins, greased and with bases lined with a circle of baking parchment
Coffee Syrup
40g golden syrup
50g caster sugar
2 tbsp instant coffee
100ml boiling water
Coffee Icing
300g butter, at room temperature
450g icing sugar
1 ½ tsp vanilla
2 tbsp instant coffee dissolved in as little hot water as possible to make a smooth paste
¼ tsp salt
Caramelised walnuts
60g walnuts
2 tbsp caster sugar
3 tbsp water
Method
- Preheat oven to 180˚C. Using an electric mixer, or with a vigorous hand, in a large bowl beat together the butter, caster sugar, muscovado, ground coffee and salt until light and fluffy.
- In a separate bowl, beat together the eggs, vanilla and dissolved instant coffee. Beat this into the butter-sugar-coffee-salt mix. Once combined, stir in the ground walnuts.
- Finally, gently fold the sieved flour into the mixture, being careful not to overbeat. Divide the mixture between the two tins and place in the oven to bake for 25 minutes (checking after 20) or until a skewer comes out clean.
- While the cakes are baking, make the coffee syrup. Dissolve the instant coffee in the water and pour into a small pan along with the syrup and sugar. On a medium high heat, stir until the sugar has dissolved, then allow to simmer for 5 minutes or until it thickens slightly to the consistency of maple syrup.
- Remove cakes from oven. Stab them all over with a cake tester or skewer, and spoon the syrup equally over the two cakes. Set aside on a rack and allow to cool.
Icing
- Beat together butter and icing sugar. Once combined, beat in the vanilla, coffee and salt.
- Remove the cakes from tins, place one on the serving plate and spread ¼ of the icing on its surface. Place the other cake on top and spread the icing evenly over the cake.
Caramelised Walnuts
- In a shallow pan, over a medium-high heat, stir together water and sugar until the sugar has dissolved. Then pour in the walnuts, and continue to stir and coat them until all the water has evaporated. Decant them on to a sheet of baking parchment, and allow them to cool.
- Once cool, chop roughly, and scatter as desired over the cake.
Is it just me, or is anyone else sick of logging on to Facebook, innocently hoping to drain away half an hour of one’s day (minimum) by looking at pictures of people one may or may not have half met once trying to prove how much fun they are having by posting pictures of themselves with friends/family, strained smiles stretched across their faces, and who are clearly not that immersed in the fun as they have had to spend half an hour trying to get one decent picture out of the hundred they’ve taken to emblazon it across their Facebook wall and maybe, just maybe, turn it into a cover photo?
And then – BAM - your gaze is diverted,
and you are staring down into the depths of a garishly coloured plastic bowl filled with some unidentifiable artificial gunk, pink fleshy hands massaging some other substance into it to form some putty-like emulsion which is then mushed and squeezed and squidged into a plastic mould, whizzed up, and extruded through a bag and…… oh look, it’s that Gooey Oreo, Jellied Eel and Green Marshmallow Mini Coffee Cup that “you’ve always wanted to make for your slumber party with the gals”.
Here’s an antidote. It is simple yet sophisticated, humble yet sumptuous, tangy but not cloyingly sweet, and light yet not so light when you’ve had 4+ pieces….
Ingredients
Pastry
200g white spelt flour (can be substituted with plain flour)
100g butter, roughly cubed
2 tbsp icing sugar
¼ tsp salt
1 small egg, beaten
12 x 36cm tart tin, greased and dusted with flour
Blueberry filling
800g frozen blueberries
250g caster sugar
1 tsp cinnamon
½ tsp nutmeg
2 tbsp cornflour
Zest of ½ medium sized orange
Method
- Place flour, butter, icing sugar and salt in a food processor, and blitz until it resembles damp sand. Pour in the beaten egg, and pulse until the mixture combines to form a soft dough. Remove from the processor, wrap in baking parchment and place in the fridge for half an hour (or freezer for 10-15 minutes) – this will prevent the dough from shrinking when it bakes.
- Preheat the oven to 180˚C. Lightly dust a surface with flour and roll out the dough in a rough rectangle to 0.5cm thickness. Roll the pastry around a rolling pin and transfer to the tin, pressing it into the fluting (if, indeed, your tin is fluted). Run a knife along the top edge of the tin to remove excess pastry. Prick the base of the pastry a few times with a fork, and place back in the fridge for 30 minutes (or freezer for 10 minutes).
- Prepare the pastry for blind baking by lining the inside with a sheet of tin foil and filling it with baking beads to weigh it down while it bakes and to prevent it from shrinking. Place in the oven for 15-20 minutes until the pastry is dry and beginning to turn golden. If it is cooking too slowly, you can remove the beads and tin foil after 15 minutes and continue to bake. Remove from oven and set aside to cool.
- To make the spiced blueberry filling, place a large pan over a high heat and pour in all the ingredients. Stir continuously until the sugar is dissolved in the juice that runs off the blueberries. When the mixture begins to boil, reduce the heat to medium-high and allow to simmer for 20-30 minutes, stirring occasionally to prevent it from catching, until the liquid is almost completely reduced and with the viscosity somewhere between a syrup and a jam. Allow to cool to room temperature, then pour into the pre-baked pastry case.
I refuse to believe that the macaron is simply a fad. Admittedly, there was a craze which saw the opening of several French macaron boutiques in London. I shan’t name names but one of the largest French specialists does not even make them fresh in London. Instead, they import them frozen from France - in a state of hibernation, as they call it.
Despite this, the specialists remain, and the macaron is here to stay. Now that the craze has faded a little, I feel more free to write a recipe as people will be slightly less sick of the sight of the perfect ruffled shells.
Many are intimidated at the prospect of making them, but there really is no need. The rumour of the challenge in making them may well have been promulgated by the macaron specialists themselves in order to justify their extortionate pricing.
To make them extra tangy and fruity, raspberry is worked into these macarons in three ways: freeze dried raspberries, raspberry jam and raspberry liqueur. If you can’t get hold of freeze dried raspberries, just omit this element from the recipe.
Triple Raspberry Liqueur Macarons
Makes about 30 small macarons
Ingredients
110g icing sugar, sieved
50g ground almonds, blitzed in a blender to a fine powder, and sieved
5g freeze dried raspberry powder OR 10g freeze dried raspberries, crushed or whole (see below)
60g egg whites (about 2 eggs' worth)
40g caster sugar
A couple of drops of pink food dye (optional)
200g seedless raspberry am
4 tbsp Chambord (raspberry liqueur)
2 large baking trays lined with baking parchment – if you wish to achieve perfectly circular macarons, create guidelines for the piping by drawing in pencil round a 4cm bottle lid repeatedly on the greaseproof paper, leaving at least 4cm between each circle. Flip it over after doing this to ensure that the pencil does not transfer to the macaron
Piping bag fitted with 0.5cm nozzle
- In a large bowl, mix together the sieved icing sugar, ground almonds and freeze dried raspberry powder. If you can only get hold of crushed or whole freeze dried raspberries, place these in a blender and blitz until they are as pulverised as possible, and then sieve to remove the seeds. You should be left with a fine red dust.
- Pour egg whites into the bowl of a bone dry electric mixer fitted with a whisk attachment. Whisk at a high speed until soft, foamy peaks form. Then, with the whisk still ongoing, add in the caster sugar, a tablespoonful at a time. Keep whisking until the meringue is glossy and firm peaks form.
- Take a third of the meringue and mix it into the dry ingredients. If the dry ingredients don’t fully combine, stir in another tablespoon of meringue. At this point you can add a couple of drops of food dye to reach desired colour - anything from baby girl to schiaparelli pink. The mixture should turn into a thick, smooth paste. Then, gradually fold in the rest of the meringue, a tablespoon at a time, until the mixture becomes glossy and smooth.
- Spoon mixture in the piping bag and pipe little dots directly onto the corners of the baking tray to stick the baking parchment down. Then pipe the mixture into each circle. Once finished piping, tap the tray down firmly on a hard surface a couple of times to remove the air bubbles from the macarons. Then set the macarons aside at room temperature for 30 minutes. This will allow a skin to form and will lead to the creation of the often-elusive but essential “macaron foot”.
- While they are resting, preheat oven to 150˚C. Bake the macarons for 20 minutes or until they can be lifted off the tray cleanly with a pallet knife. Allow them to cool until they reach room temperature.
- Place raspberrry jam in a small pot over a medium-high heat and stir continuously. After it has bubbled furiously for a couple of minutes, stir in the Chambord. Allow the mixture to simmer for about 5 minutes, or until it has become more viscous and thick enough to be able to be dropped off a spoon. Remove from the stove, allow to cool for 5 minutes and then sandwich each pair of macaron shells together with a teaspoon of the mixture.
Caramelised White Chocolate Cheesecake with Salty-Sweet Fudgy Biscuit Base & Blackcurrant Glaze
I’m at risk of sounding like one of those mindless click-bait buzzfeed articles when I say this, but I mean ever word: you’ve been eating white chocolate incorrectly your whole life.
Would you believe me if I told you that the innocent Milky Bar Kid’s saccharine white cocoa butter chocolate has a deeper, darker, more seductive side?
The corruption process is simple. All you need is:
- heat
- good quality white chocolate
-a tray
After about 20 minutes, the heat will begin to convert the pool of glossy molten cocoa butter into white chocolate’s luscious evil sister. I dare you to try it.
It’s pretty sublime on its own but, if you can resist eating it all, it works deliciously well in a cheesecake. I pair it with a fudgy, salted, graham cracker-style base and an astringent blackcurrant glaze to cut through the sweetness.
Often cheesecakes call for a base simply made out of crushed store-bought cookies. I’m no stranger to doing this myself, but I’m always left with a pang of guilt for cheating. Not only does homemade biscuit base taste better, it’s chemical-free and you have much more control over the flavour balance – this one’s especially fudgy.
However, if you’re feeling lazy you can make the base using 400g digestive biscuits blitzed into crumbs with the 120g browned melted butter. If you are a coeliac just use gluten-free digestive biscuits.
You can also use non-caramelised white-chocolate. It will still taste delicious, just not anywhere near as ambrosial.
If you can’t get hold of any blackcurrants, feel free to use fresh or frozen raspberries or redcurrants instead.
This is best made the day before serving and kept in the fridge overnight. In fact, the fridge works wonders.
Ingredients
Salty-sweet, fudgy biscuit base
200g white spelt flour
60g light muscovado sugar
1 tsp bicarbonate of soda
1 tsp salt
60g unsalted butter, diced
70g clear honey
4 tsp vanilla extract
120g unsalted butter, for melting
Large baking tray, lined with baking parchment
20cm square tin (or round with similar capacity), lined with baking parchment
Caramelised white chocolate filling
300g good quality white chocolate, broken into pieces
180ml double cream
500g full fat cream cheese, at room temperature
100g caster sugar
4 eggs, at room temperature
1 tbsp vanilla bean paste (or the seeds of 1 vanilla pod)
Bone dry baking tray (preferably non-stick)
Sour cream topping
220ml sour cream
40g icing sugar, sifted
Blackcurrant glaze
200g blackcurrants
80g caster sugar
3 tbsp water
100g fresh blackcurrants to decorate (optional)
Method
Salty-sweet fudgy biscuit base
- Preheat the oven to 180˚C. Pour flour, sugar, bicarb, salt and diced butter into a blender and blitz until the mixture resembles damp sand. Alternatively, use your fingers to rub the butter into the other ingredients.
- Whisk together the honey, vanilla and milk. Stir this into the dry mixture to combine and form a paste-like dough.
- Spread the dough on to the baking tray in an even 0.5cm thick layer. Bake in the oven for 15-20 minutes until golden brown and cooked through. If it doesn’t become dry and brittle after cooling, bake for a further 5 minutes.
- Brown the 120g of butter for melting by placing it in a pan over medium heat and allowing it to turn a golden brown before setting it aside to cool. It should give off a wonderfully nutty aroma.
- Crumble the baked biscuit into a blender with the browned melted butter, and pulse until it turns to damp sand-like consistency. Tip this out into the lined cake tin and press down to form an even layer. Place in freezer to set.
Sour cream topping
- Whisk together sour cream and icing sugar until smooth. Store in the fridge until ready to use
Caramelised white chocolate filling
- Preheat the oven to 130˚C. Pour broken white chocolate on to the tray and place in the oven. Every 10 minutes remove the chocolate from the oven, stir with a bone dry utensil, and place back in the oven. After about 30-40 minutes it will have taken on a beautiful honeyed caramel tone. As ovens vary in character and different chocolate brands vary in ingredient quality, it may take longer. The chocolate may also seize. Don’t panic if this happens: just keep going until it turns golden (I’ll explain how to proceed with this in the next step).
- Increase the oven temperature to 160˚C. Place the double cream in a small pan over a high heat. Once it begins to boil, remove from the heat and pour into it the caramelised white chocolate. Stir to combine until smooth. If the chocolate did seize in the oven, it will be lumpy. If this is the case, pour the lumpy cream and chocolate mixture in a blender and blitz until completely smooth. If a few recalcitrant lumps remain, simple sieve them out.
- Either using a stand mixer fixed with the beater or a hand held whisk, beat the cream cheese together with the caster sugar until completely soft and smooth. Beat in the cream and white chocolate caramel. In a separate bowl, whisk together the eggs and vanilla. Pour this into the cream cheese mixture and beat until completely smooth and glossy.
- Remove the cake tin with the biscuit base from the freezer, and pour into it the filling mixture. Bake in the oven for 1 ½ hours, checking after 45 minutes. If it begins to go brown, cover with tin foil and continue to bake for the full time.
- Keeping the oven on, remove the cheesecake from the oven and allow it to cool for 10 minutes. Spread the sour cream topping in an even layer over the surface of the cake. Place the cheesecake back in the oven, switch off the oven and leave its door slightly ajar while the cheesecake sets inside for a further 1 ½ hours.
- When the cheesecake reaches room temperature, remove from the oven, cover the cake tin with cling film, and place it in the fridge to allow it to set over night, or place it in the freezer for a couple of hours.
Blackcurrant glaze
- Place 200g blackcurrants, caster sugar and water in a small pan over a high heat and stir until the sugar is dissolved. When it begins to boil, reduce heat slightly and allow it to simmer for 5-10 minutes or until it thickens to a viscosity like that of maple syrup. Strain the mixture through a sieve and place the liquid back in the pan to simmer for a further 3 minutes.
- Allow the syrup to cool slightly then carefully pour it over the chilled cheesecake. Scatter with fresh blackcurrants and serve.
There is a particular trend that is permeating the London dining scene like a contagion.
In the flurry of new openings, and novel and exotic twists on traditional gastronomies, a number of restaurateurs have become smitten with Spanish tapas, and have decided to exploit this style of cuisine for all its worth. Tapas are traditionally displayed on a menu in a long list, and served all at once, so diners can delight in dipping in and out of them with a few drinks as they please. Instead of serving a carefully structured plate of well-balanced complementary elements, the restaurants at fault are breaking the plates down into individual elements.
They call them “small plates”, and I detest them.
You’ll know that you’ve found yourself in this “small plate” trap when the waiter suggests that each person orders three, despite the fact that one is the cost of a normal large plate. Not only do they expand their profits substantially by doing this, but the effort required by the kitchen is significantly reduced. Chefs don’t need to bother about planning dishes when they can just make whatever the hell they like, call it another small plate and let the diner err when structuring their picky little meal. Oh, and these small plates seem to have a life of their own: you see, they can arrive according to their own whim and in any combination. At my most recent visit to a restaurant of this type, all vegetables were deemed unsuitable to be served with fish.
My rage against small plates had been boiling for several weeks when I decided to return to Honey & Co, where I knew my craving for a large plate could be fulfilled. Call me demanding, or even greedy, if you like. I’d been before and thoroughly enjoyed the experience, but sadly forgot to bring my camera. This time, however, I was armed. Itamar Srulovich and his wife Sarit Packer rule the roost at this tiny 30 cover Canaan. He’s ex- Ottolenghi - an almost guarantee of success - and the Ottolenghi influence is strongly evident in the cuisine. Décor is kept to a minimum, with stark white walls and patterned blue tiled floor forcing your eye greedily towards the focal countertop display of spiced and perfumed cakes. Despite the minimalism, there is no lack of atmosphere. Most people are so pleased to have acquired their 1.5 hour table slot that they exude an aura of excitement.
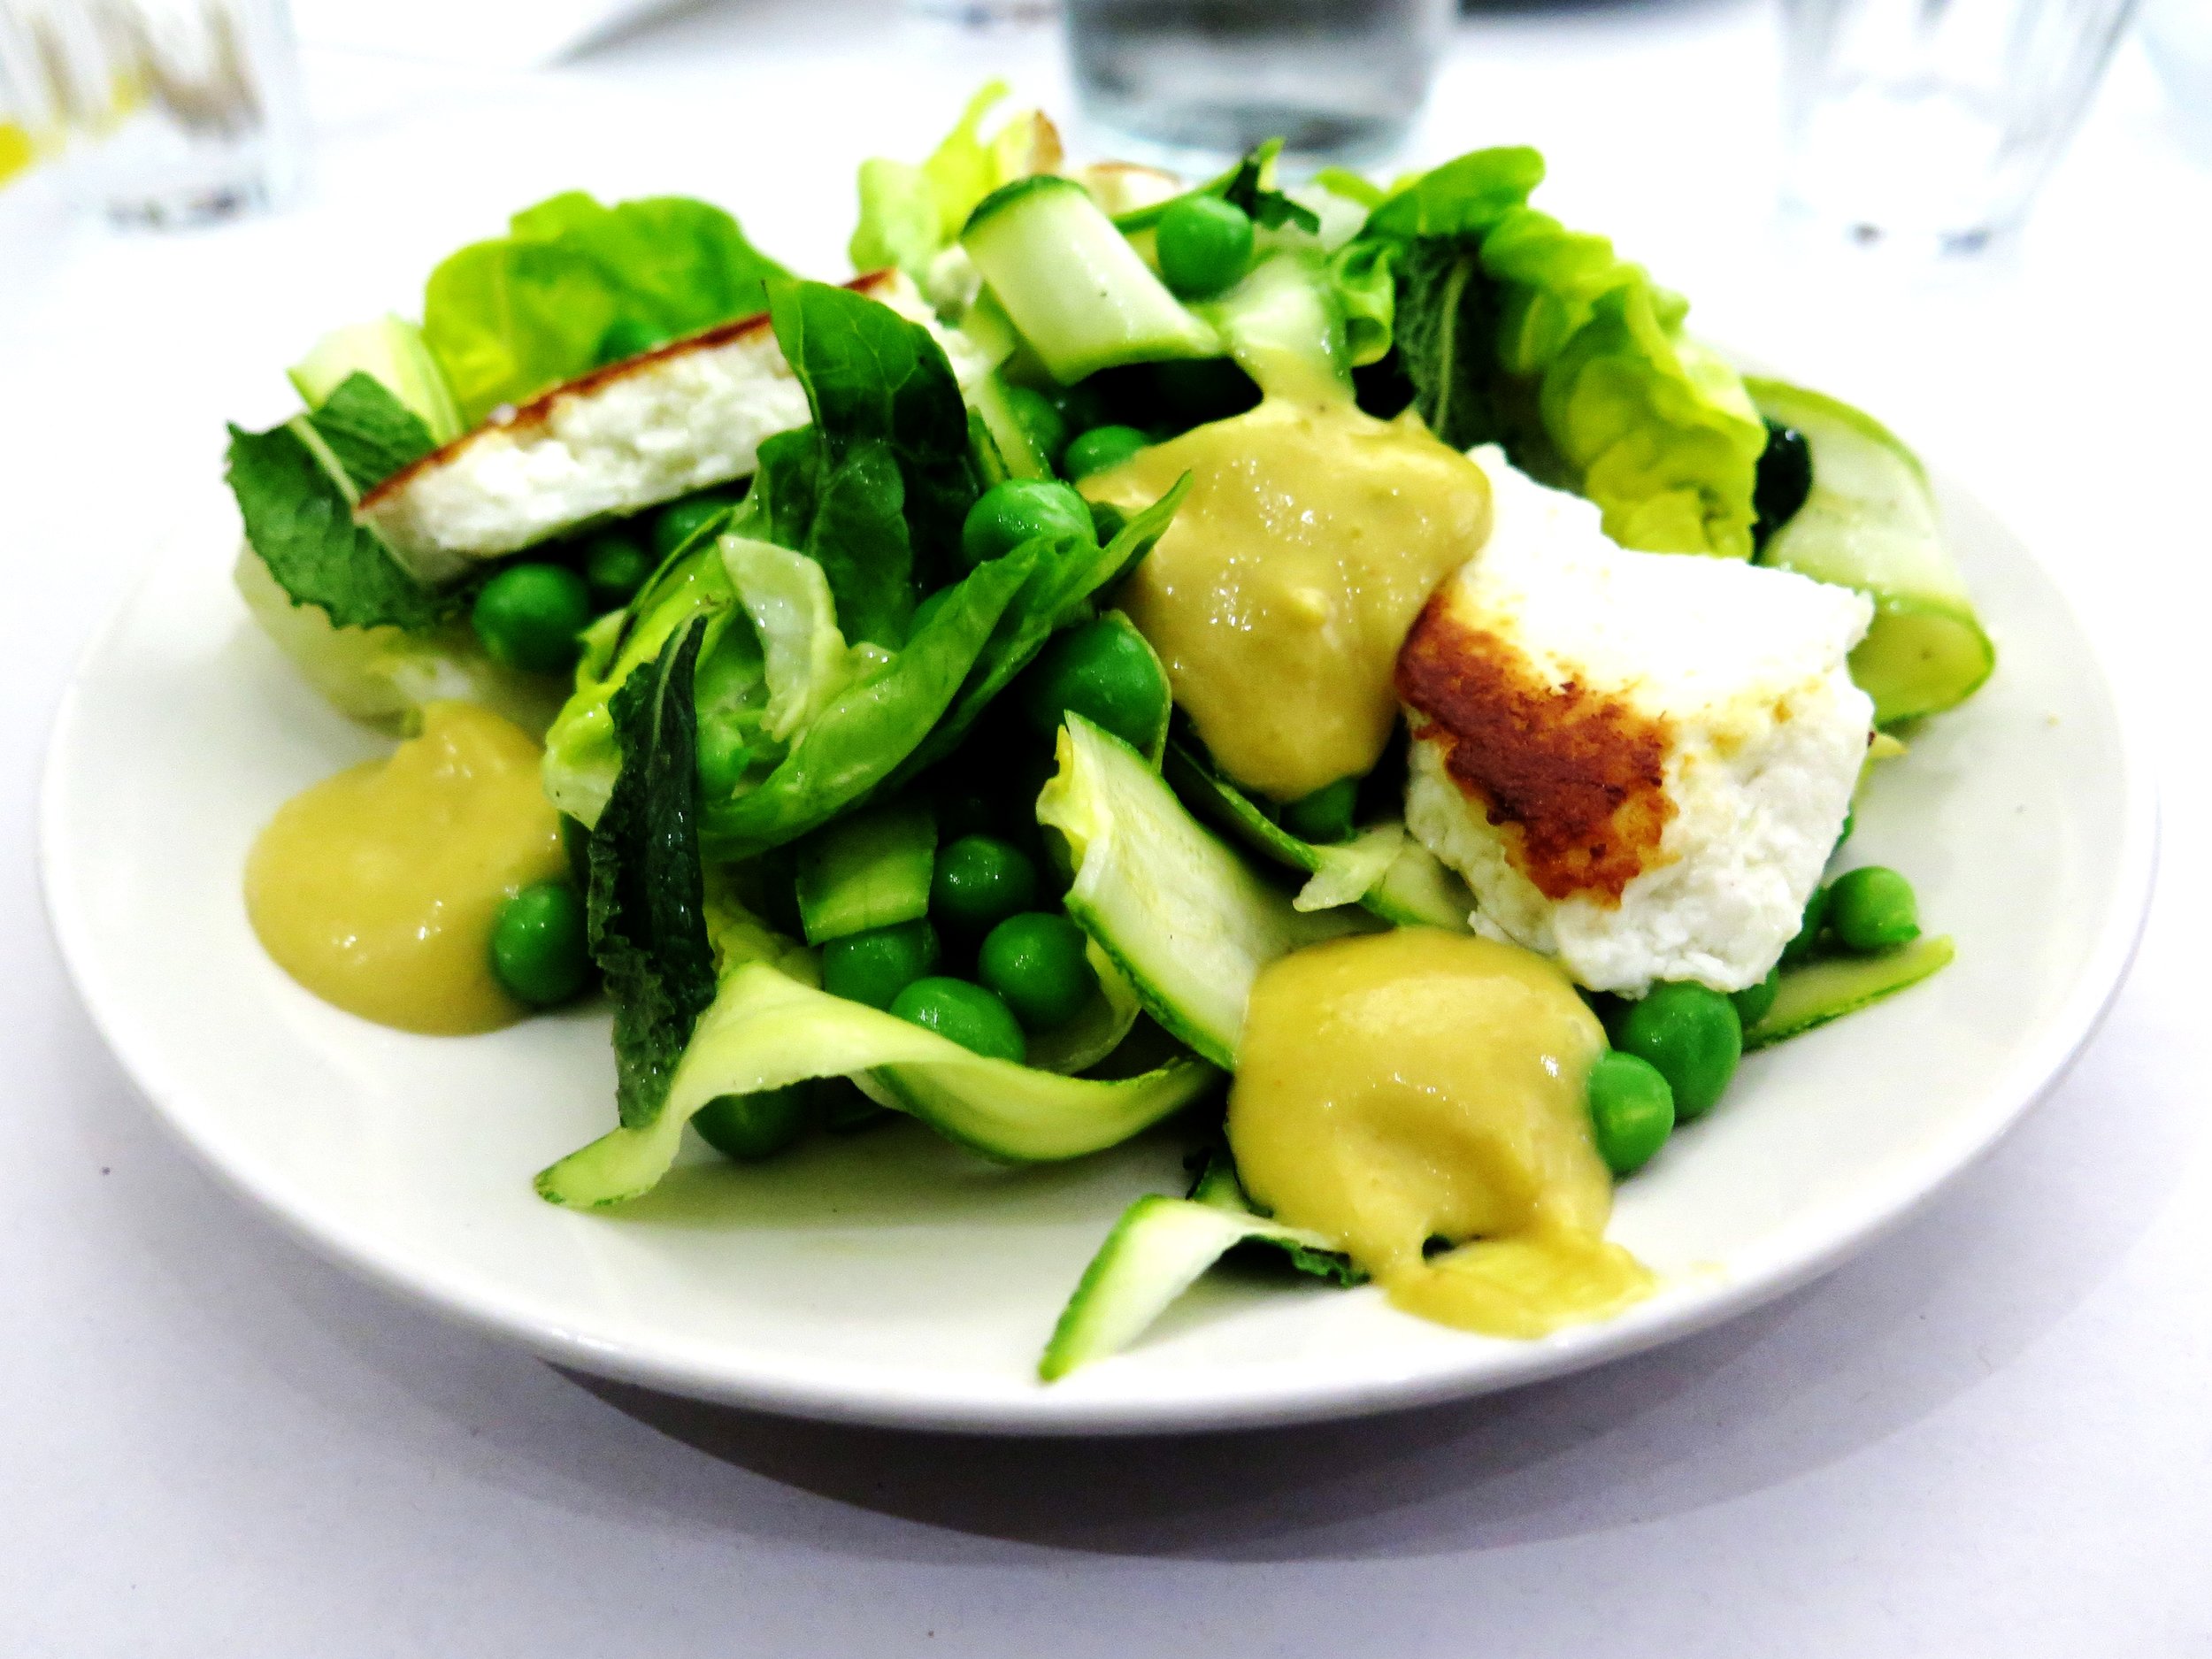
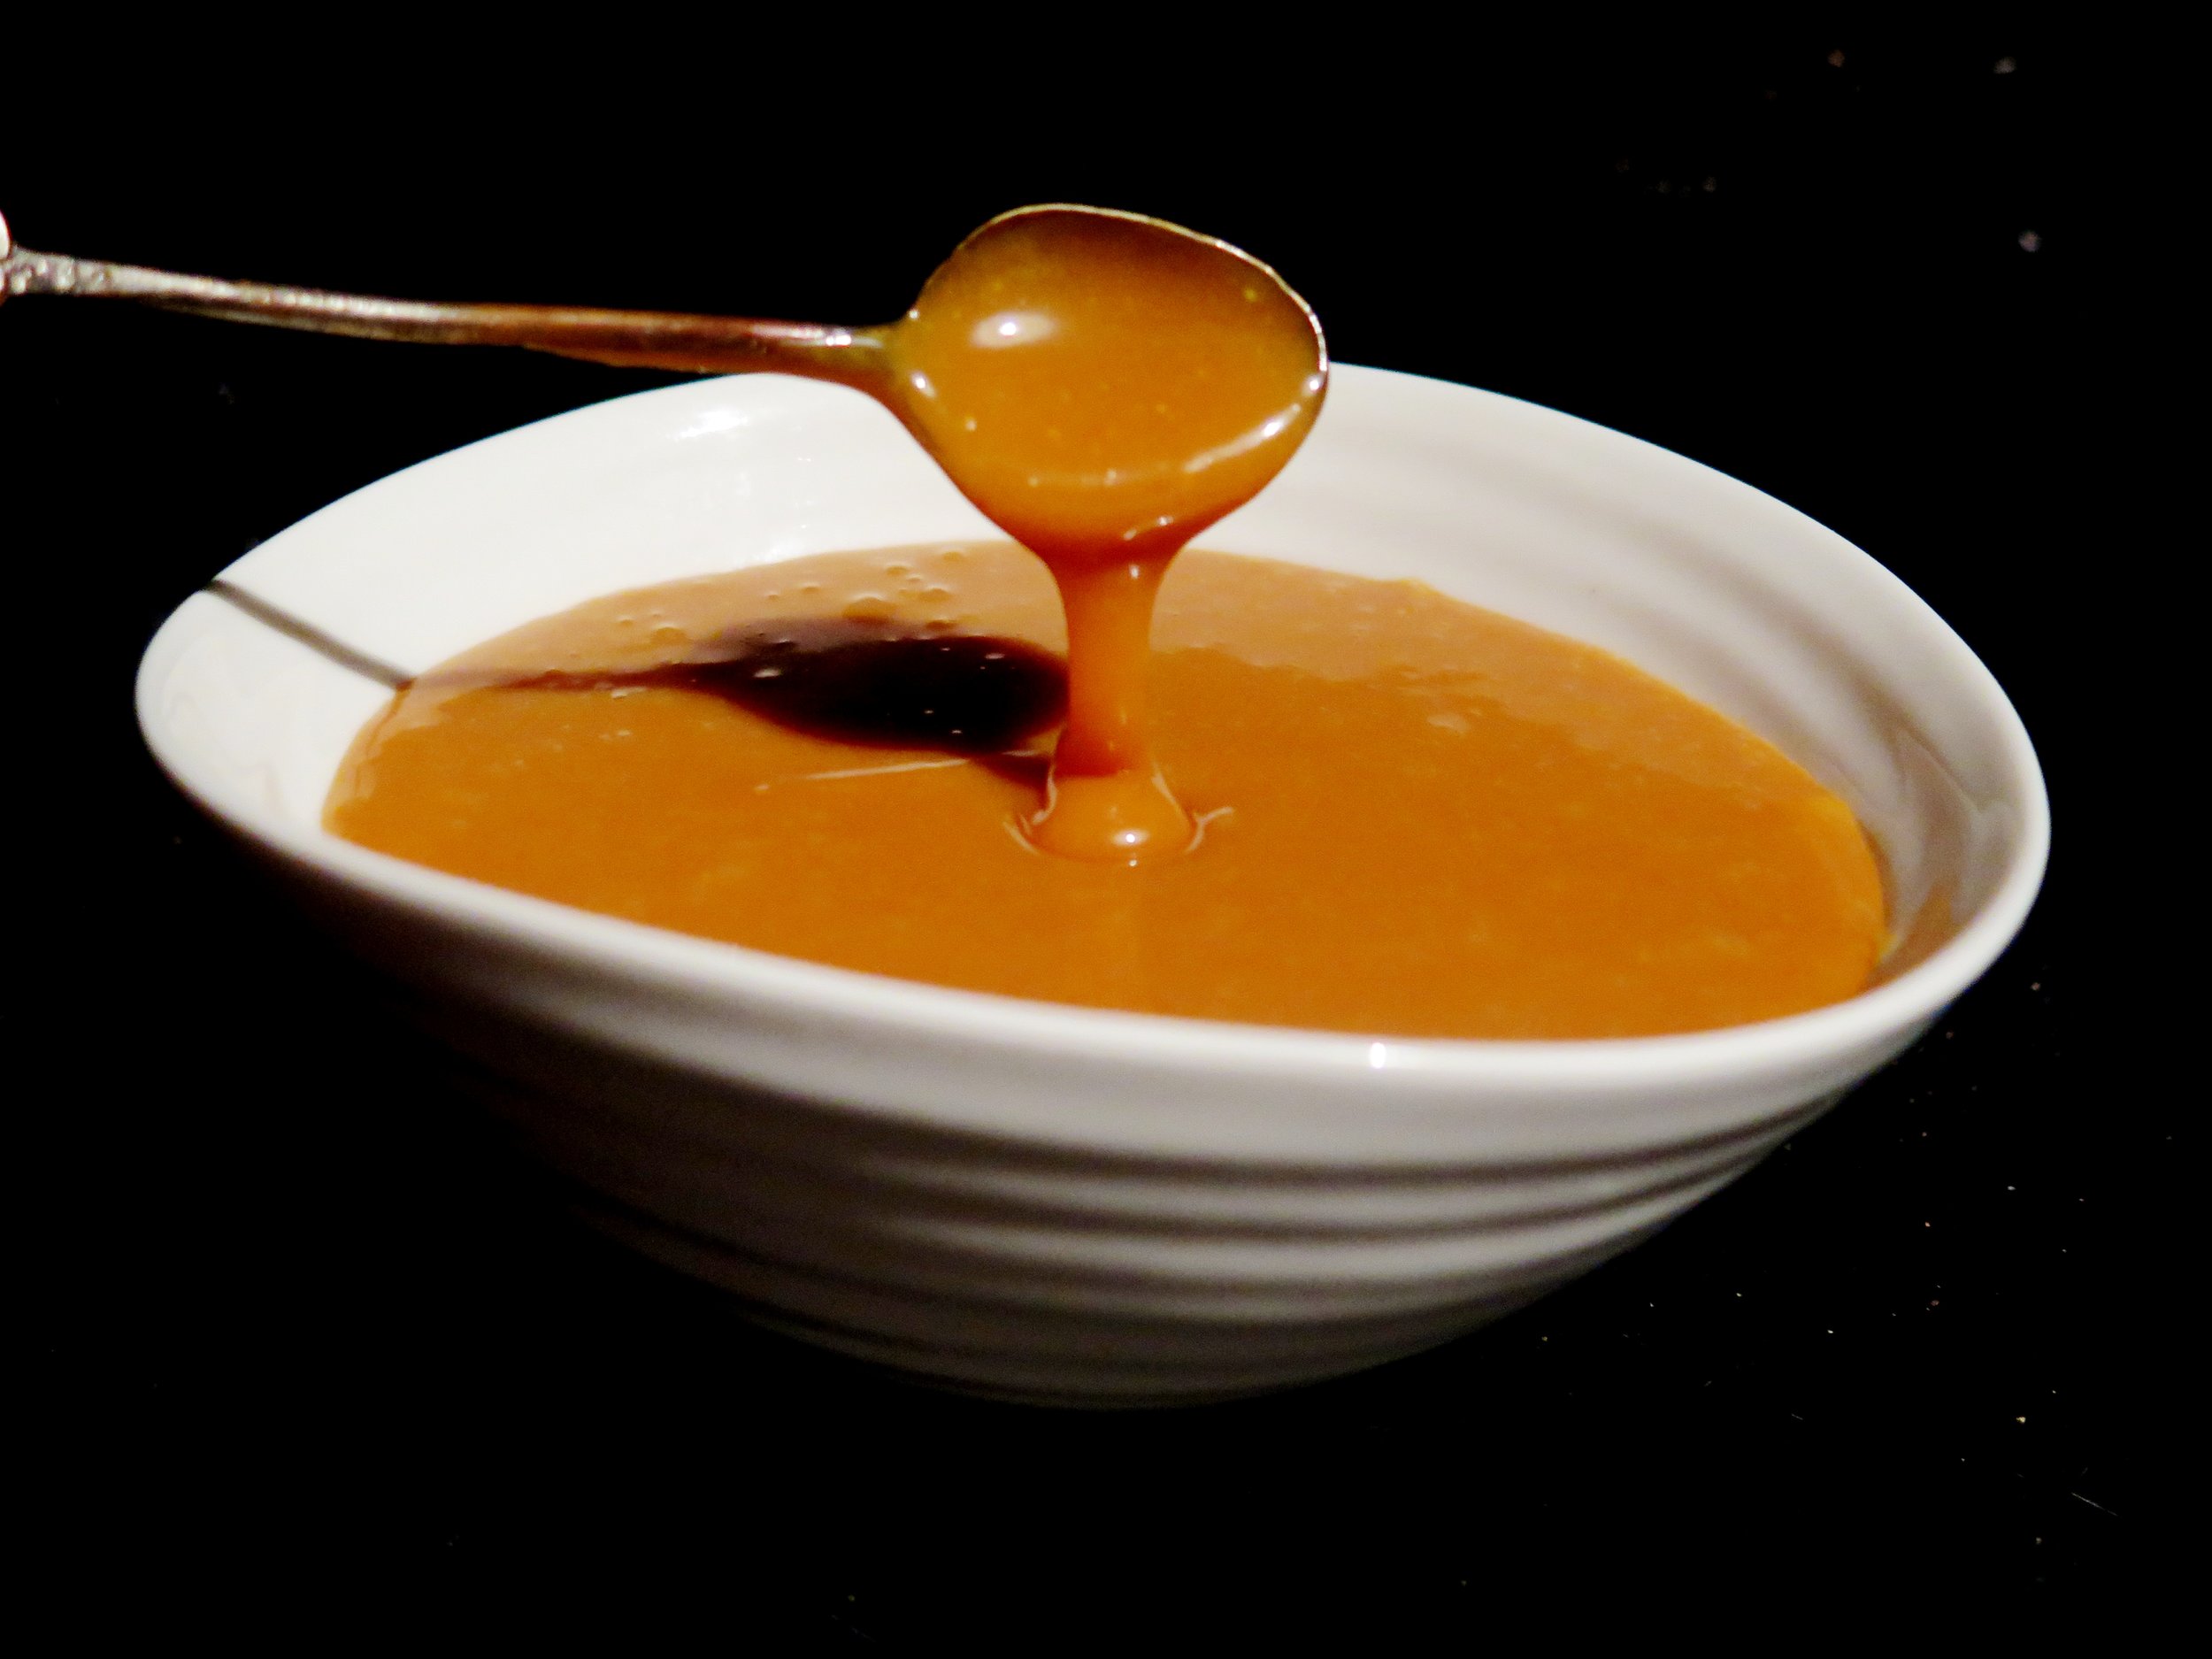
The menu is divided into starters and mains (hallelujah) – I plumped for spring salad of peas, courgettes, and warm manouri cheese with a lemon and saffron sauce. Crisp, and light with the nuttiness of the manouri and electric tang of citrus, the dish was very pleasant.
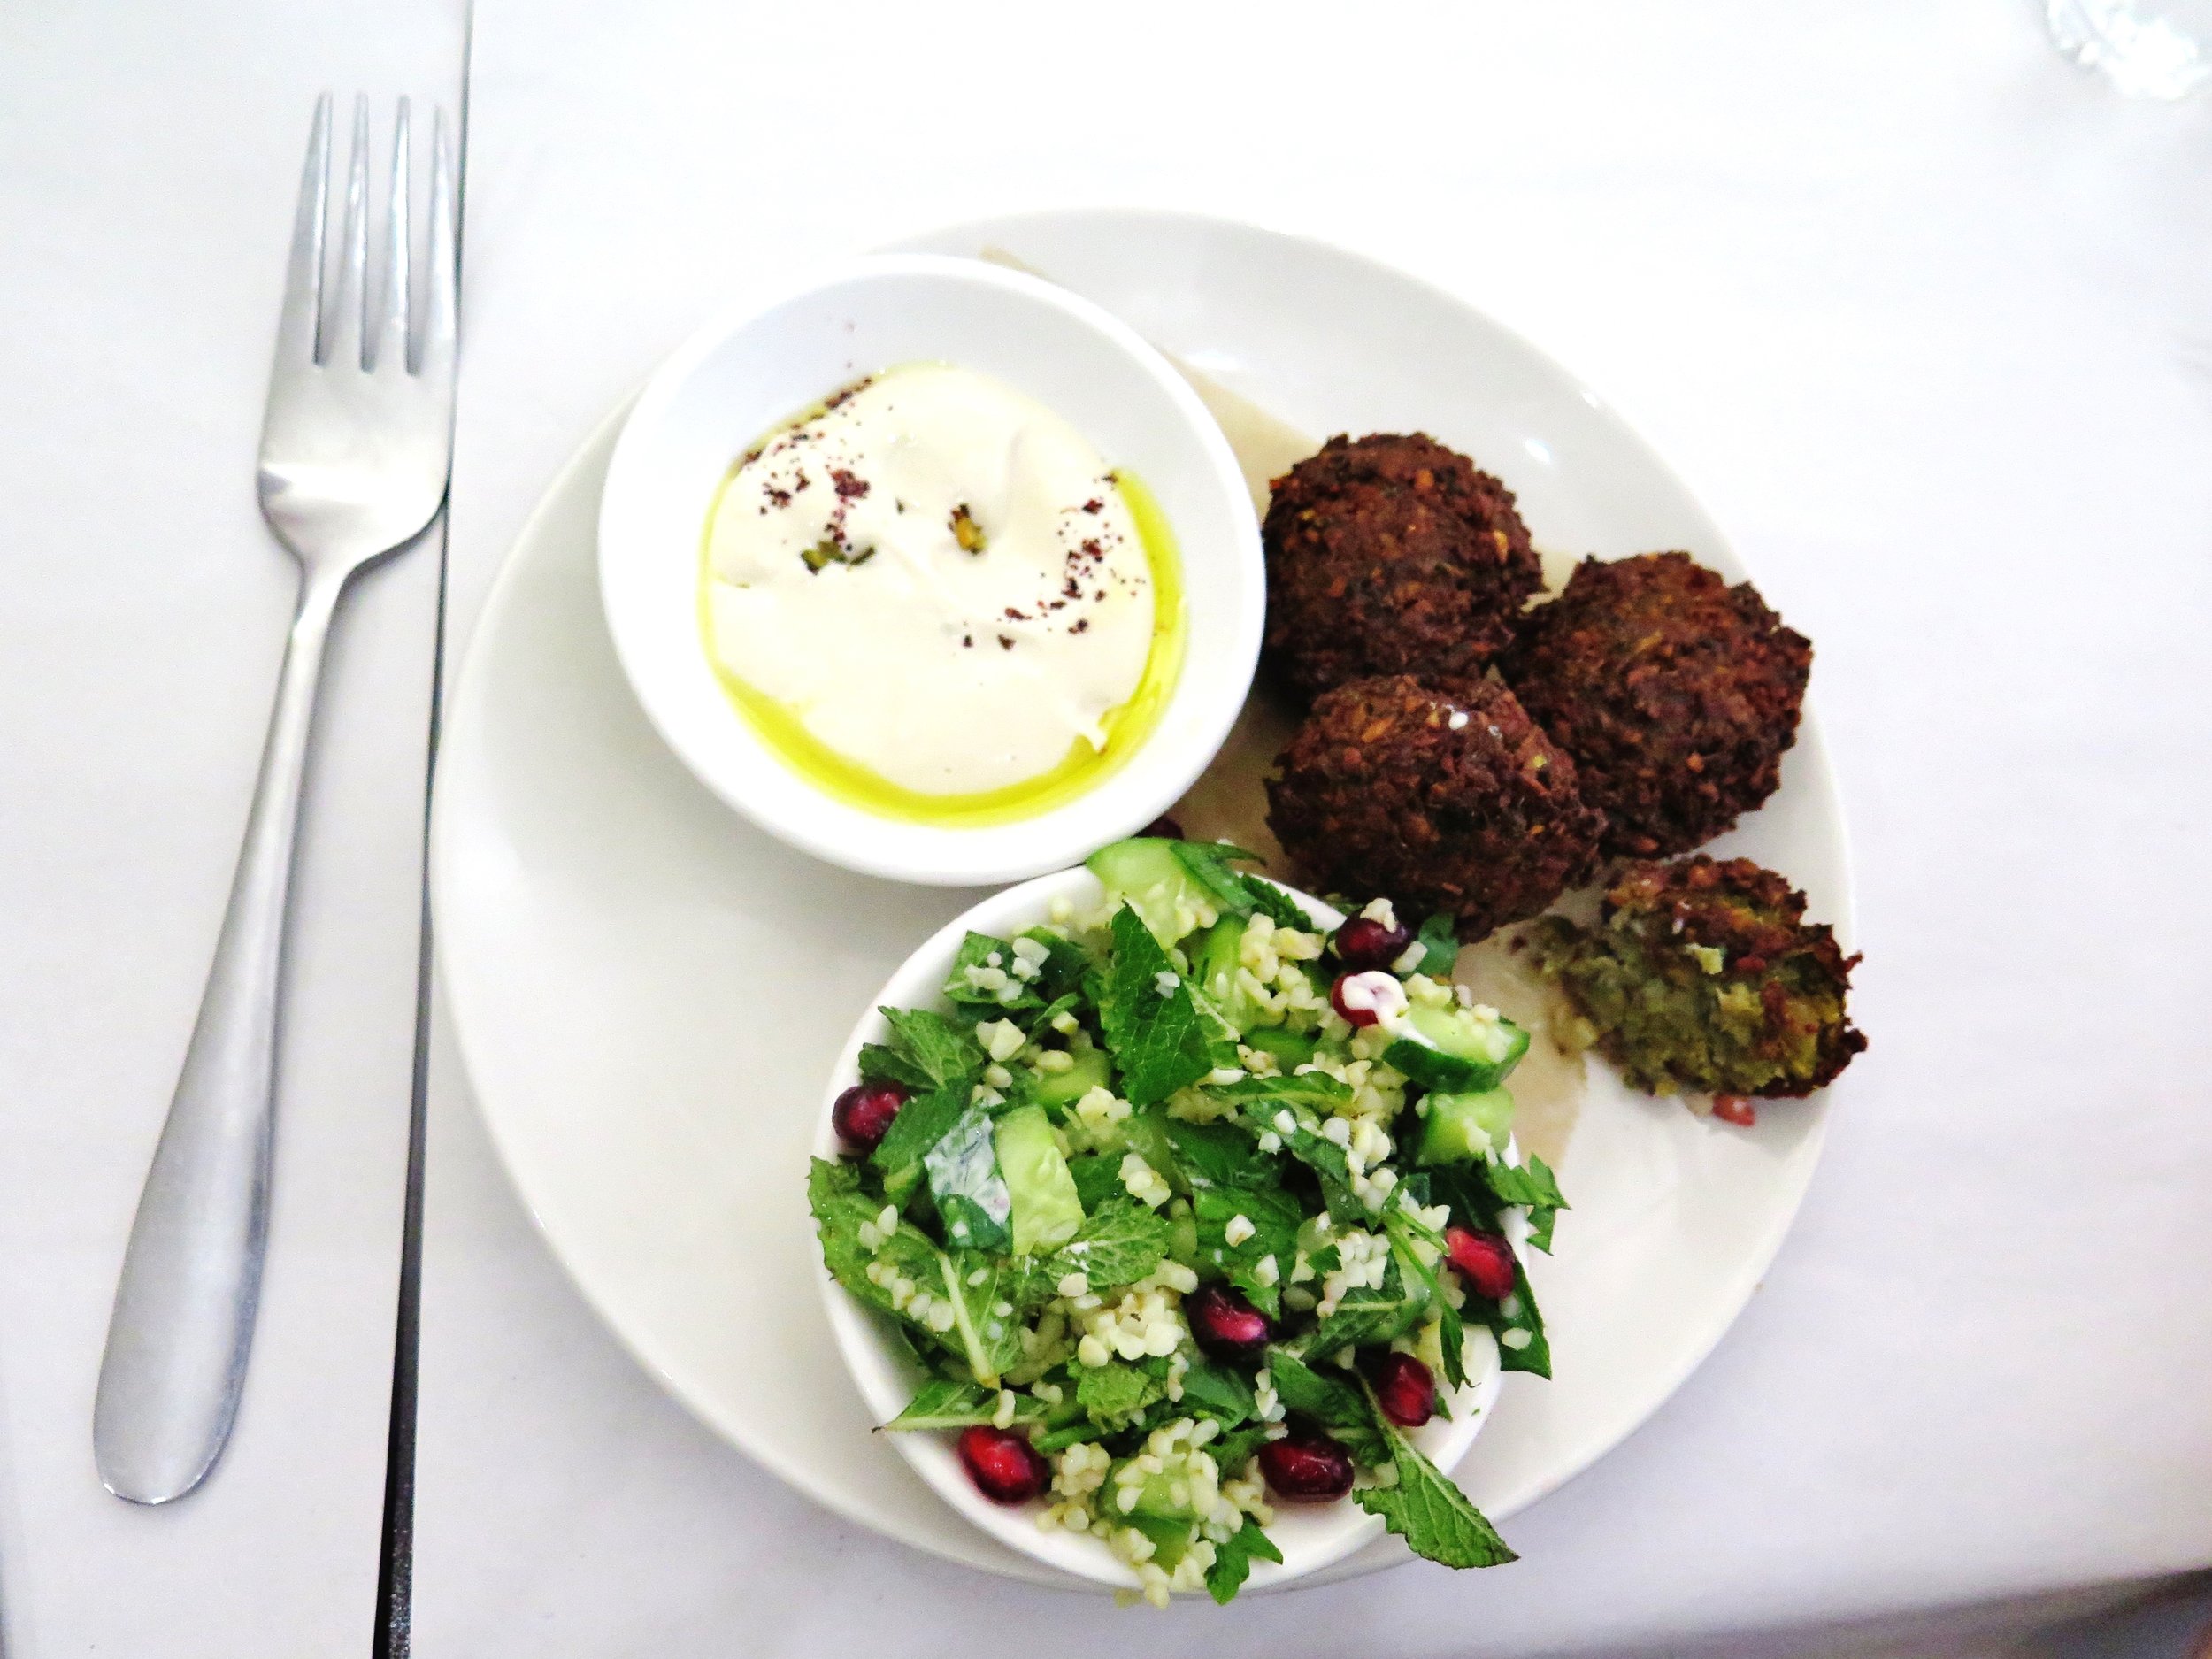
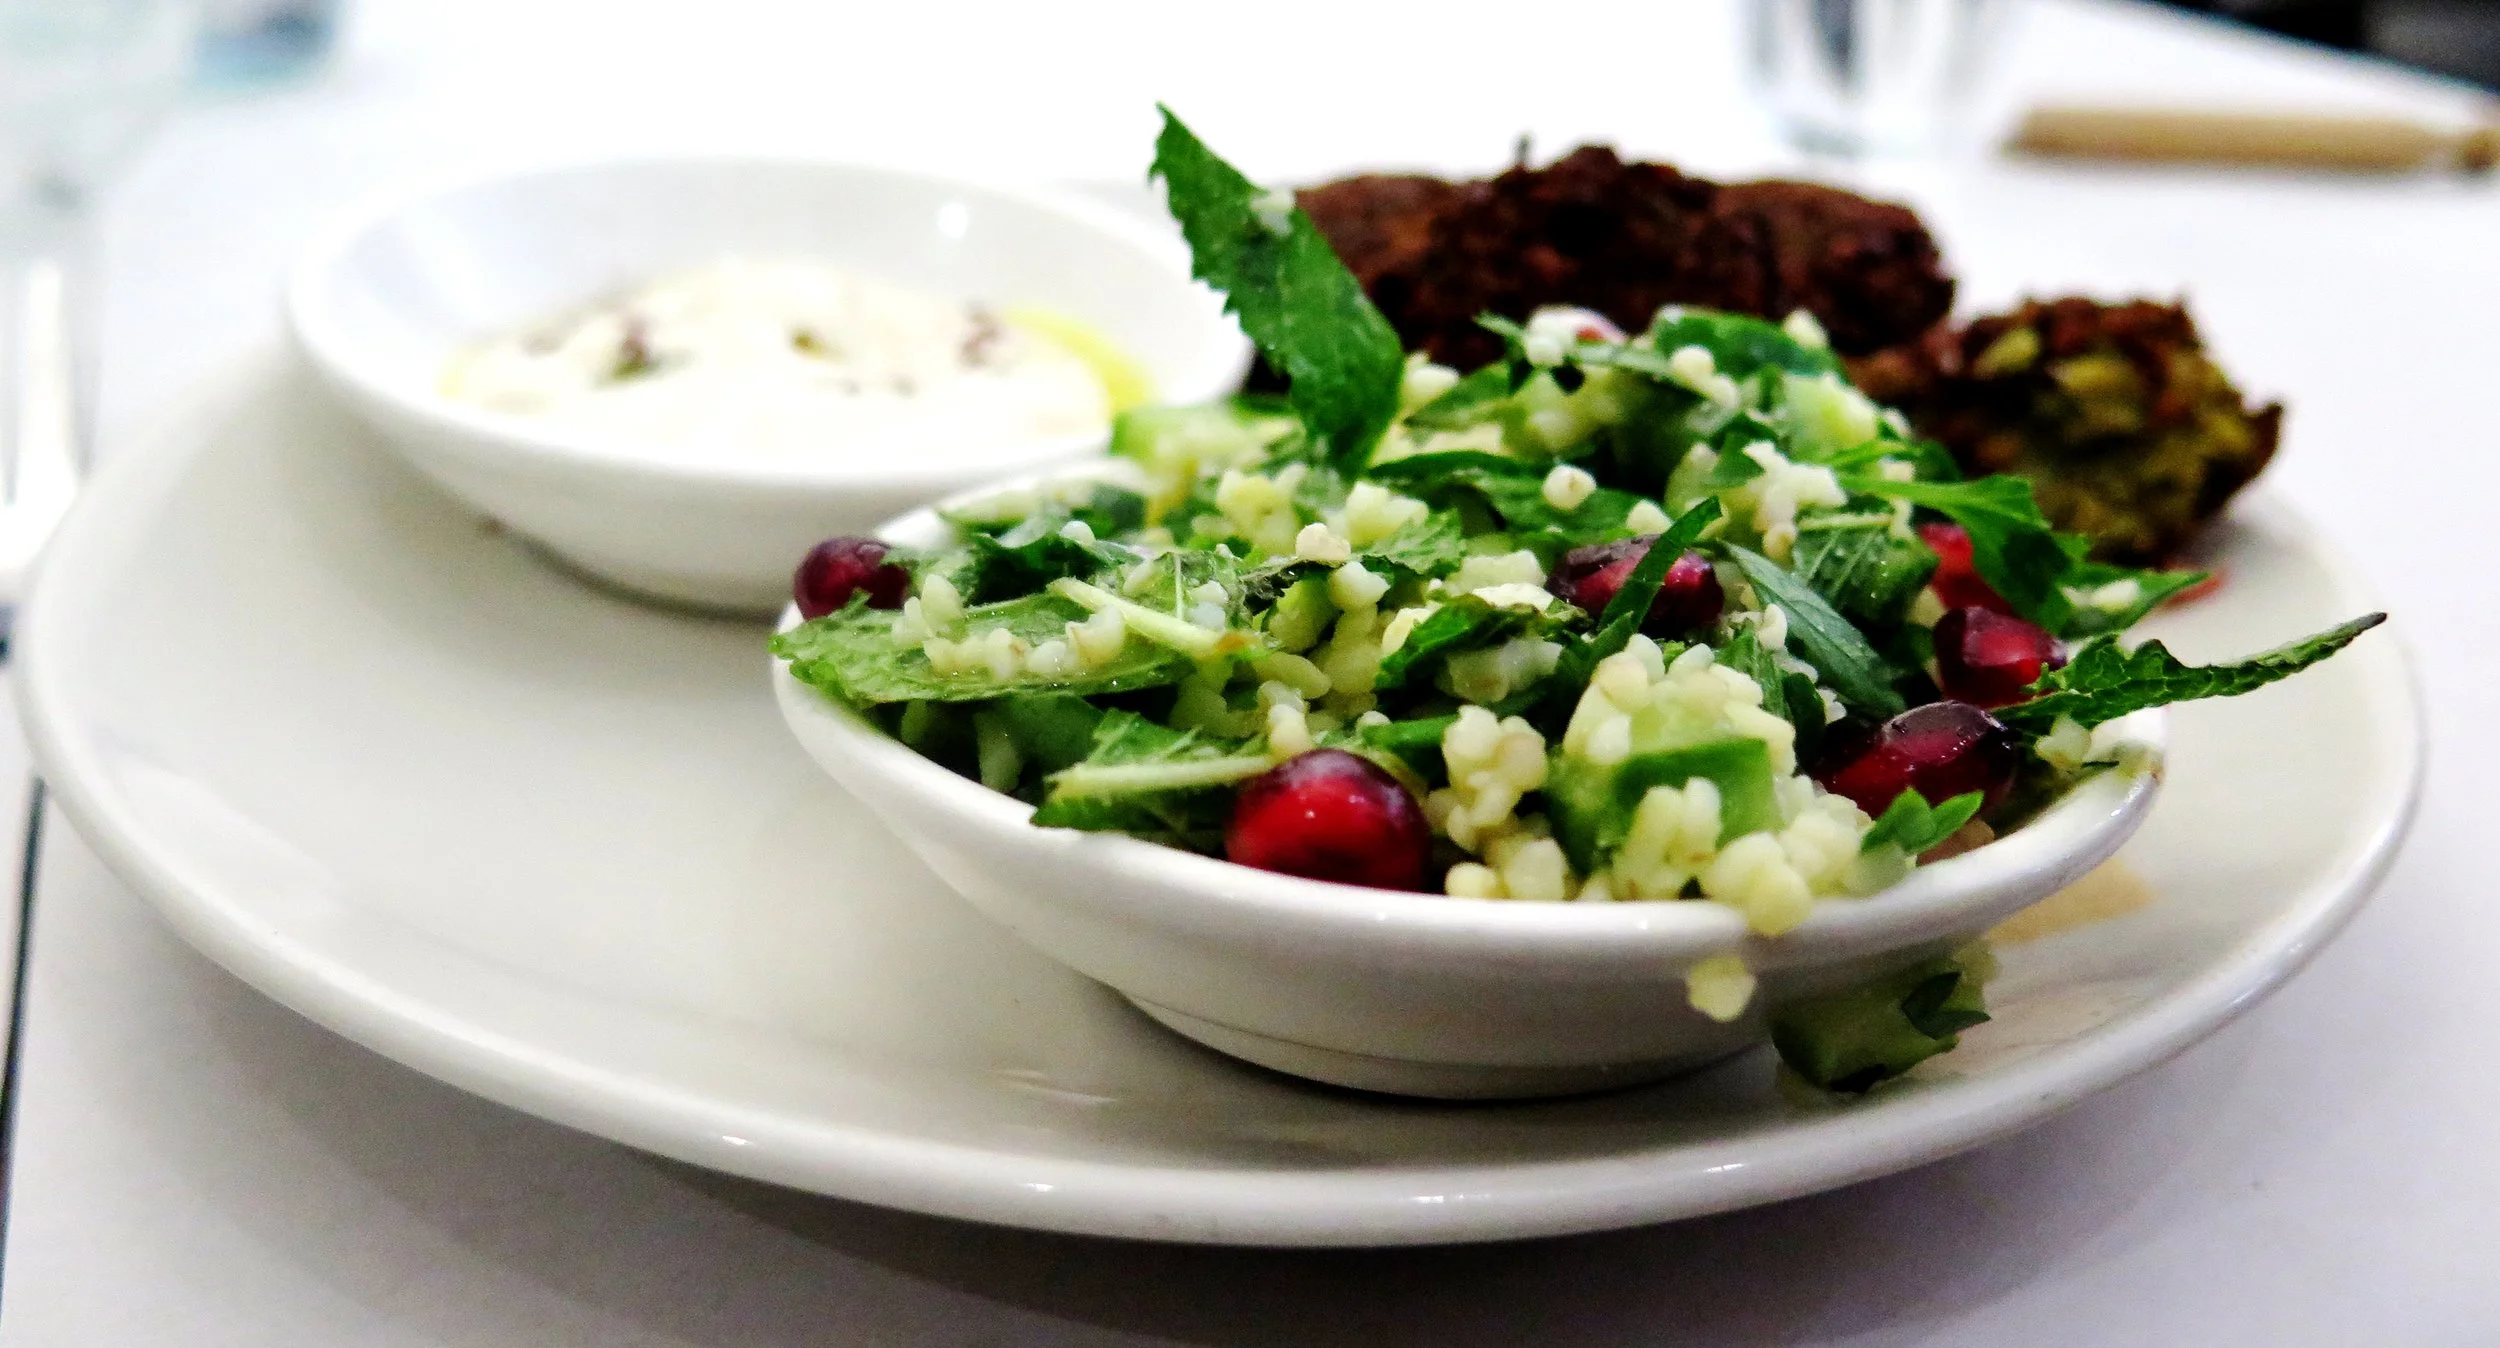
One dining companion went down the more obvious but inevitably delicious route of falafel served with a tabbouleh and tahini sauce – one of the most popular on the menu (the chefs undoubtedly roll falafel in their sleep).
The other opted for the braised artichoke with parsley za’atar and yoghurt dipping sauce.
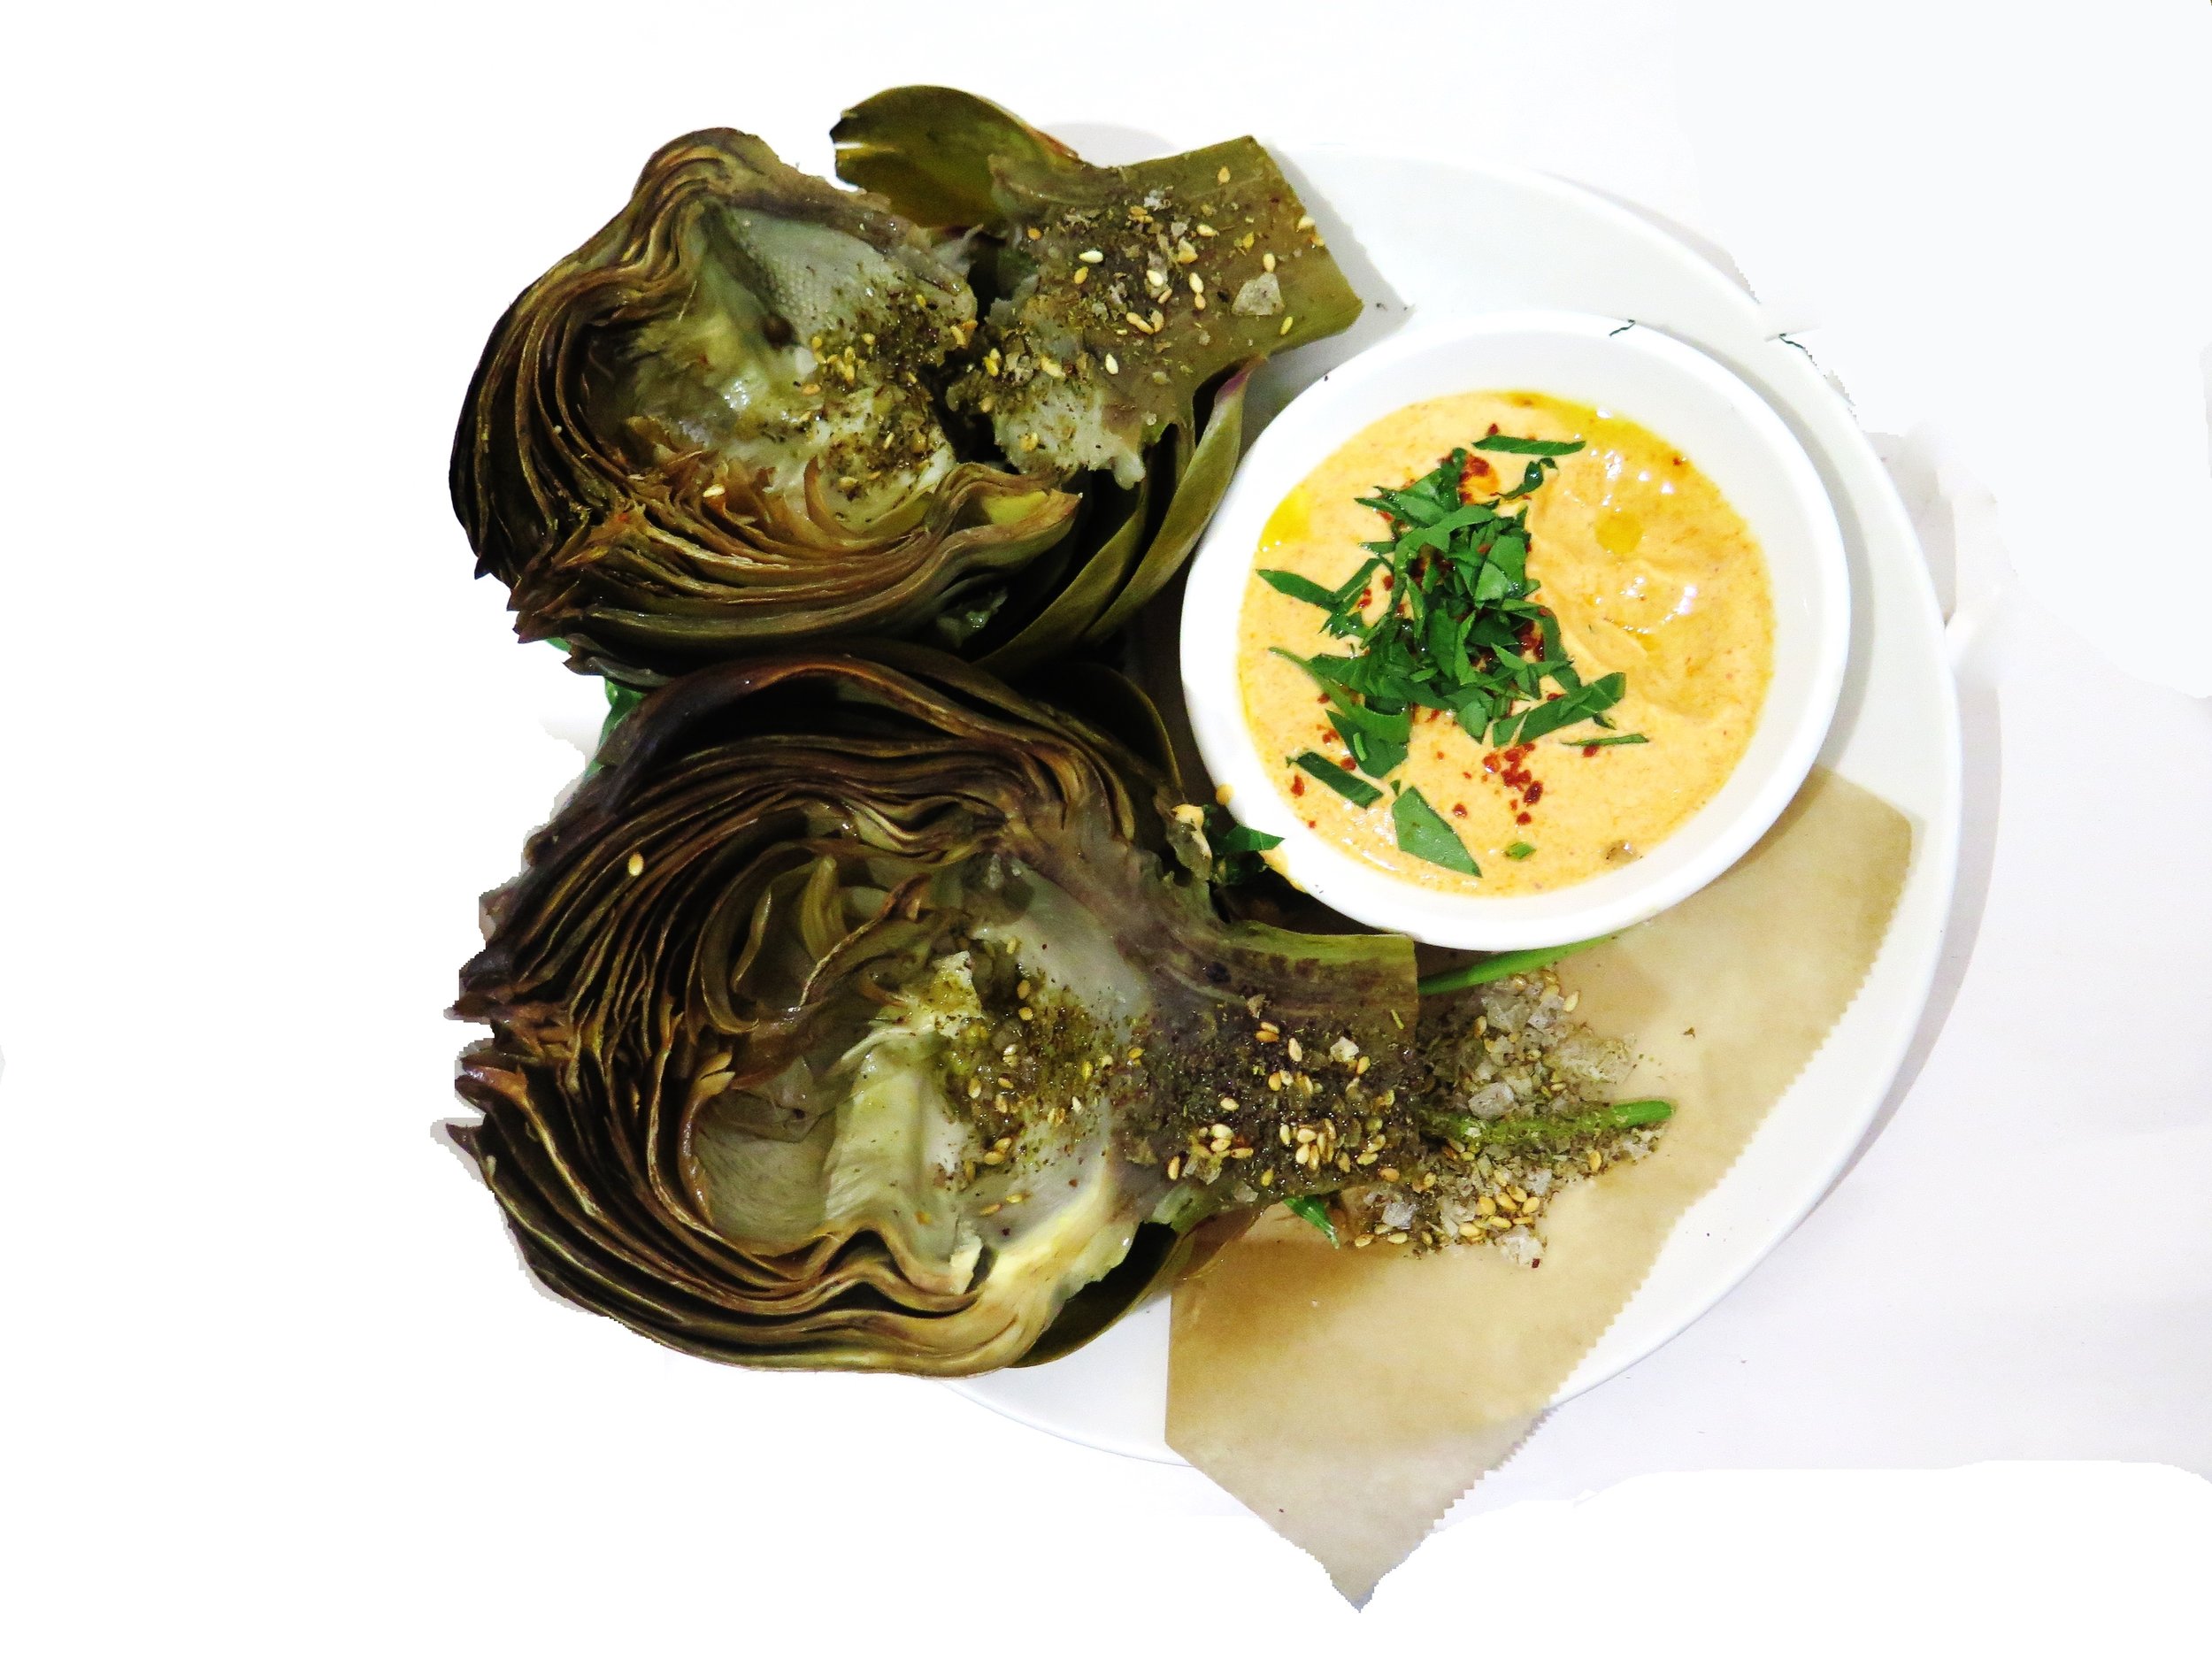
This was rather a tame option as there only so much you can do to a whole artichoke in terms of flavour(read: very little), and so no matter how delicious the sauce the eating becomes tiresome. It resides alongside eating fish and quail on the bone in my list of things that I just don’t have time for. I can’t be bothered to fuss around with scraping a half centimetre of blandish artichoke flesh against the back of my teeth.
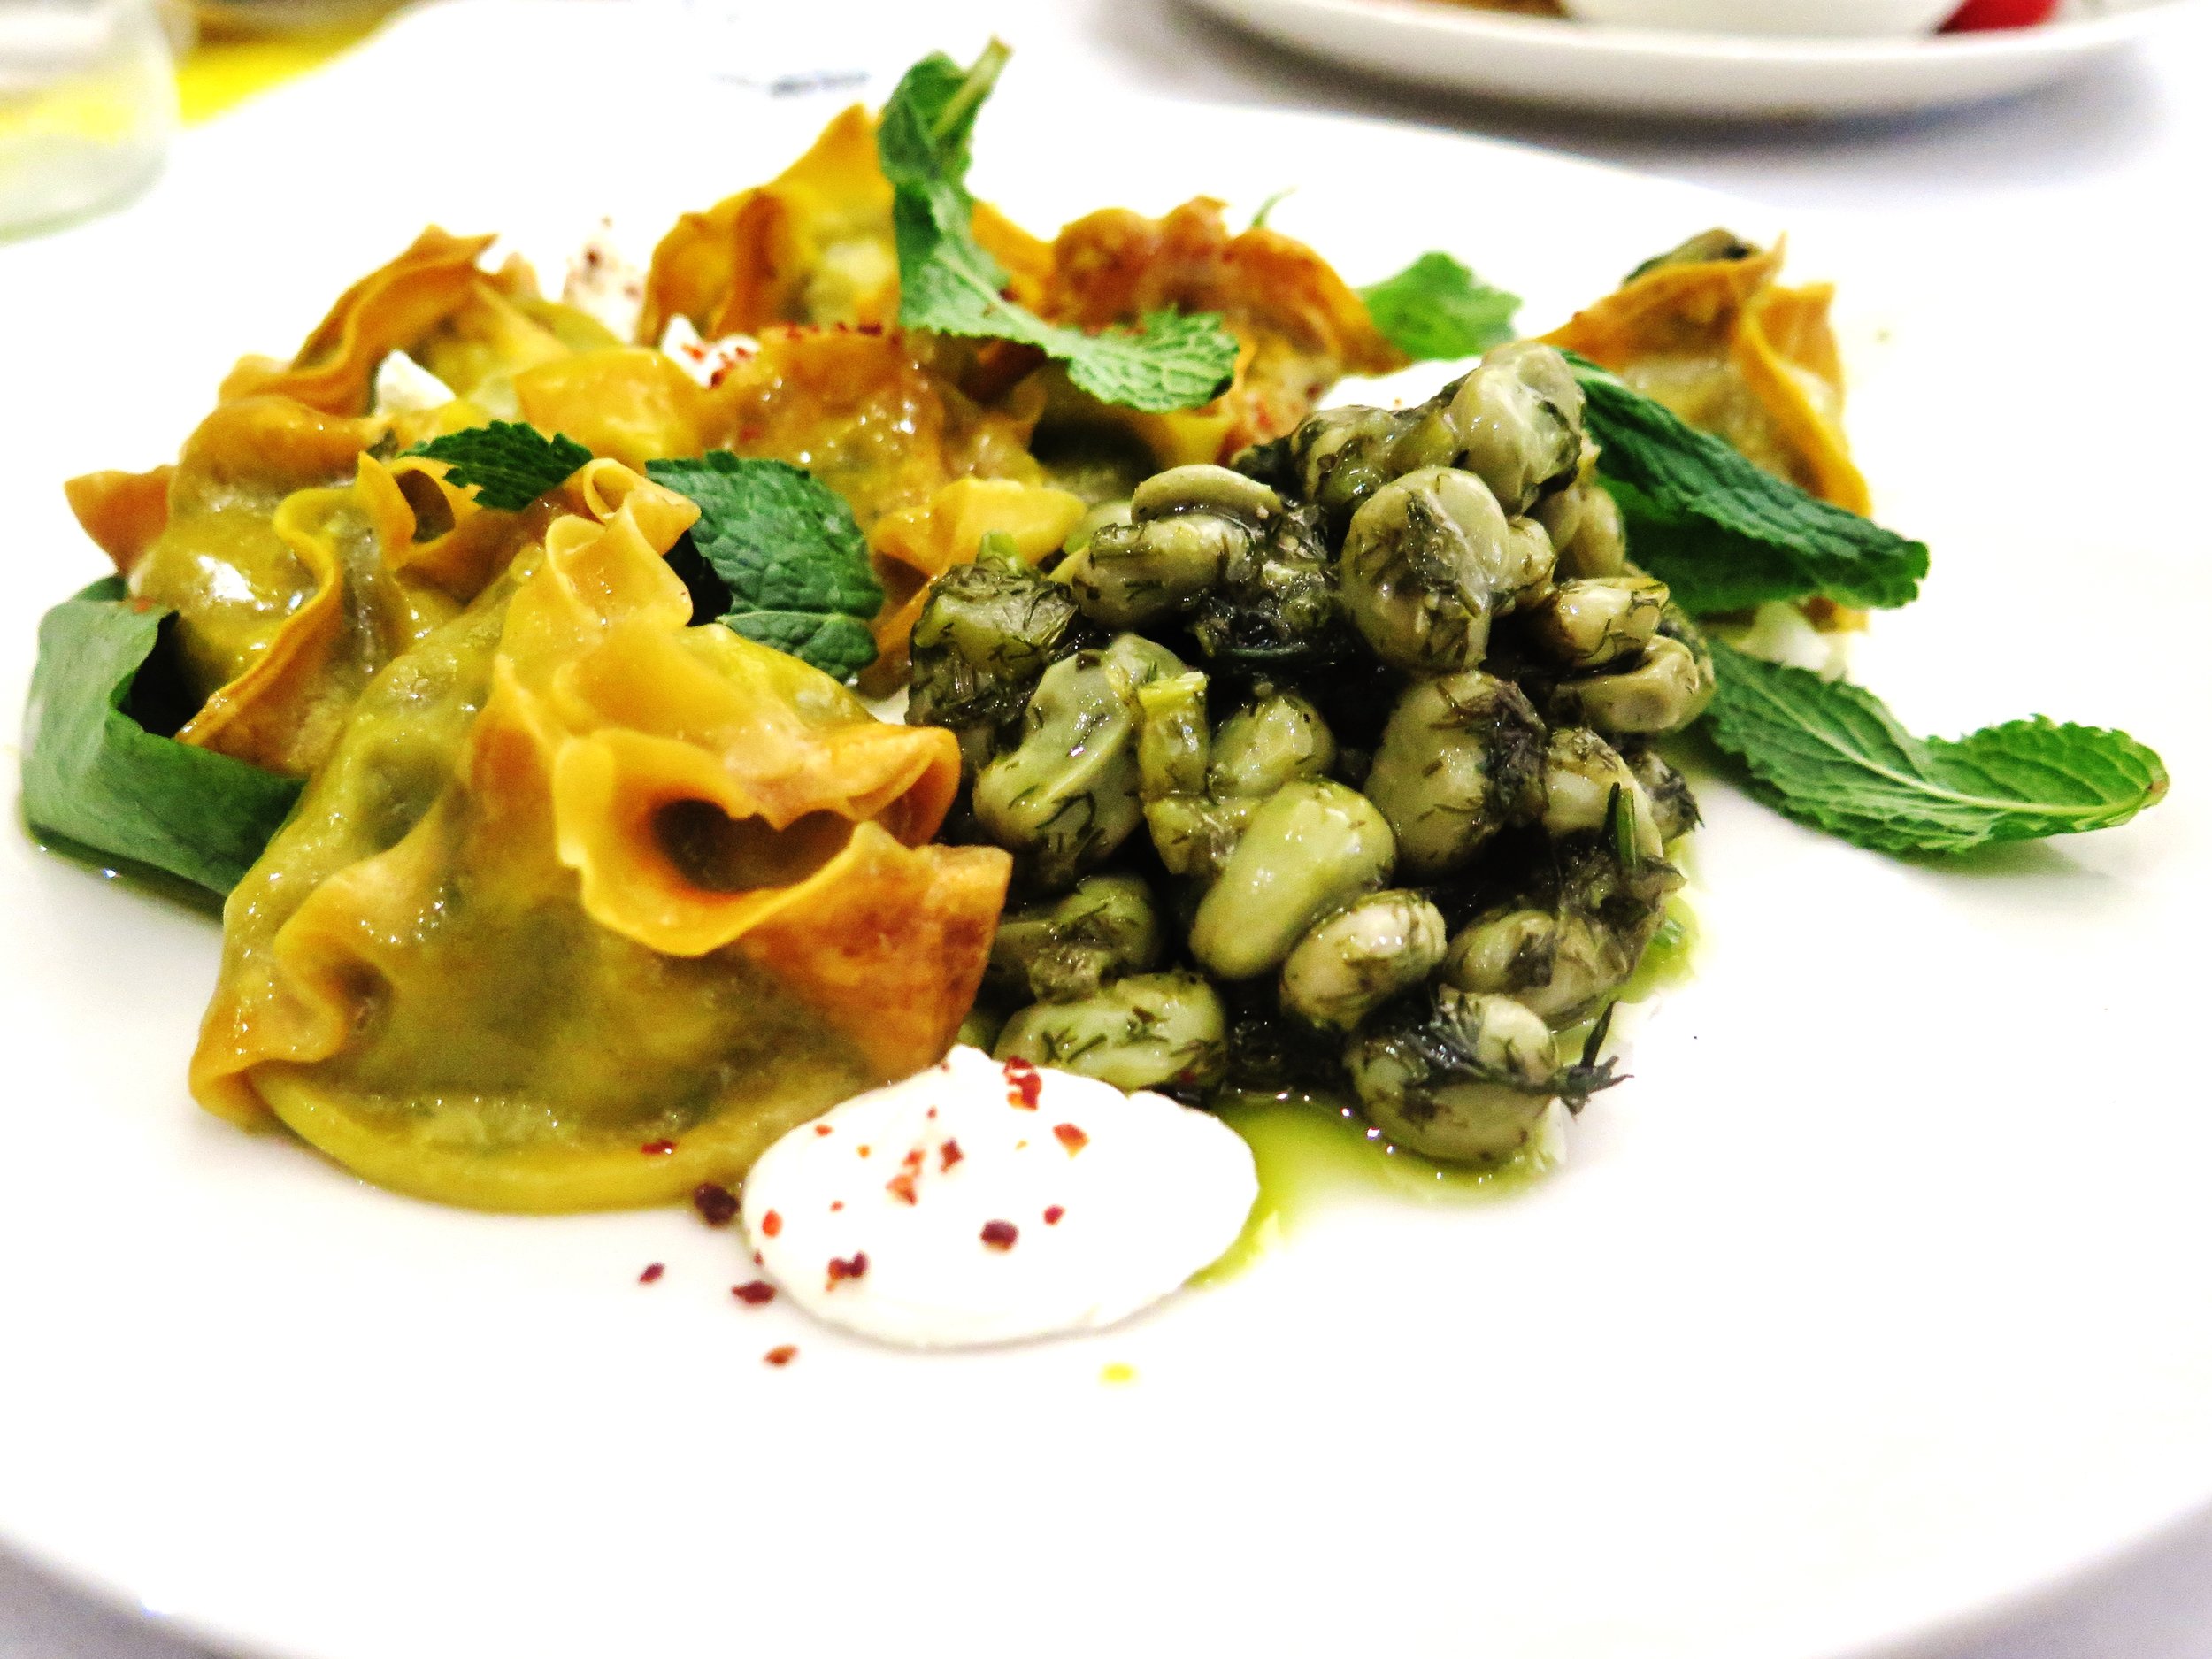
My main course was very good: a plate abounding with plump parcels (aka Menti) of burnt courgette and herb with olive oil braised broad beans and whipped feta, the latter adding a kick of saltiness to draw out the sweetness from the dumplings and green vegetables.
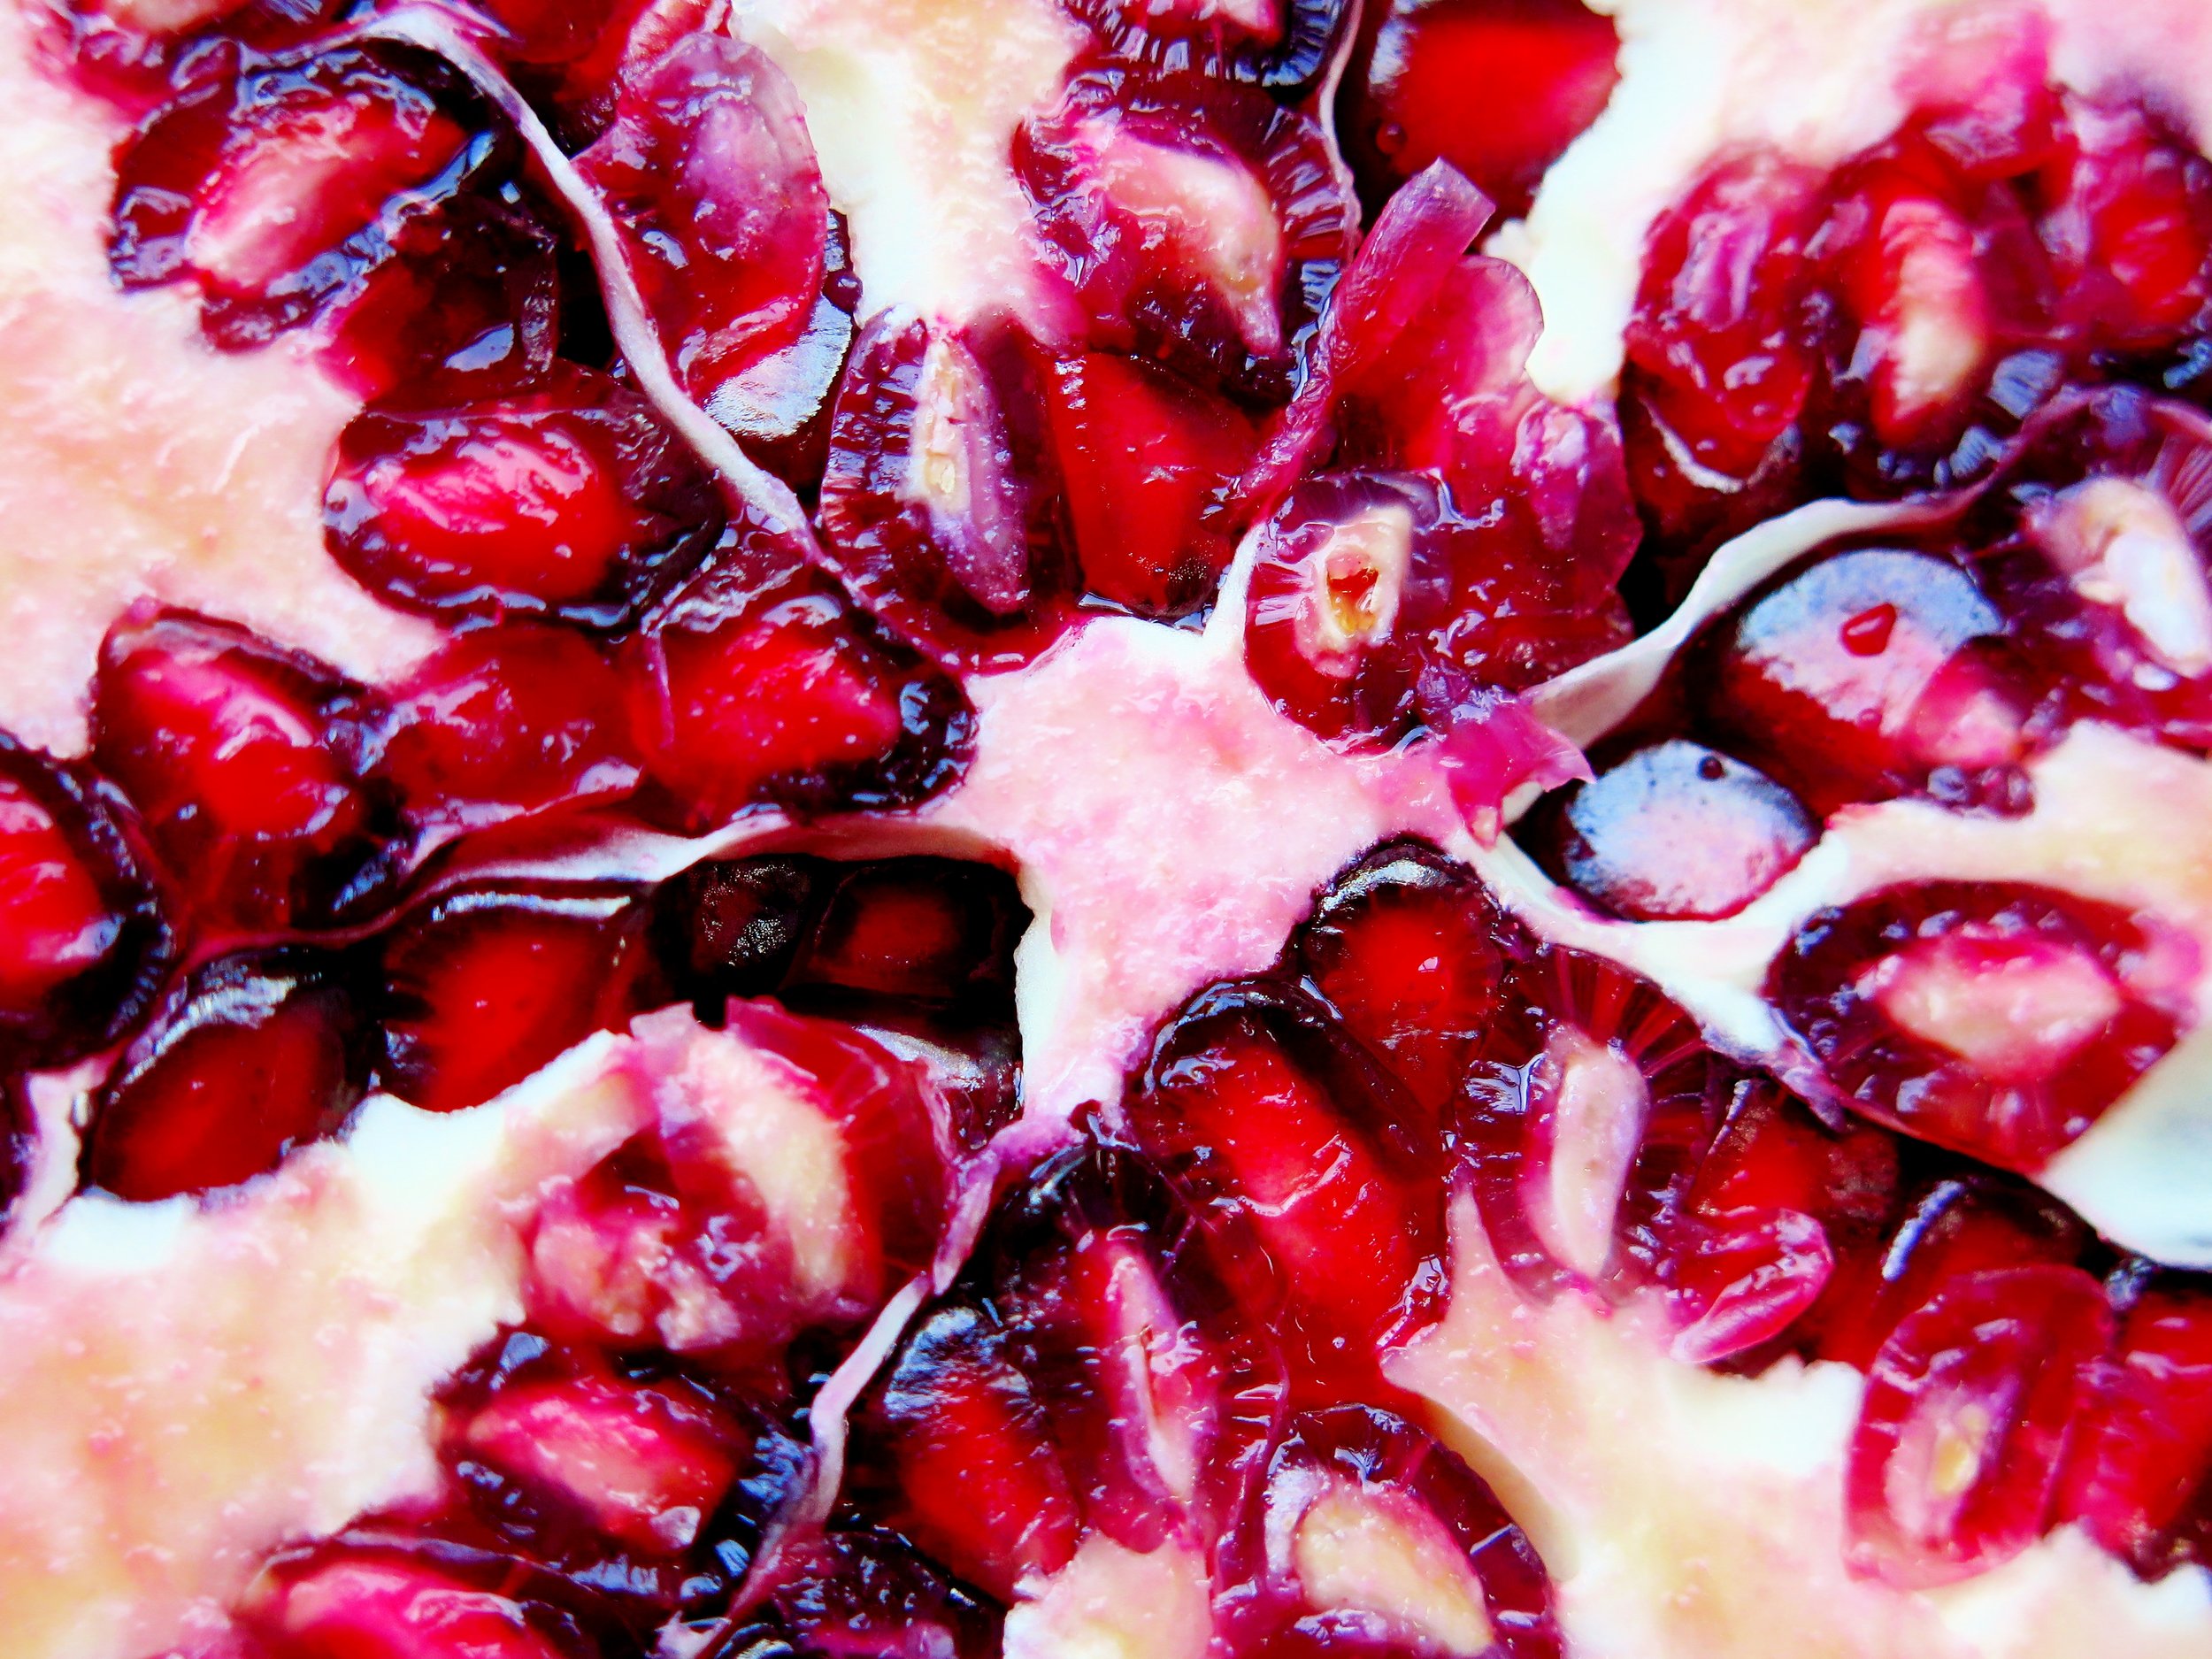
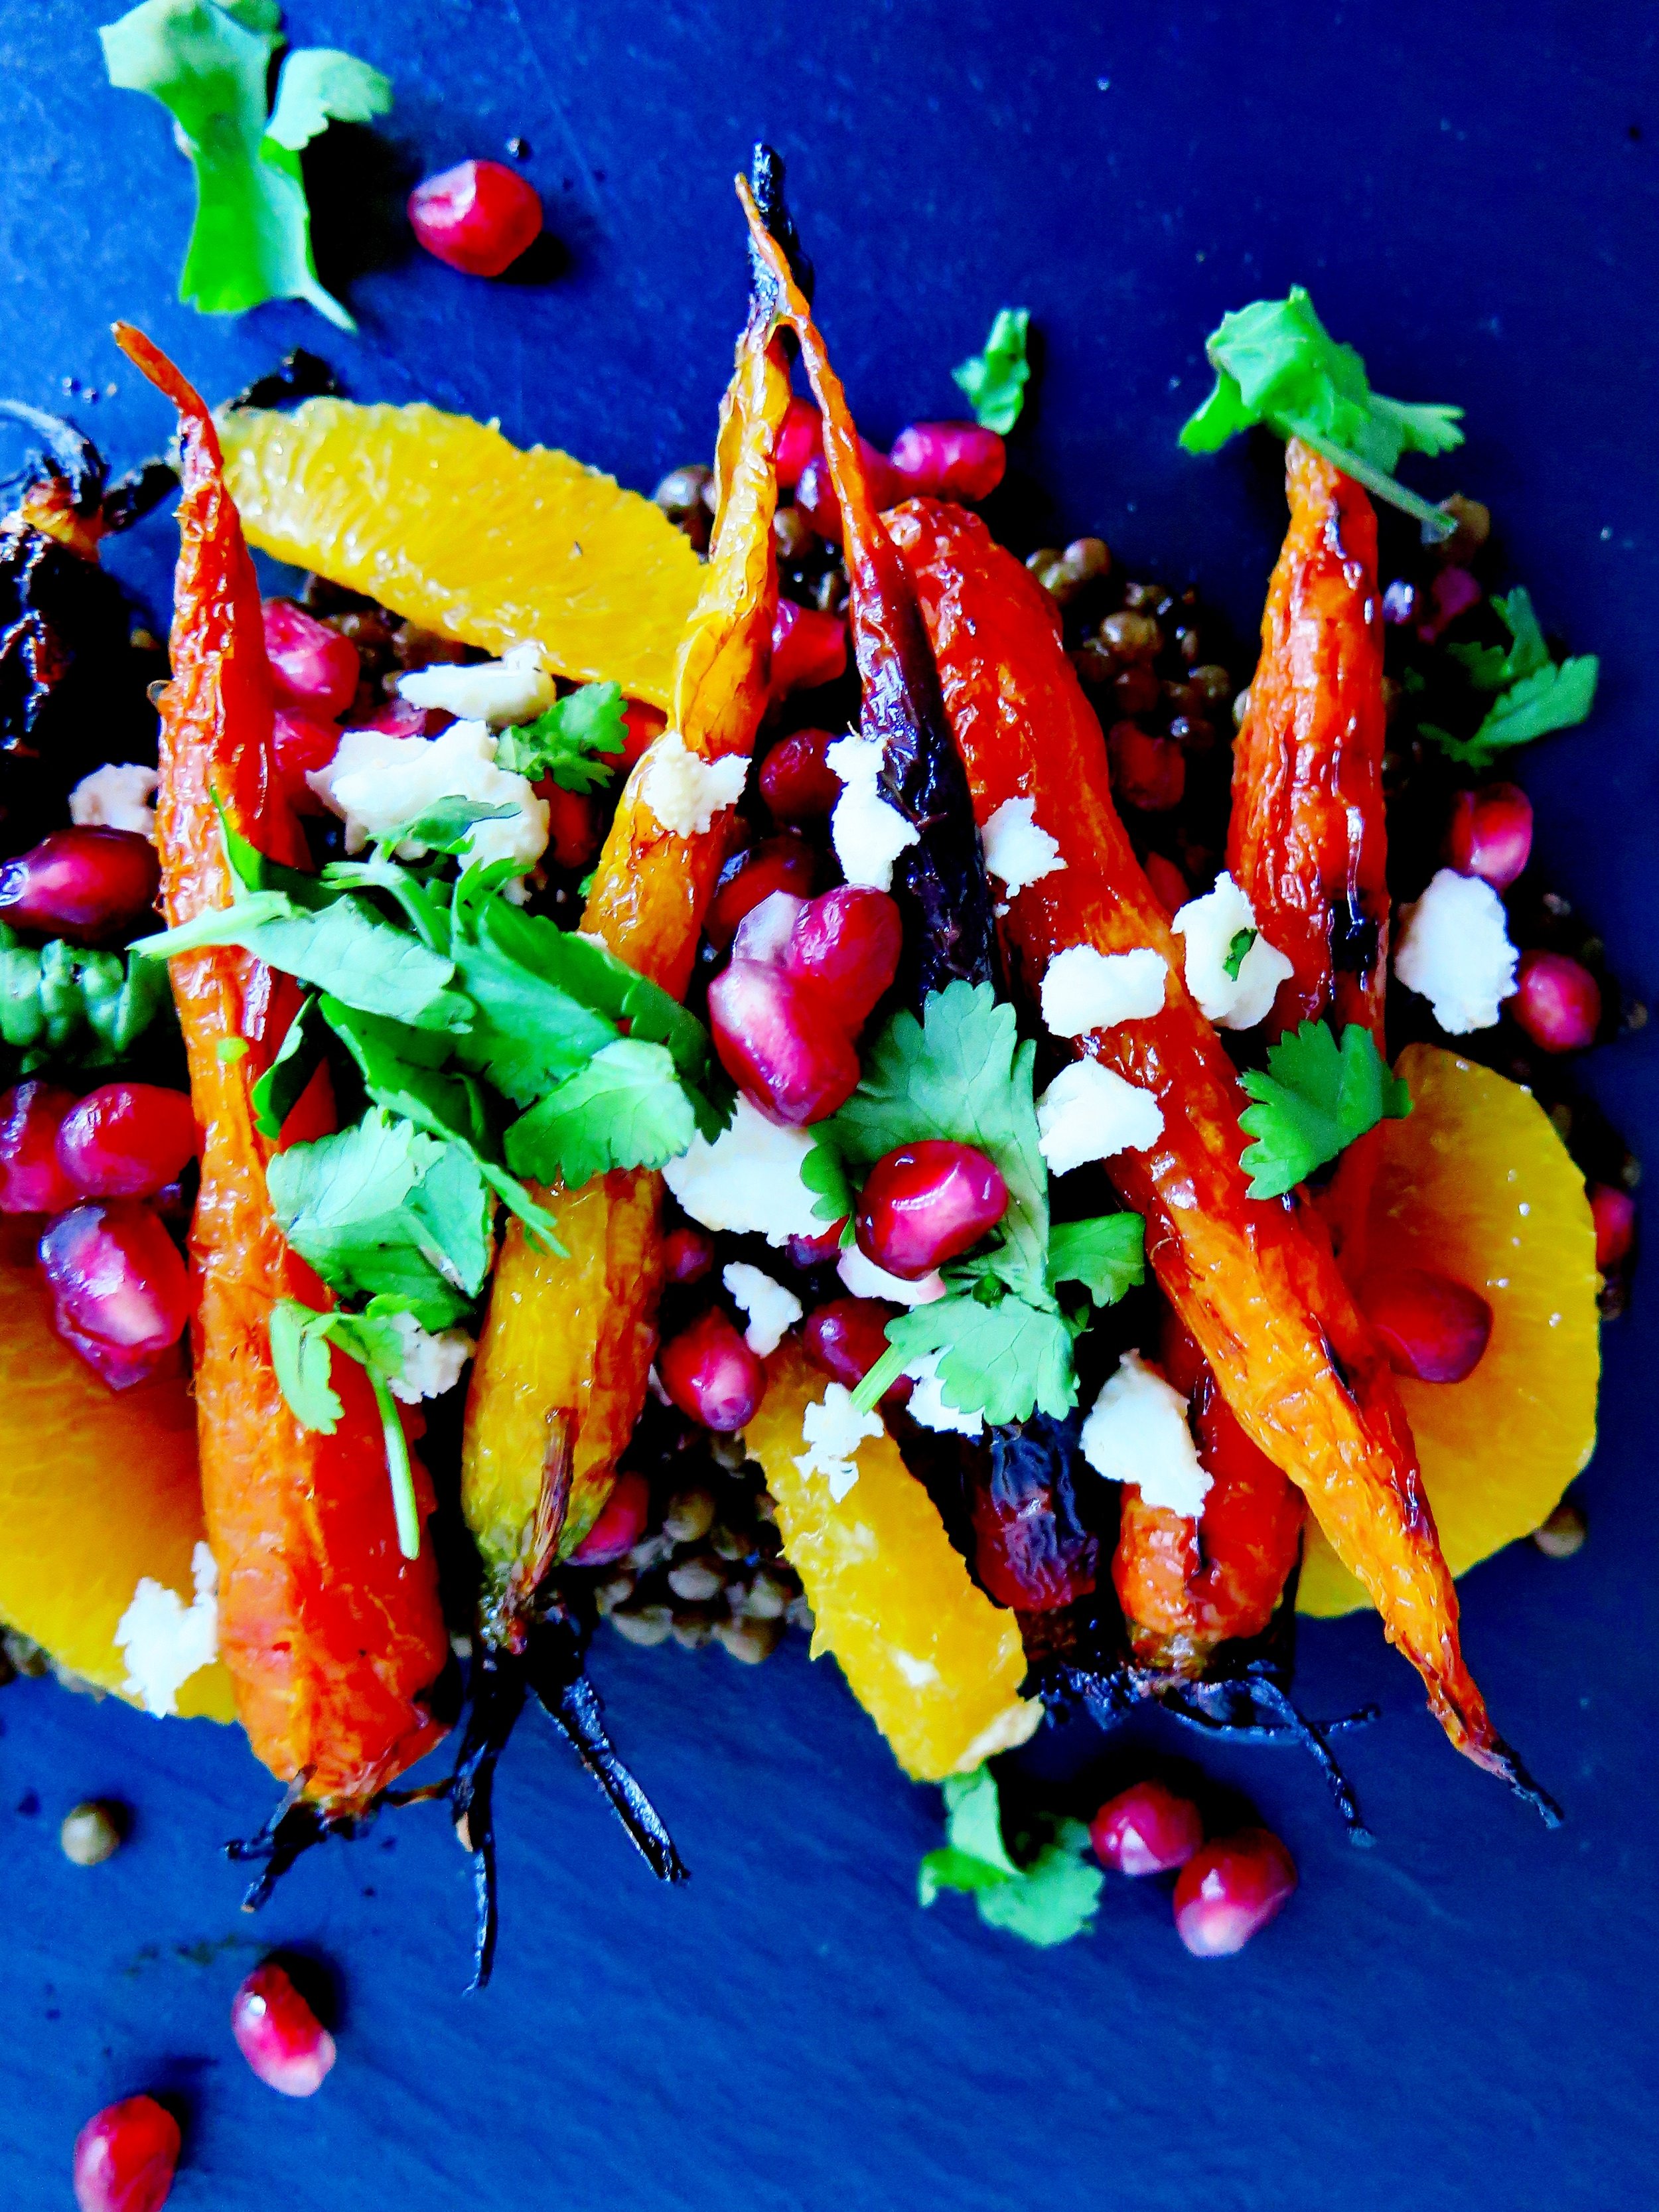
Despite the petit nature of the restaurant (even the waitresses are petite, needing to squeeze between the close-set tables), the kitchen at Honey & Co must go through roughly an entire field of mint every day. It resides proudly on almost every plate, and nor is its presence irrelevant – it lifts the earthier flavours into more summery tones, like for example, the shawarma of slow cooked lamb shoulder burnt pitta and goat’s yoghurt with amba mint and pomegranate. I’m not the greatest fan of lamb, but this dish convinced me that my prejudice was poorly founded.
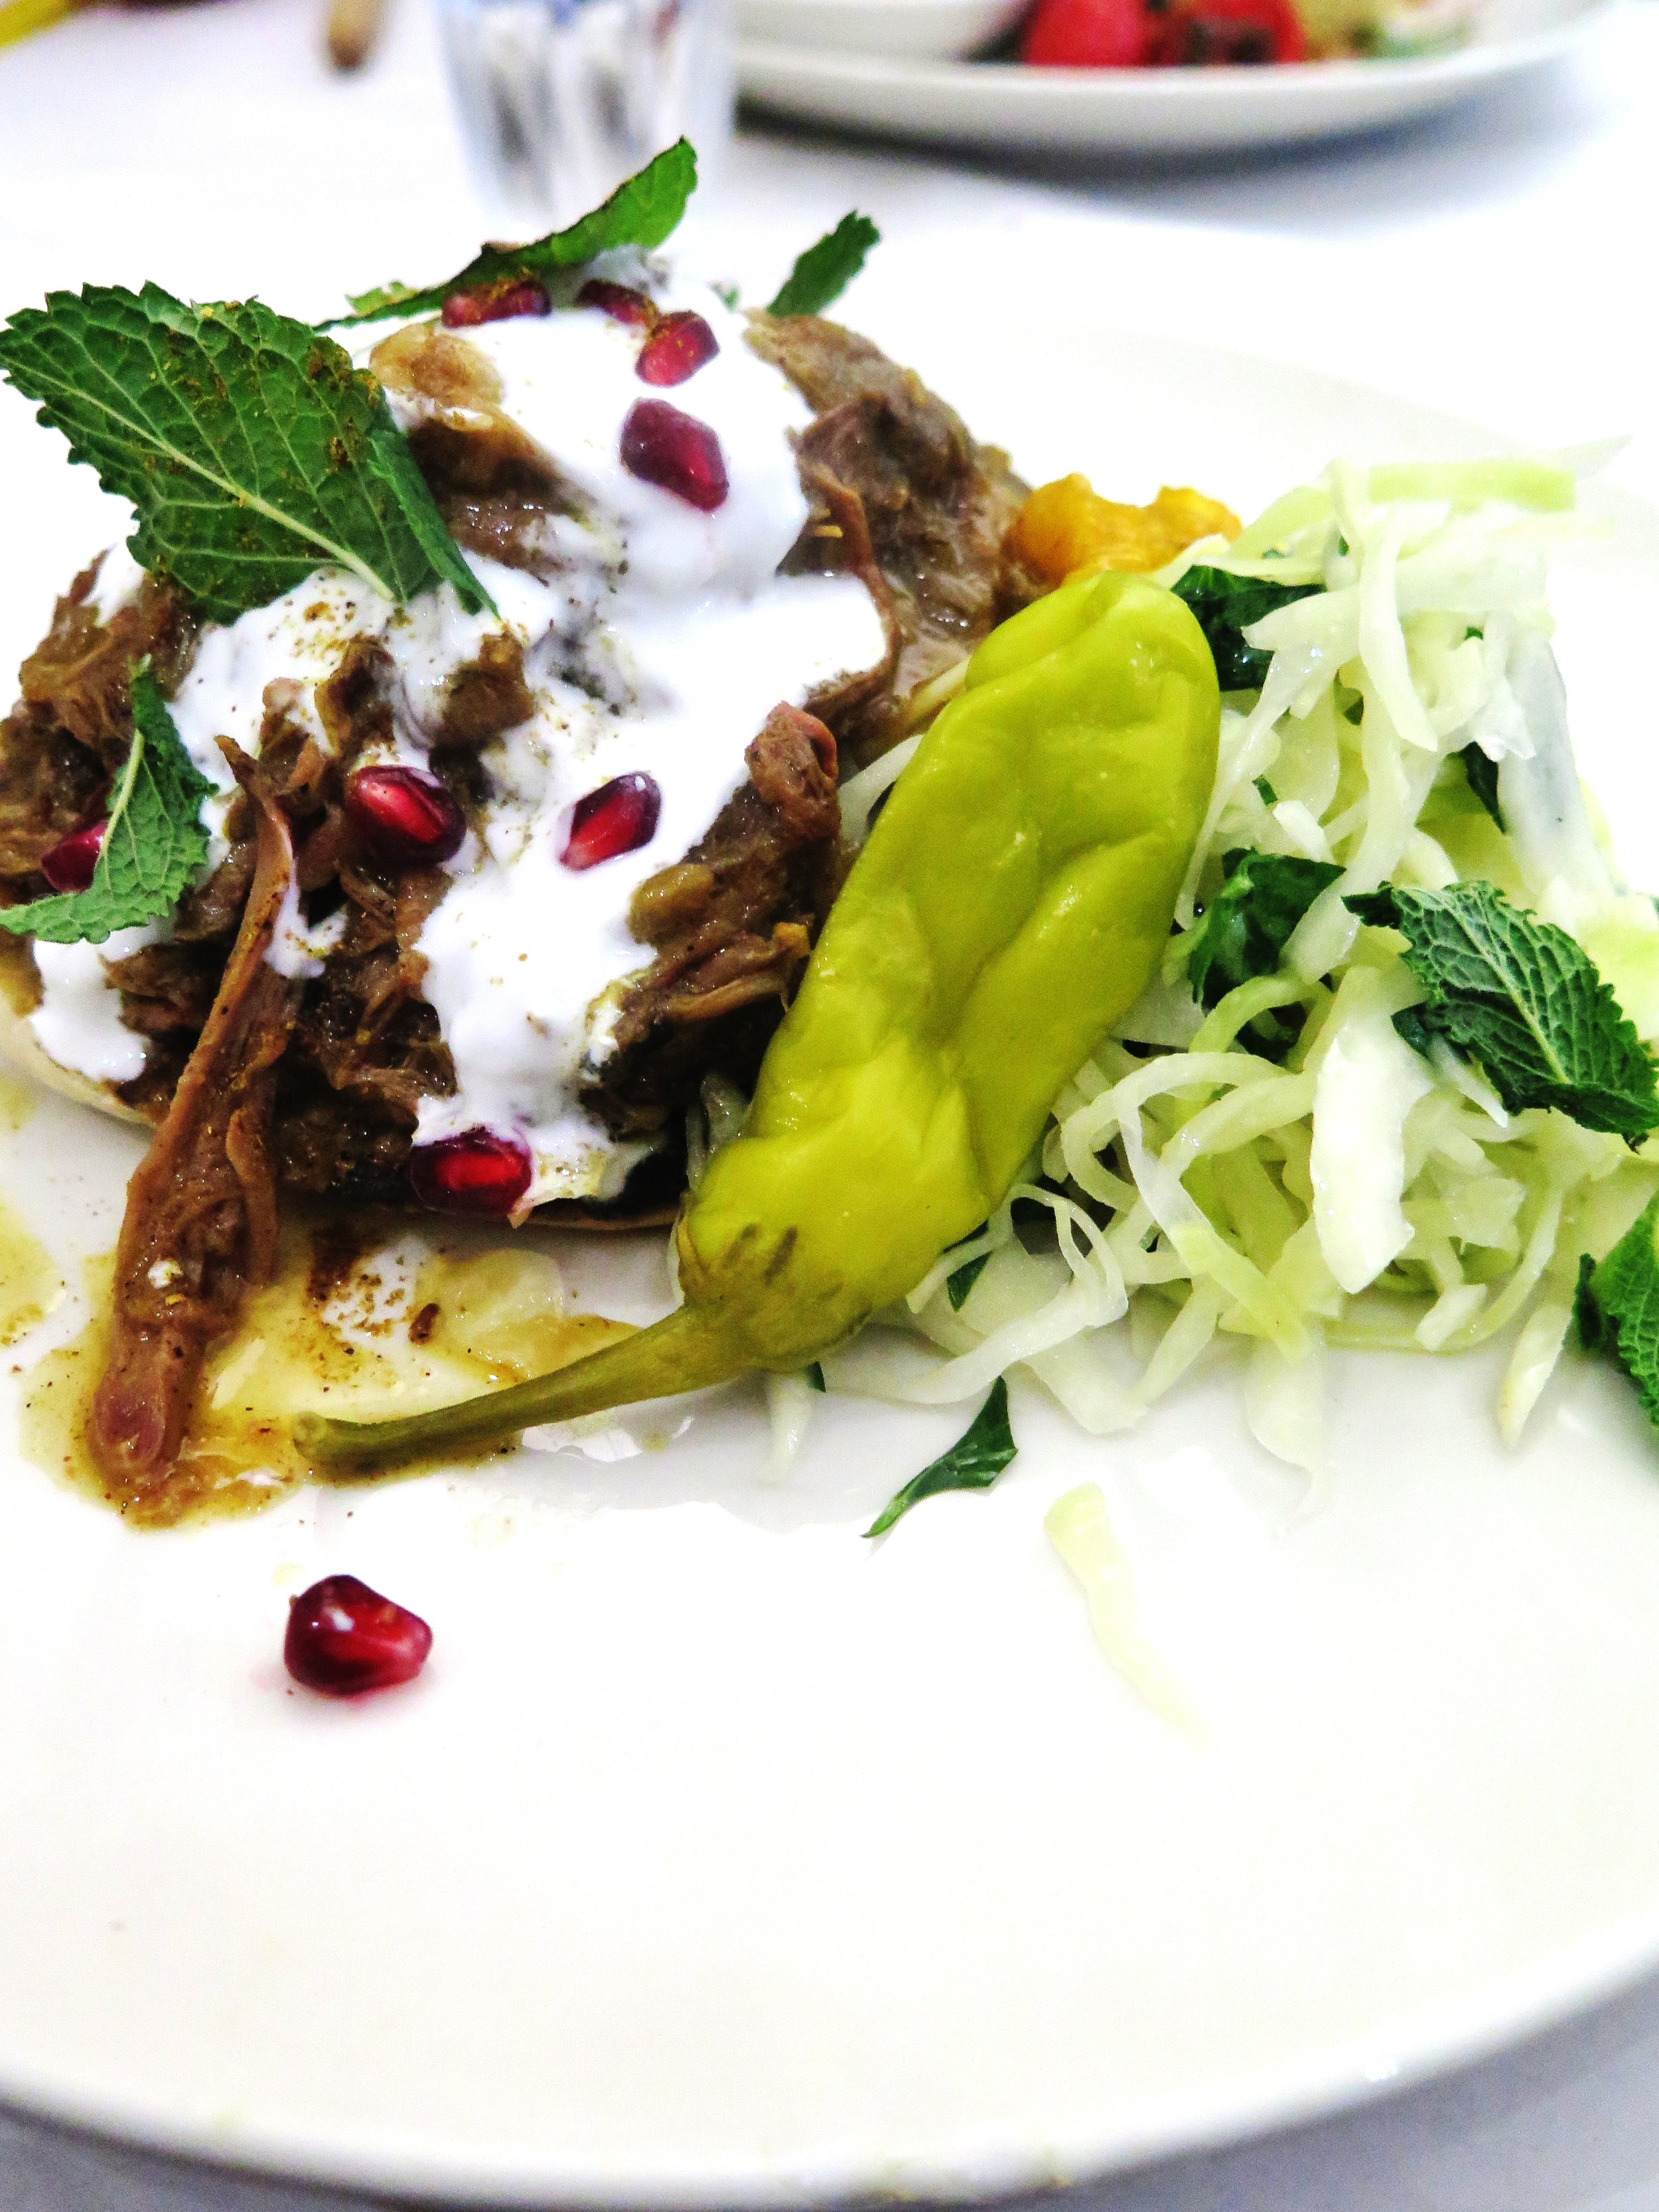
The lamb was succulent, tender and sweet, and lifted to higher planes with the addition of juicy gems of pomegranate and the ubiquitous mint.
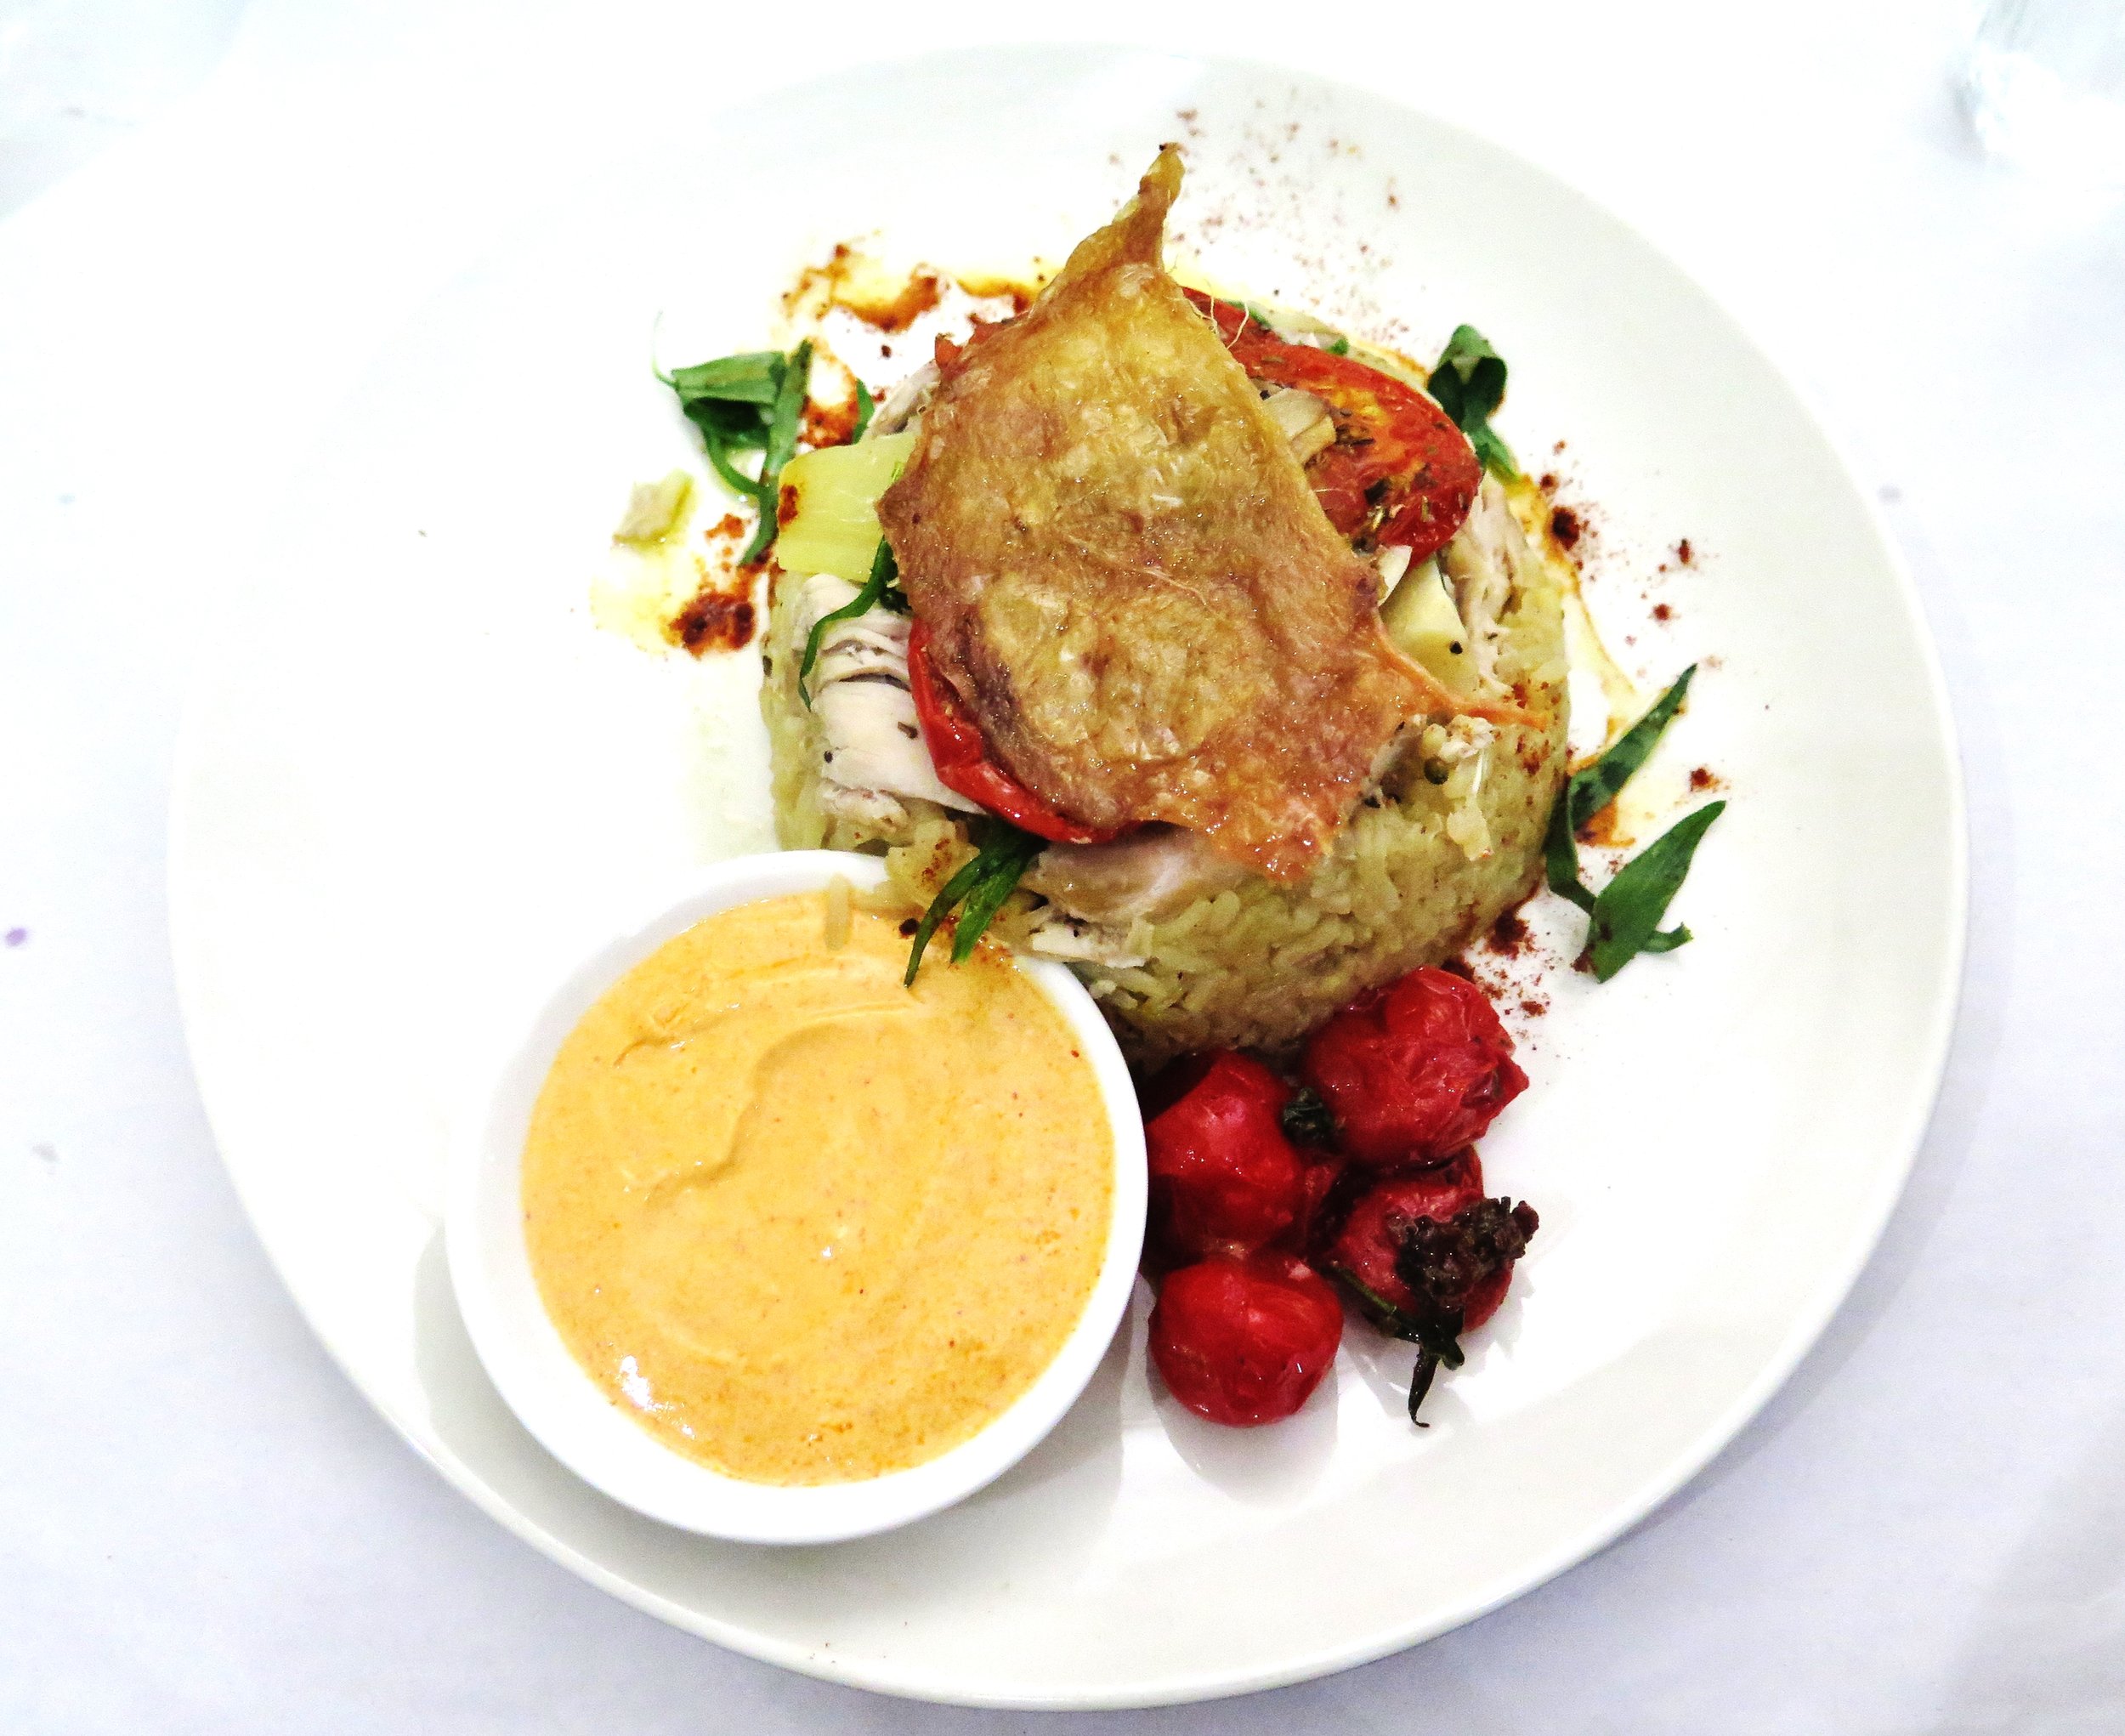
The only disappointment was my dining companion’s chicken makloobah with saffron rice and a lemon yoghurt sauce. Visually, the dish lacked the vibrant flair that every other possessed and was a little bland.
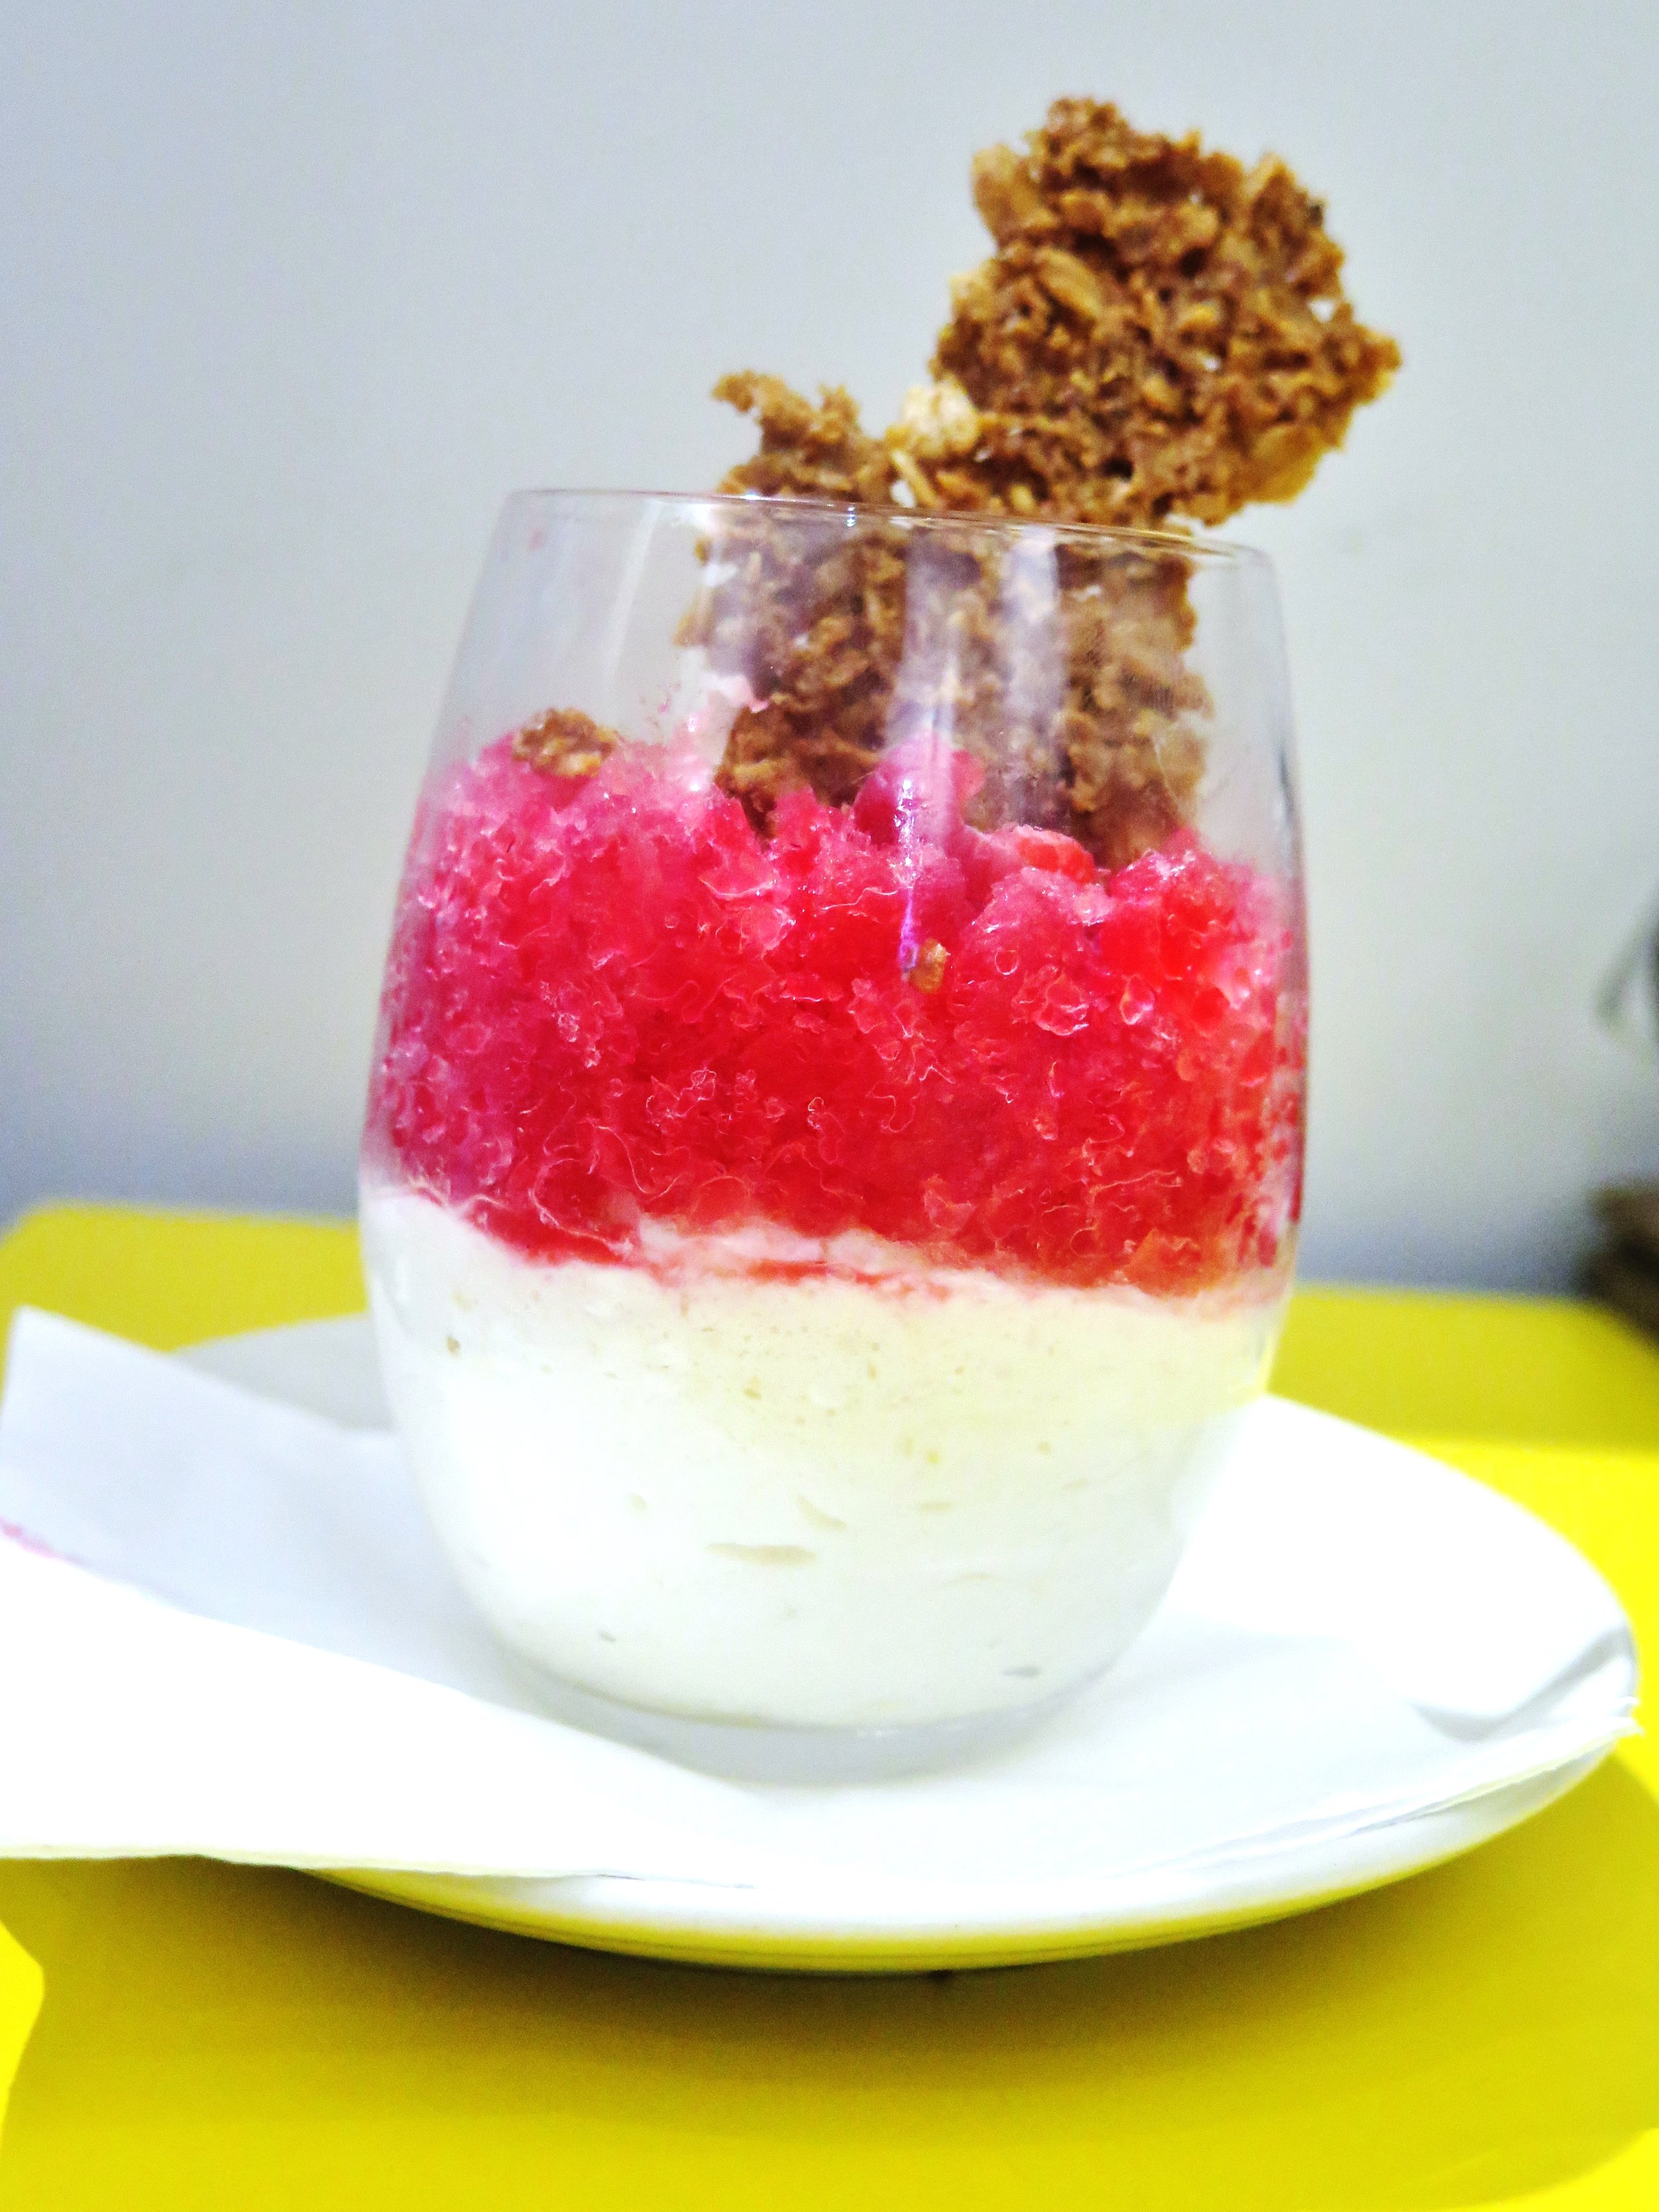
One dining companion went on to order the pink grapefruit and raspberry granita with yoghurt mousse and honeyed oat crisp. The flavours bounced nicely off each other but I found the granita a little too perfumed.
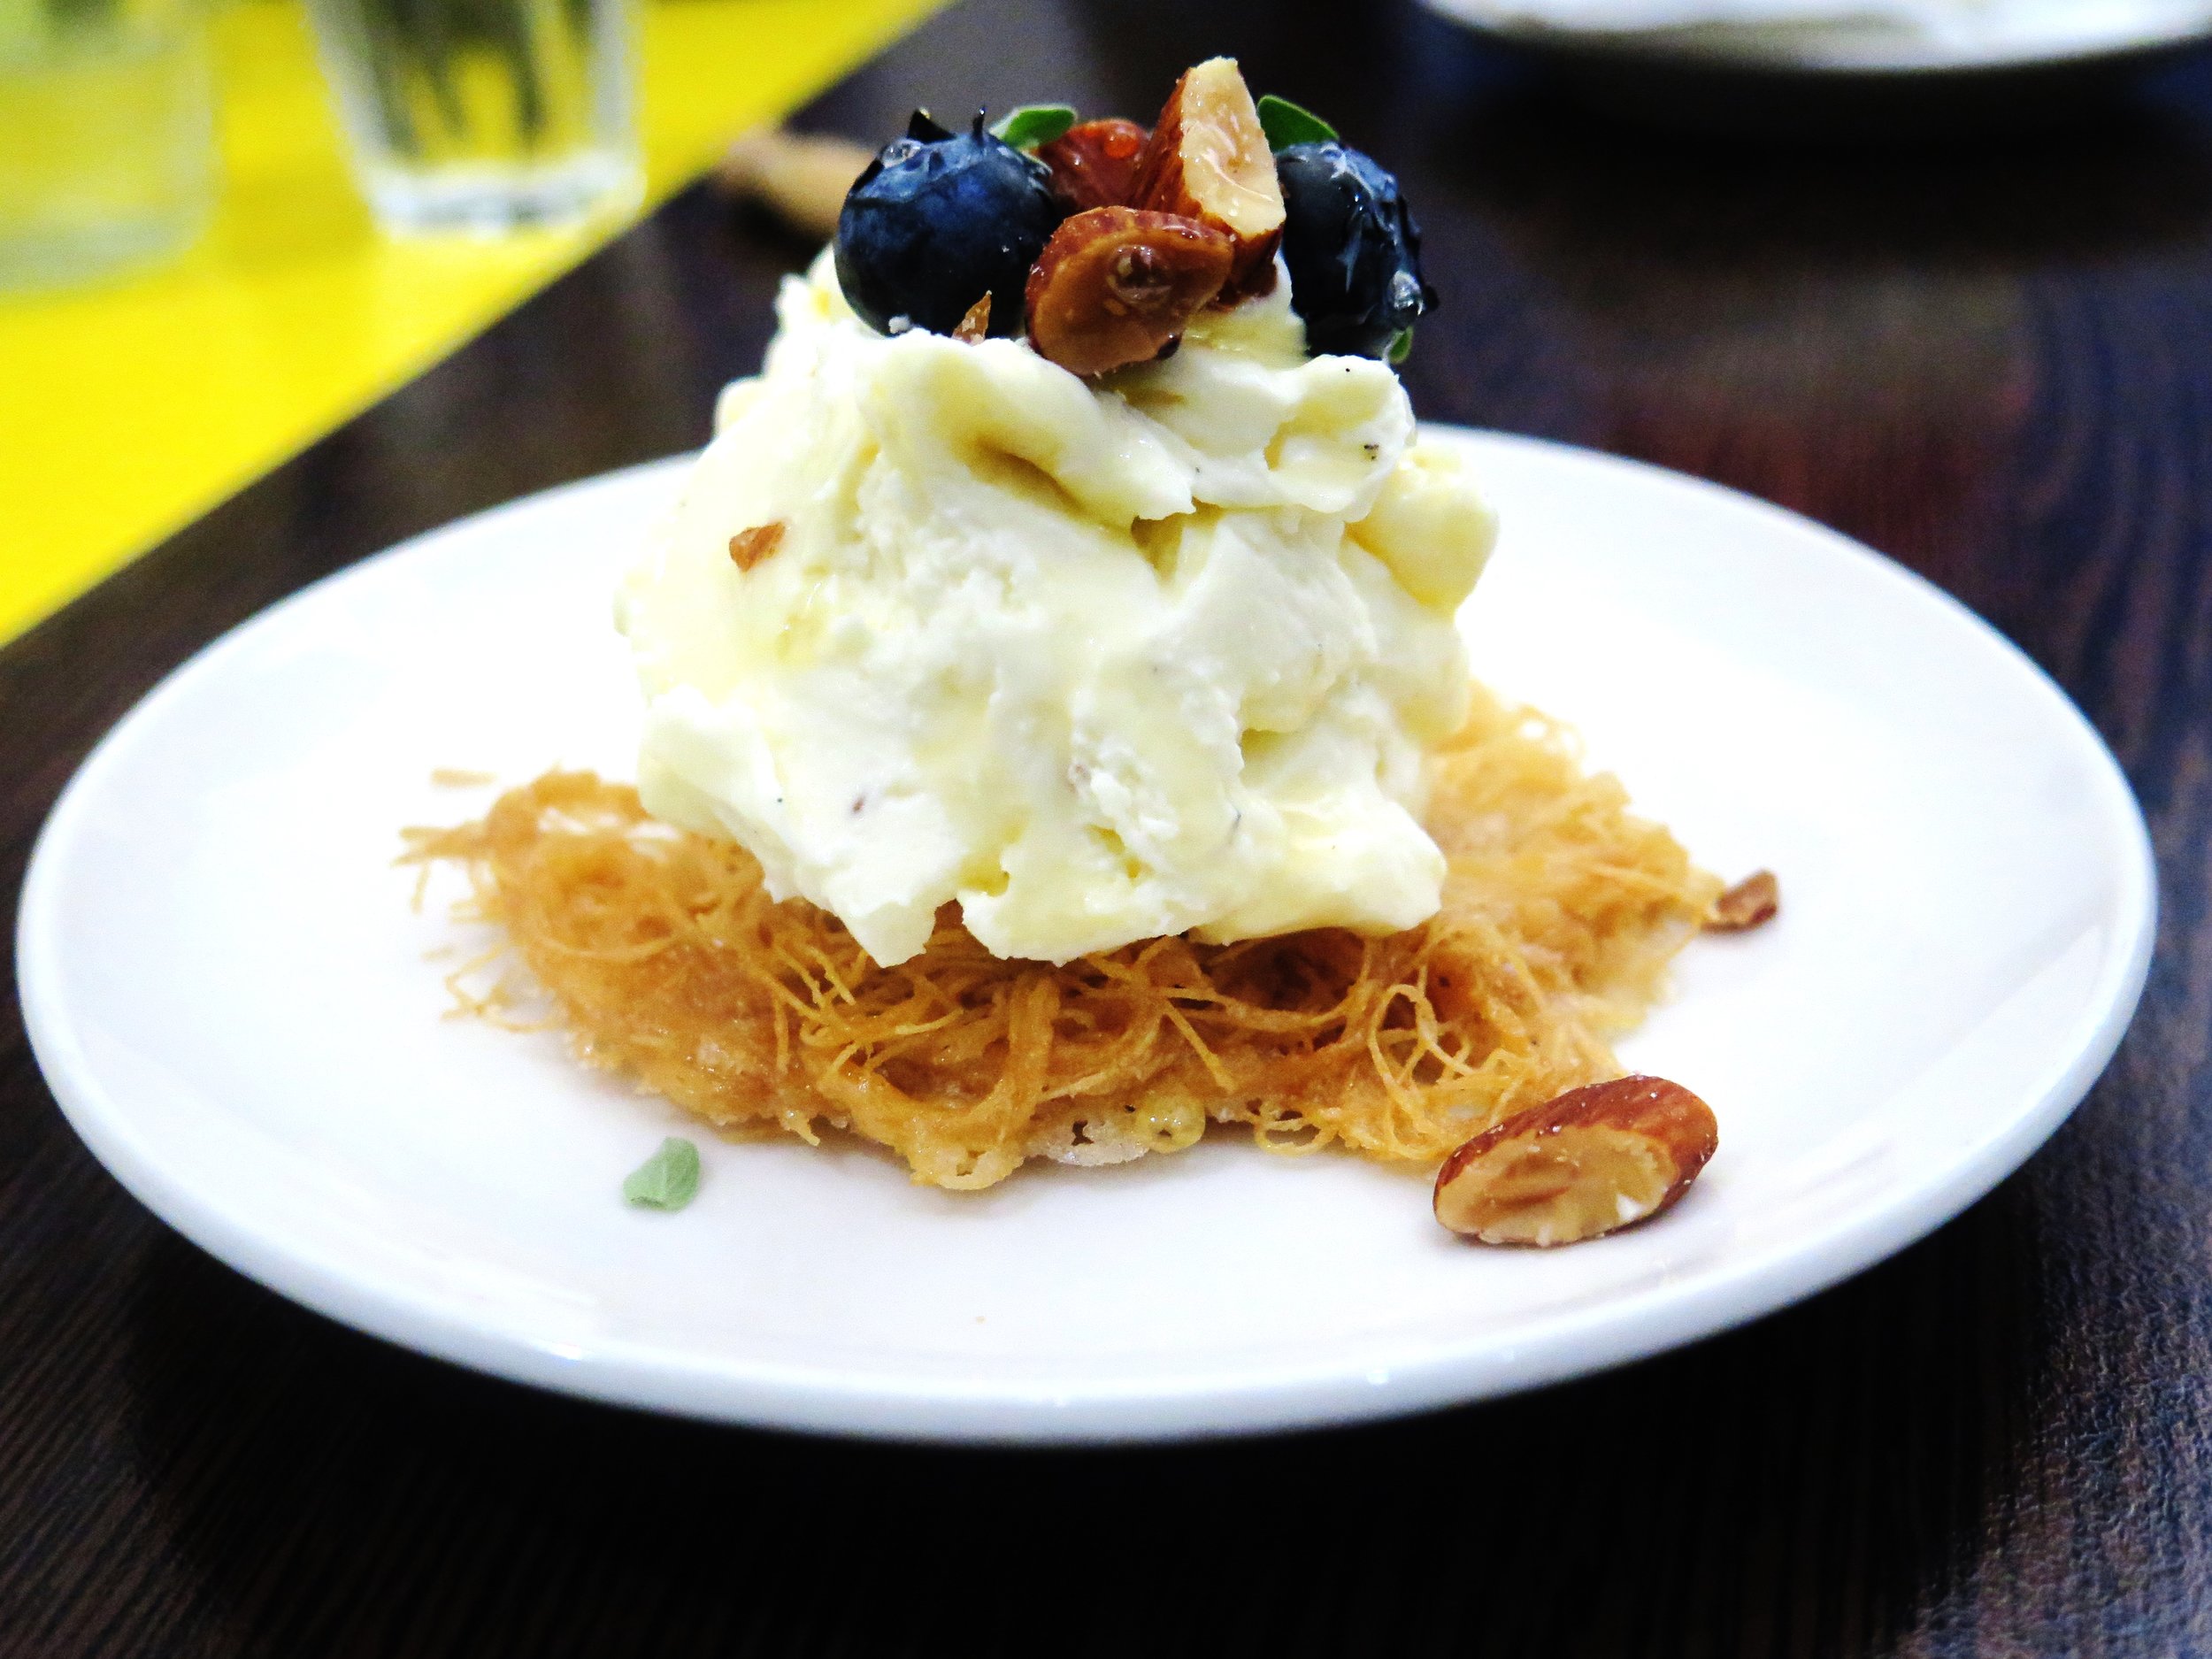
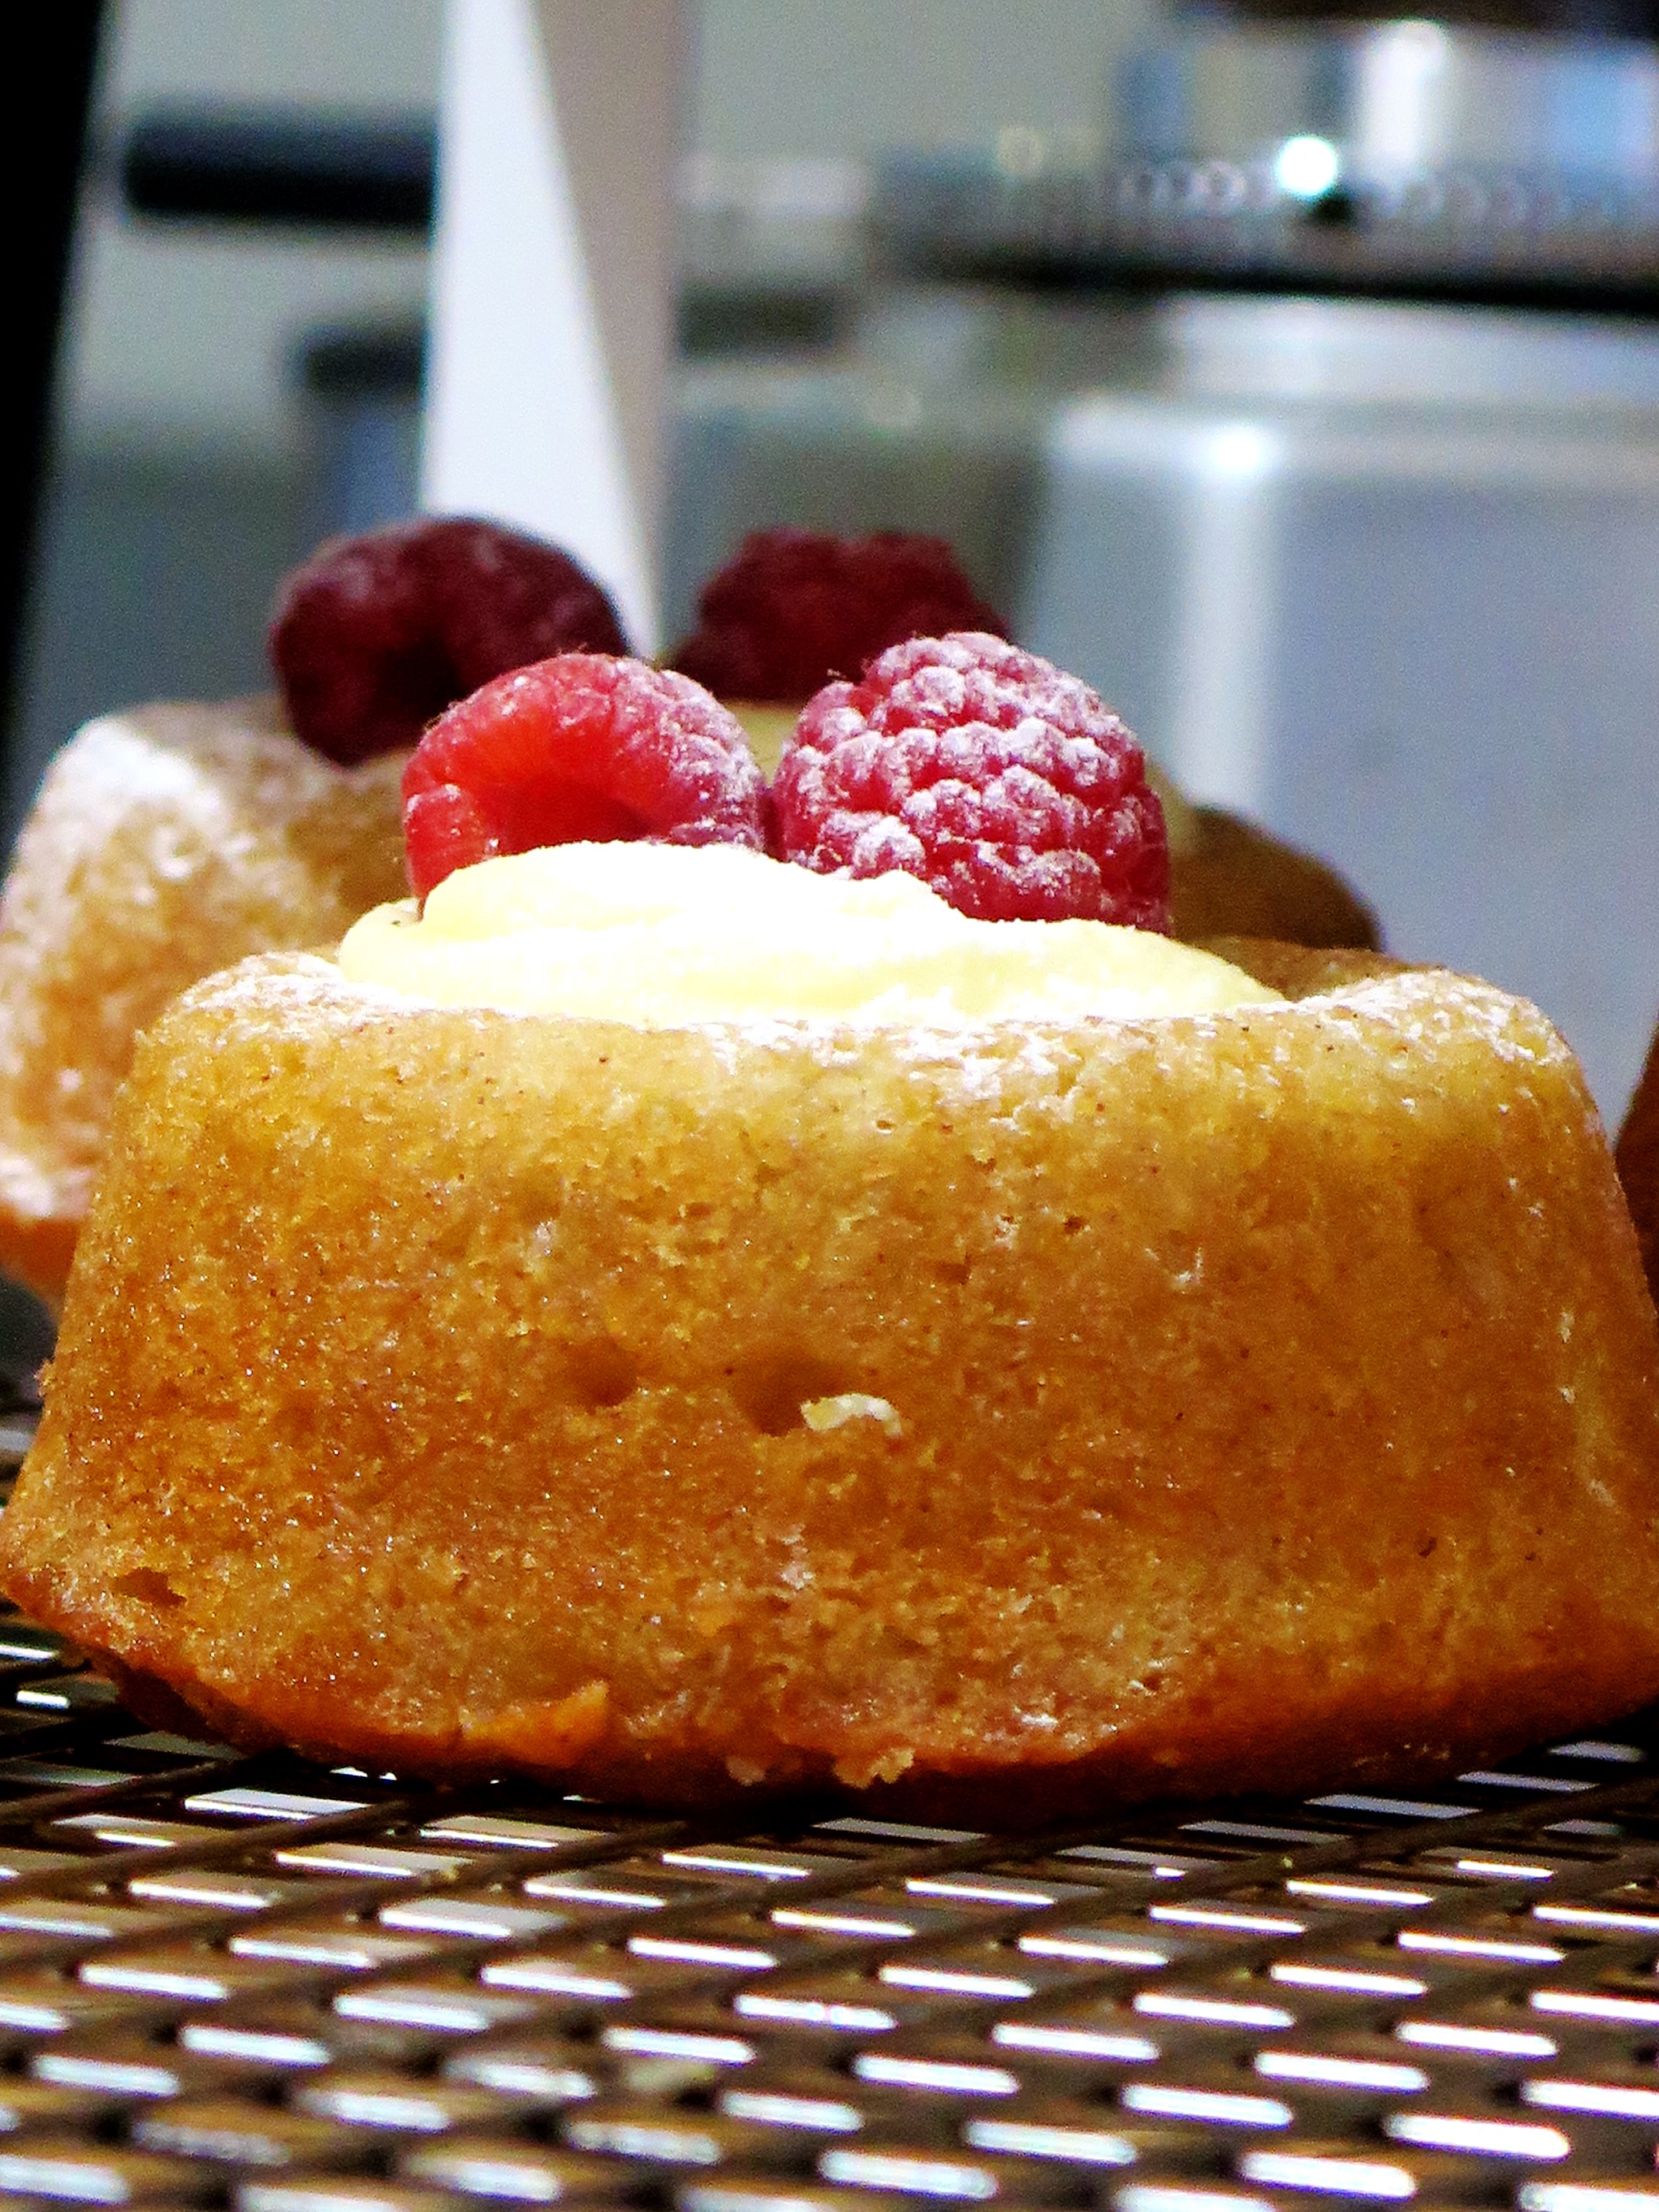
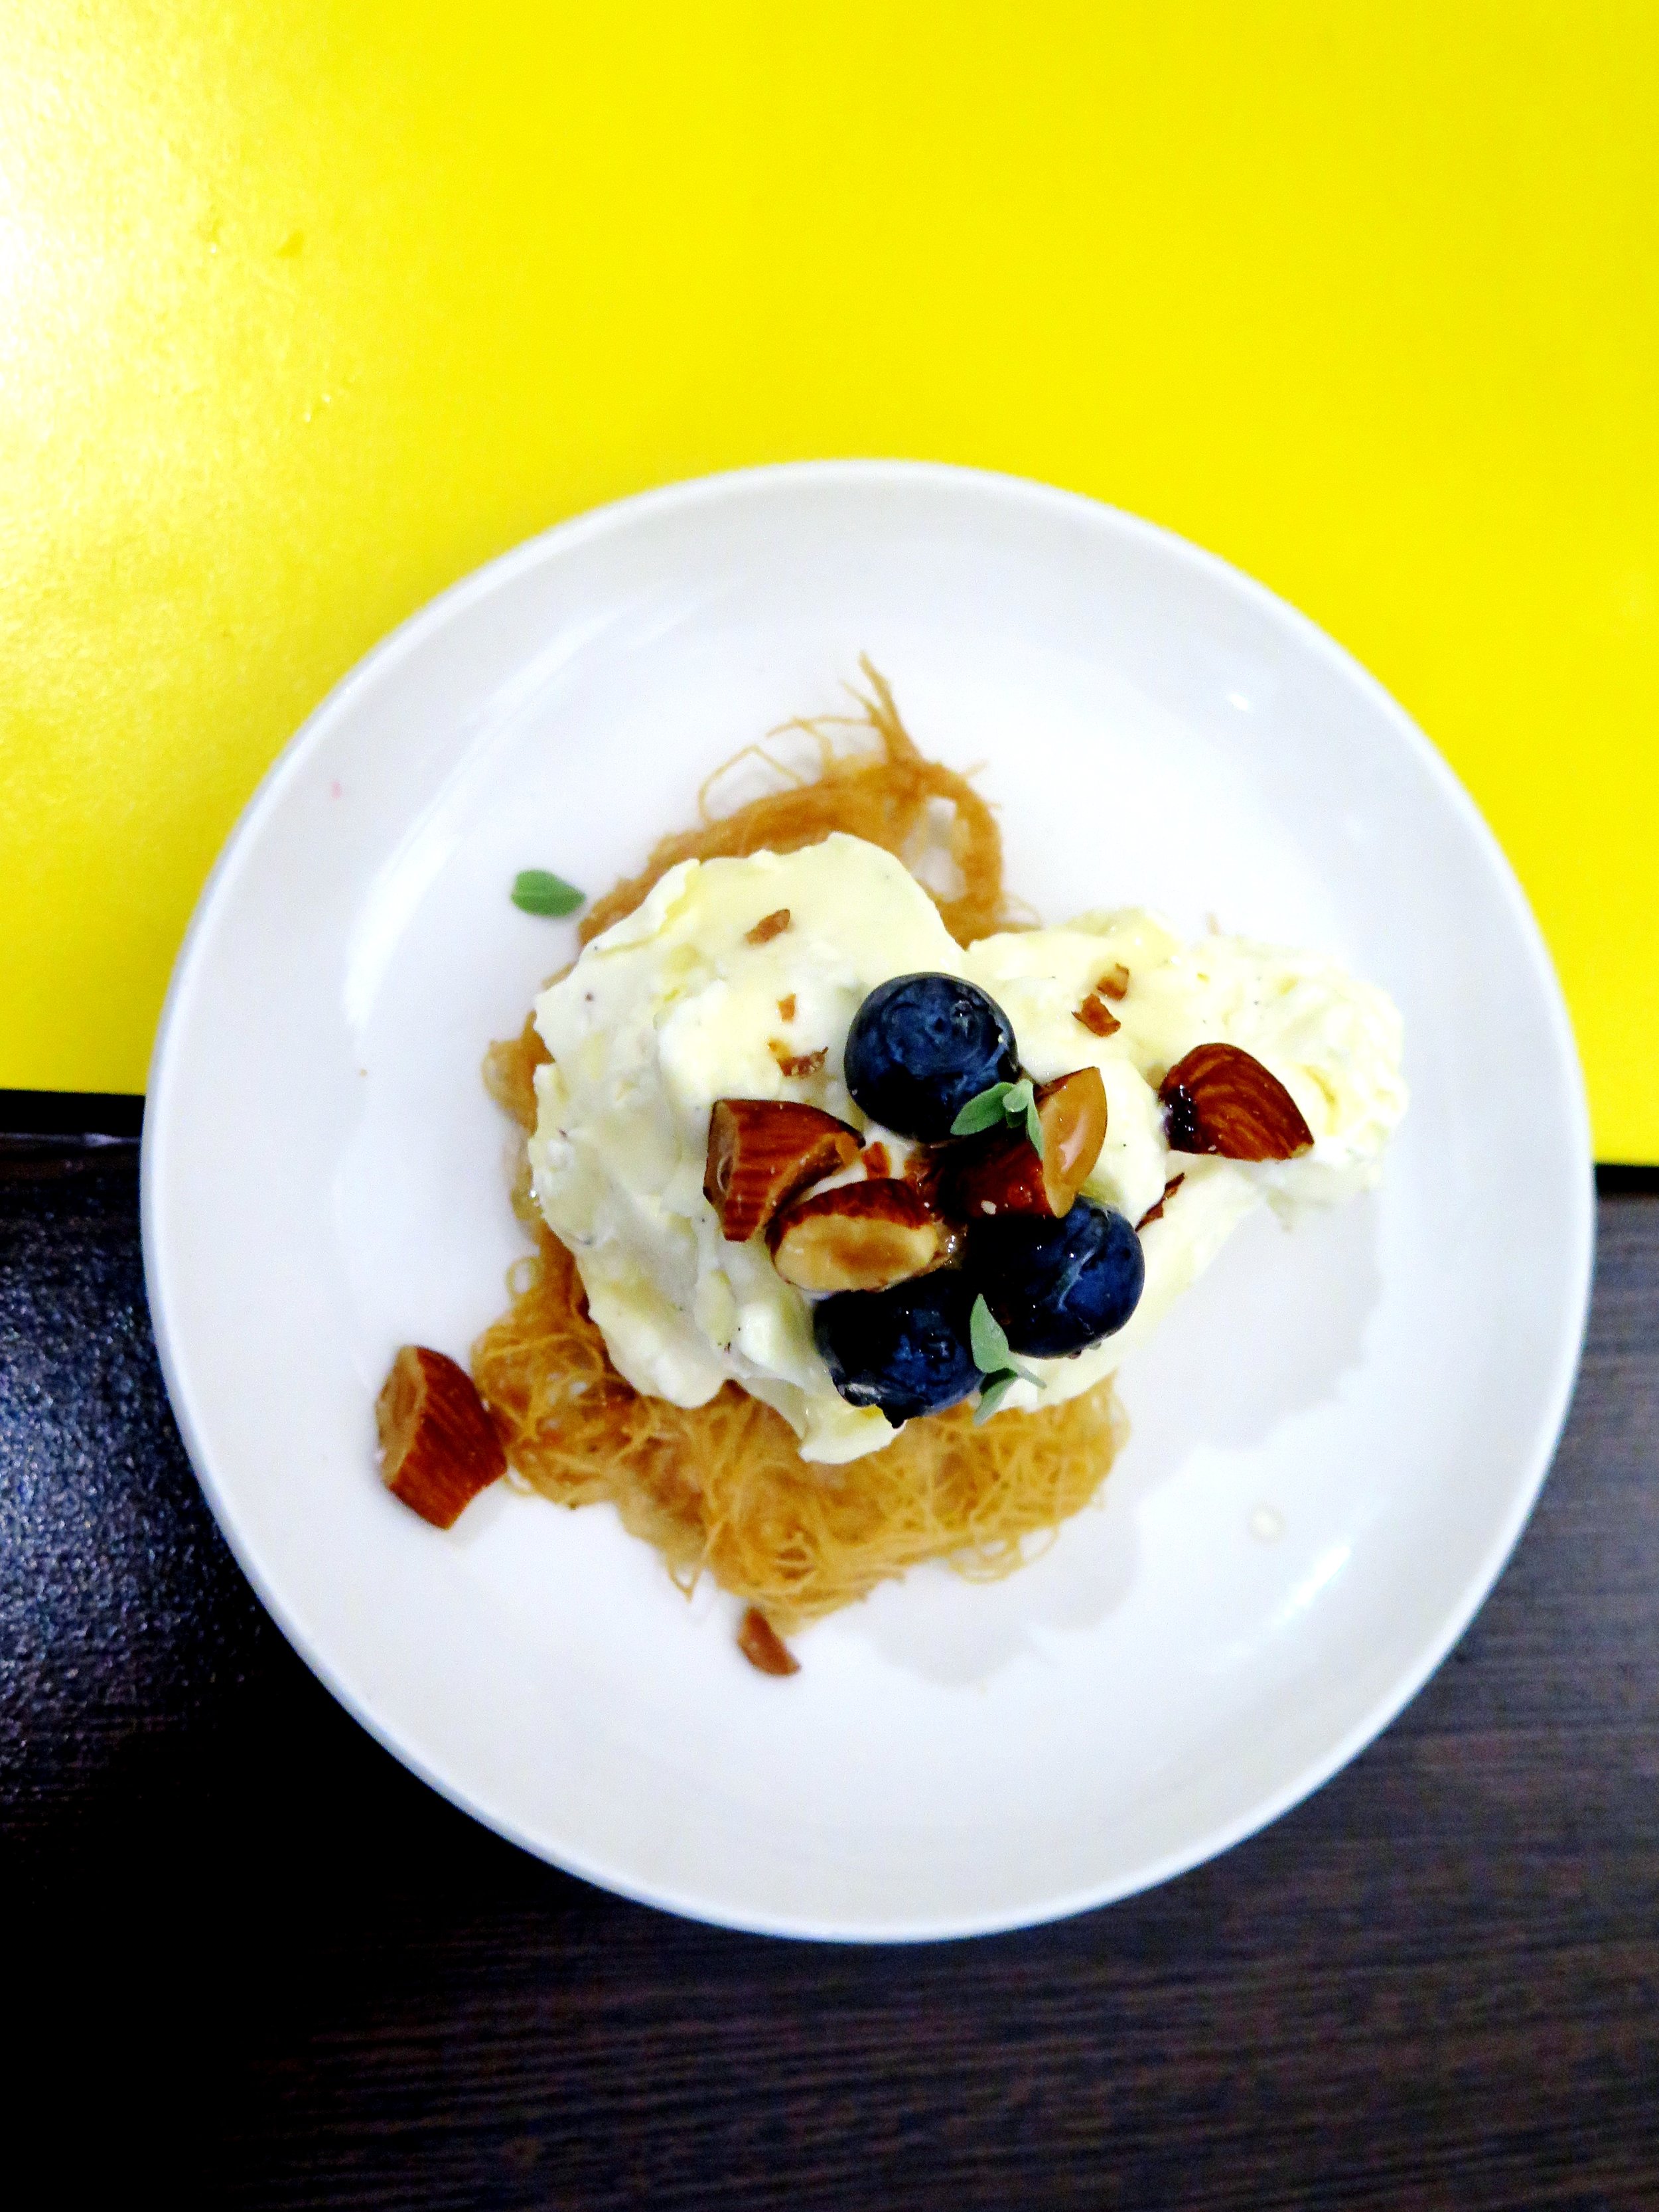
I’m also more inclined to a substantial dessert: I don’t particularly care for palate cleansers. If I’m going to sin, then I’ll sin properly. And there’s one vital way to do that at Honey & Co: the cheesecake with kadaif pastry and honey. Perhaps not the most beautiful of desserts, but more than made up for in flavour – the cheesecake is well balanced, creamy and contrasts perfectly with the crunchy, sticky tangled nest of kadaif.
Bold, well-balanced, vibrant, and generous, the food at Honey & Co is the perfect antidote to the small plate disease.
Food: 8.75/10
Ambience: 7/10
Service: 9/10
Price: ££££
Loos: N/A
Suitable for: buisness lunches, casual dates, family, friends, vegetarians
I wandered into my favourite greengrocer yesterday in search of inspiration, and came out laden with half the store. Amongst the wooden crates I found the most beautifully vibrant baby carrots and blushing, freckled pomegranate orb.
Although lentils and carrots are usually associated with comfort and winter, I used fresh orange and pomegranate jewels to lift them to a lighter, more summery dish.
The carrots are poached in orange juice and maple syrup until juicy and softened and the liquid has reduced to a golden caramel. They are then roasted until sticky, slightly charred and a little withered, but dense with succulence and depth of flavour. The caramel is turned into a citrusy dressing to drench the lentils, with the sweetness balanced with the salty kick of feta.
Ingredients
200g puy lentils
2 tsp vegetable bouillon stock
1 litre boiling water
400g baby carrots
Juice of 3 oranges (15 tbsp)
5 tbsp maple syrup
¼ tsp salt
2 tbsp olive oil
1 ½ tsp lemon juice
1 tbsp pomegranate molasses
¼ tsp salt
2 large garlic cloves, crushed
2 oranges supremed (i.e. segmented with skin and membrane removed)
100g feta
140g pomegranate seeds (half a pomegranate)
20g fresh coriander, roughly chopped
Method
- Place lentils, stock and boiling water in a pan over a high heat and allow to simmer with a lid on for 30-35 minutes until fully cooked. They should be soft and no longer chalky, but definitely not mushy. Drain them, and set aside in a bowl to cool.
- While the lentils are cooking, prepare the carrots: pour the orange juice into a large frying pan over a medium high heat, add the maple syrup and salt, and stir to combine. Carefully arrange the carrots in the pan and allow to simmer for about 30 minutes or until the carrots have softened and the liquid has reduced by about two thirds and become viscous and syrupy. Remove from the heat.
- Preheat the grill to 230˚C. Remove the carrots from the frying pan (while preserving the syrup), arrange them on a baking tray and grill for 5 minutes (checking after 3 minutes) or until they are slightly charred.
- Into the pan with the remaining syrup, pour in the olive oil, pomegranate molasses, lemon juice, crushed garlic cloves and salt to make the dressing. Stir the mixture over a low heat until fully combined. Pour the warmed dressing over the bowl of lentils.
- To serve, carefully spoon the lentils and any non-absorbed dressing on to a platter, and scatter with pomegranate seeds and crumbled feta. Arrange the orange segments and roasted carrots over the top, and sprinkle with the chopped coriander.
HUNGRY FOR MORE?
(Affectionately known as Froyo Yoyos)
If something becomes a fad, I usually try to avoid it. Cupcakes were once things of joy, their light, sweet, spongeyness perfuming the house with the scent of birthdays. And there was always the hope of left over icing, not to mention the ease with which one could convince oneself that the perfectly domed surface was in need of decapitation, just to preview the crunchy golden coated delicate sponge, just in case the cupcakes weren’t guest-worthy. But now those simple pleasures have been crushed for me as the once-a -year treat has lost its golden hued novelty.
The single-concept shops dedicated to cupcakes are now a graveyard for the dying fad. I walked past a well-known purveyor of cupcakes in the middle of an airless department store only last week, and watched as the woman behind the counter shuffled the gaudy treats into reverse rainbow order in an attempt to look busy.
Frozen yoghurt is no longer a novelty, but for me at least it has not yet lost its appeal. Some people (including me) are able to delude themselves that even with the marshmallow, cookie dough, caramel topping it’s a healthier version of their favourite ice cream.
When the clouds deigned to expose a sliver of sunlight for a short while on Saturday, I decided to indulge in a little frozen yoghurt.
The cherries at my favourite fruit monger were so glossy and irresistibly crimson they were begging to be involved in my hoping-for-summer recipe. I combined them with yuzu juice for a touch of astringency to cut through the sweet creaminess of the yoghurt. Then, to add a childlike allure, I sandwiched the frozen yoghurt between two discs of biscuit which I’d infused with almond extract to bring out the cherry flavour further.
The yuzu juice provides a wonderfully tart citrusy note to the frozen yoghurt. If you can't find it, substitute it with lemon or lime.
I used an ice cream churner to make the frozen yoghurt smoother and the ice crystals finer, but if you don’t have one this stage can be skipped and the result will still be delicious.
Of course, the cherry and yuzu frozen yoghurt can be enjoyed sans biscuit. The biscuit is however, rather useful if you wish to turn it into a hand held treat, whether or not the sunshine lingers.
Ingredients (makes 8-10)
Cherry and Yuzu Frozen Yoghurt
375g cherries, halved and pitted
125g caster sugar
250g full fat natural yoghurt (don’t use Greek)
1 tsp yuzu juice
6 drops of almond extract
1 medium sized (18cm x 28cm approx.) loaf tin, lined with cling film
Almond Biscuit
160g butter, at room temperature
2 egg yolks
10 drops almond extract
210g plain flour
50g sugar
1tsp vanilla extract
¼ tsp salt
1 large baking tray lined with baking parchment
4.5/5cm circular cookie cutter or wine glass
Method
Cherry & Yuzu Frozen Yoghurt
- Place cherries and sugar in a small pan over a high heat. Stir occasionally to prevent sugar from burning. When enough liquid has run out from the cherries to coat the base of the pan and it begins to boil, reduce heat to medium. Allow to simmer for 10 minutes until the liquid from the cherries has reduced and is just slightly thicker than maple syrup.
- Allow the cherries and syrup to cool then blitz them together with the yuzu, almond extract and yoghurt until smooth. If you are using an ice cream maker, chill the mixture and then churn according to the manufacturer’s instructions. Otherwise, proceed to step 3.
- Pour the mixture into the cling film-lined loaf tin, and smooth the surface with a spatula. Place in freezer for 1-2 hours until solid.
Almond Cookies
- Beat the butter in a mixer (or by hand) until light and fluffy. Into this, beat the almond extract, vanilla extract and egg yolks.
- In a separate bowl, mix together flour, sugar and salt. Stir this into the butter mixture until a dough forms.
- Flatten the dough into a disk, wrap in baking parchment and place in freezer for 15 minutes (or fridge for 30 minutes).
- Preheat oven to 160˚C.
- On a floured surface, roll out the dough to 7mm thickness. Using the cookie cutter, cut the dough into the discs and place on lined tray.
- Bake for 7-10 minutes until cooked all the way through but still pale. Allow to cool.
Assembly
Remove the loaf tin containing the frozen yoghurt from the freezer. Using the cookie cutter, cut the frozen yoghurt into discs and sandwich each disc between two almond biscuits. Store these in an airtight container and return to the freezer until ready to serve.
Khanom krok, crepes, blinis, dosas, tortillas, msemmen, ingera, beghrir, and both pandan and rice pancakes - dense, spongy, fluffy, light,... I've devoured them all. But when it gets to Sunday, and brunch is obligatory, I always revert to American-style pancakes. I want to whisk up something quick, easy and delicious.
The internet is currently riddled with recipes for "sugarless, 2-ingredient protein pancakes". Warning: two ingredients = egg and banana, and there are many things I'd rather eat than a banana omelette. So I came up with my own healthier version of American-style pancakes using wholegrain spelt and coconut oil.
They're fluffy, light and filling, and the wholemeal spelt flour adds a warming nuttiness as well as lowering the overall GI level. They're also really addictive - the photos are of the fourth batch I made on the day (as the first batch were consumed as a solo act, and the second and third were inhaled by my brothers).
I paired them with a very simple mixed berry compote, the recipe for which is below.
Ingredients
Wholesome American Style Spelt Pancakes
340g wholemeal spelt flour (can be substituted with plain flour, wholemeal wheat or white spelt)
4 1/2 tsp baking powder
1/4 tsp salt
3 large eggs
450ml unsweetened almond milk (can be substituted with any other kind)
1 tbsp vanilla extract
45g coconut oil, melted + extra to coat frying pan (can be substituted with butter)
Berry Compote
500g mixed frozen berries
3 tbsp maple syrup (optional)
1tbsp vanilla extract
Method
Pancakes
1.) In a blender, blitz together all the ingredients until smooth.
2.) Place shallow frying pan over a medium-high heat and melt 1tbsp of coconut butter (or butter, if using), swirling it around to coat the pan.
3) Pour batter into pan to desired pancake size and cook for a couple of minutes until bubbles begin to break through the surface. Flip, and cook for a further couple of minutes until golden.
Mixed Berry Compote
1.) Place pan over high heat, pour in all ingredients, and stir to mix through.
2.) When the berries have melted and the mixture begins to simmer, reduce to a low heat and cook until berries are completely cooked through.
3.) Drench pancakes.
HUNGRY FOR MORE?
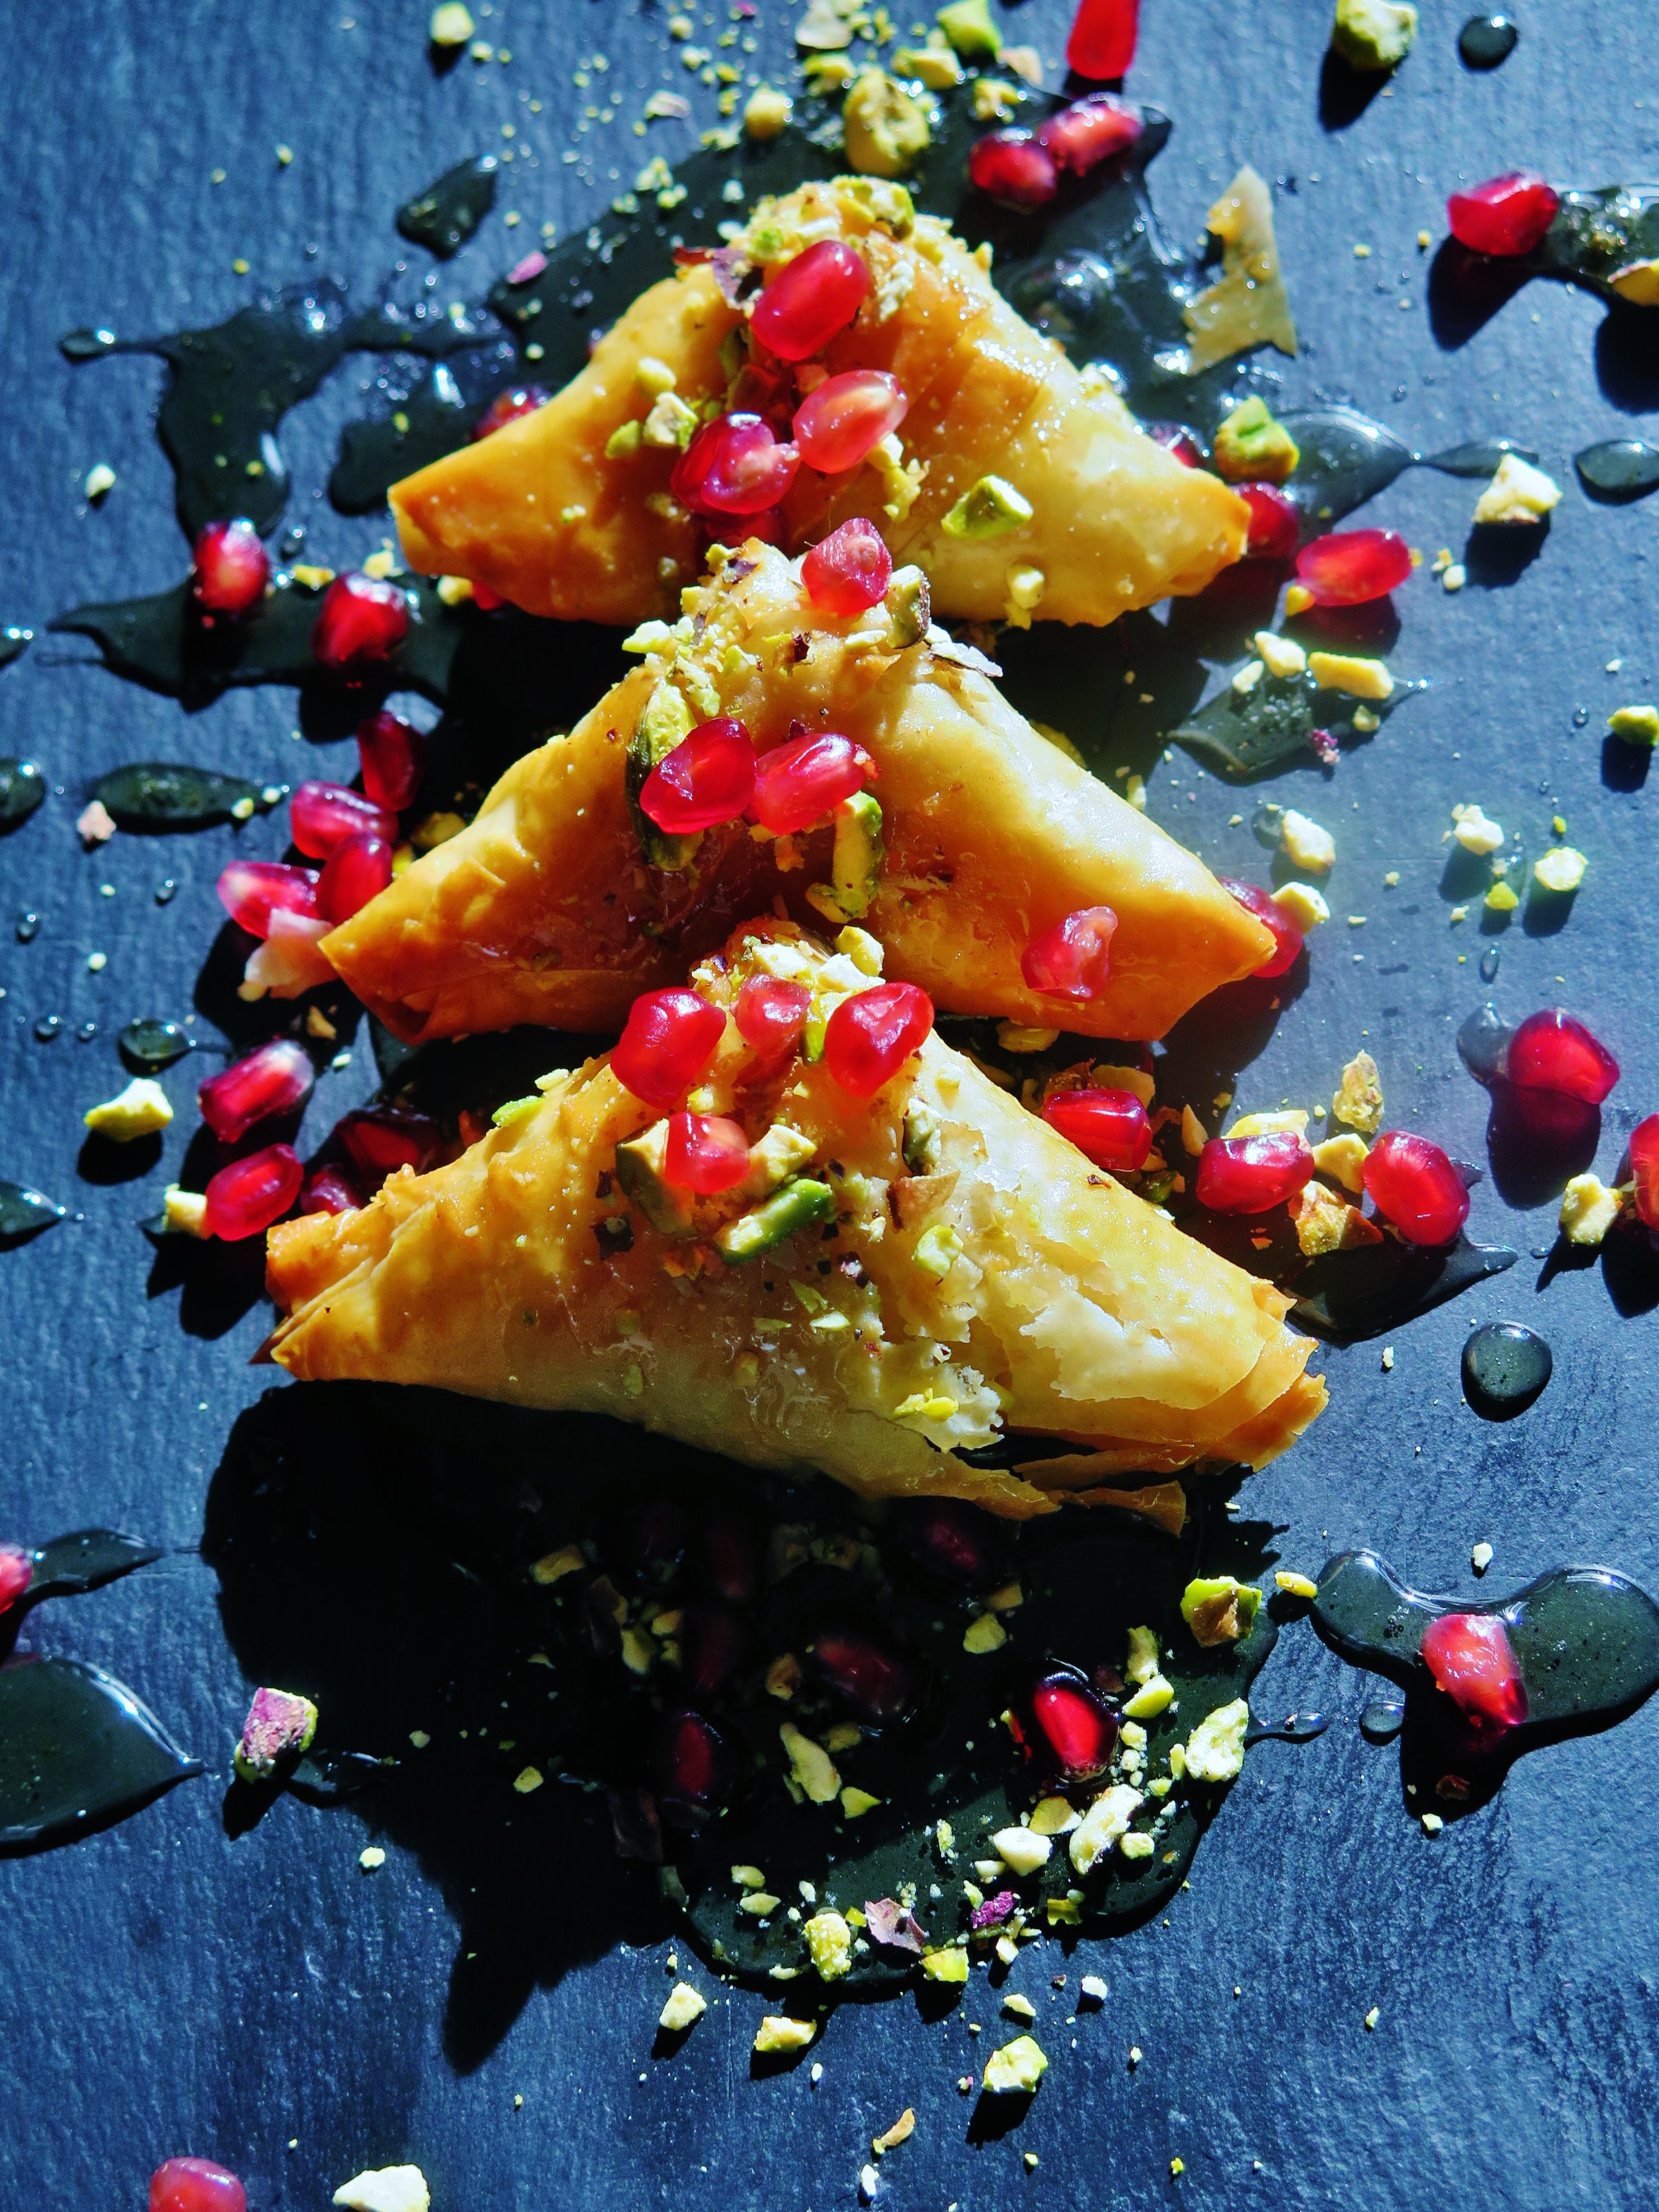
Its origins lie as either Central Asian Turkic traditional layered breads, or traditional Roman desserts from Istanbul the capital of the Eastern Roman Empire (I favour the latter option). Breakfast, afternoon tea, dinner – these golden perfumed sweets are appropriate at any time of the day in may book and they are way simpler & quicker to make than you might think.
Many recipes call for the pastry to soak for 8 hours or more – I came up with a recipe that can be made and cooked (and eaten) in less than half an hour.
Ingredients
¼ cup caster sugar
¼ cup water
¼ cup orange blossom honey
1 ½ tsp lemon juice
½ tsp rose water
100g pistachios (ground to affine rubble)
100g walnuts (ground to a fine rubble)
Pinch of salt
6 sheets filo pastry
200g melted butter
100g bread crumbs
Syrup
½ cup water
½ cup caster sugar
¼ cup orange blossom honey
1 tsp lemon juice
¾ tsp rose water
tray line with baking parchment
Method
- Preheat oven to 200˚C.
- Place sugar, water and honey in a pan over high heat and stir until the sugar has dissolved.
- Reduce to medium-high heat and allow to simmer for 4-5 minutes until slightly more viscous. Stir in the lemon juice and simmer for 1 minute, then remove from the heat.
- Stir the ground nuts, pinch of salt and rose water into the syrup and set aside.
- Lay out a sheet of filo pastry lengthways (with the shorter side of the rectangle nearer to you), paint with melted butter and lightly sprinkle with bread crumbs. Lay another sheet on top and repeat.
- Cut the layered pastry into 4 long strips. Place a teaspoon of nut mixture at the bottom right hand corner of a strip and fold the corner over to great a triangular pocket. Keep folding, in triangles until you reach the end of the strip then paint with melted butter and place on baking tray.
- Bake in oven for 10 minutes, or until the outside is golden and crisp.
- While the baklava are baking, make the syrup by repeating step 2 with the syrup ingredients.
- Once baklava are cooked, place on serving plate & drizzle generously with the syrup.
Makes 12
This citrus syrup soaked almond cake takes me back to the Jemaa el-Fnaa, the central square of Marrakesh: the teeth pullers ready to pounce with their pliers, the snake charmers forcing a writhing snake scarf on your neck, and amongst this the orange juice vendors lined up, the citrus scents suffusing the air…
Incredibly easy and quick to make, this cake will last for several weeks if kept in a sealed container.
It can be made gluten free simply by using gluten-free bread crumbs.
The candied orange topping is optional.
Ingredients
Cake
50g stale/toasted white bread crumbs (gluten free can be used)
175g caster sugar
100g ground almonds
1 ½ tsp baking powder
200ml vegetable oil
4 eggs
Finely grated zest of 3 medium /2 large unwaxed oranges
Finely grated zest of 2 unwaxed lemons
1 tsp cinnamon (optional)
½ tsp vanilla extract
¼ tsp salt
Citrus syrup
Juice of 2 oranges
Juice of 1 ½ lemons
75g sugar
6 cloves
1 cinnamon stick
Optional Candied Orange
1 cup water
½ cup caster sugar
2 small unwaxed oranges sliced across the diameter 2mm thick
20cm diameter tin, lined with baking parchment
Method
Cake
- In a large bowl whisk together oil, eggs and orange and lemon zest until combined.
- In a separate large bowl mix all dry ingredients together.
- Pour wet mixture into dry and stir until combined. Pour into lined tin and place in cold oven & turn heat to 180˚C.
- Bake for 40-50 minutes or until skewer comes out clean.
Citrus syrup
- While cake is cooking pour all ingredients into pan & place on medium high heat. Stir until sugar has dissolved then let it simmer for 4 minutes until it has reduced slightly to a thin, non-viscose syrup.
- As soon as the cake is removed the oven stab it all-over with a skewer , don’t hold back. Pour the syrup over. It may initially look like it’s drowning, but it will rapidly be absorbed.
- Serve when cool.
Optional candied orange layer
- In a large frying pan stir together sugar and water until sugar has dissolved.
- simmer for 3 minutes then add orange slices. Don’t worry if they overlap.
- Simmer on medium-low heat for 15 minutes, or until the skin of the orange is translucent.
- Arrange as desired.
(recipe influenced by Sophie Grigson)
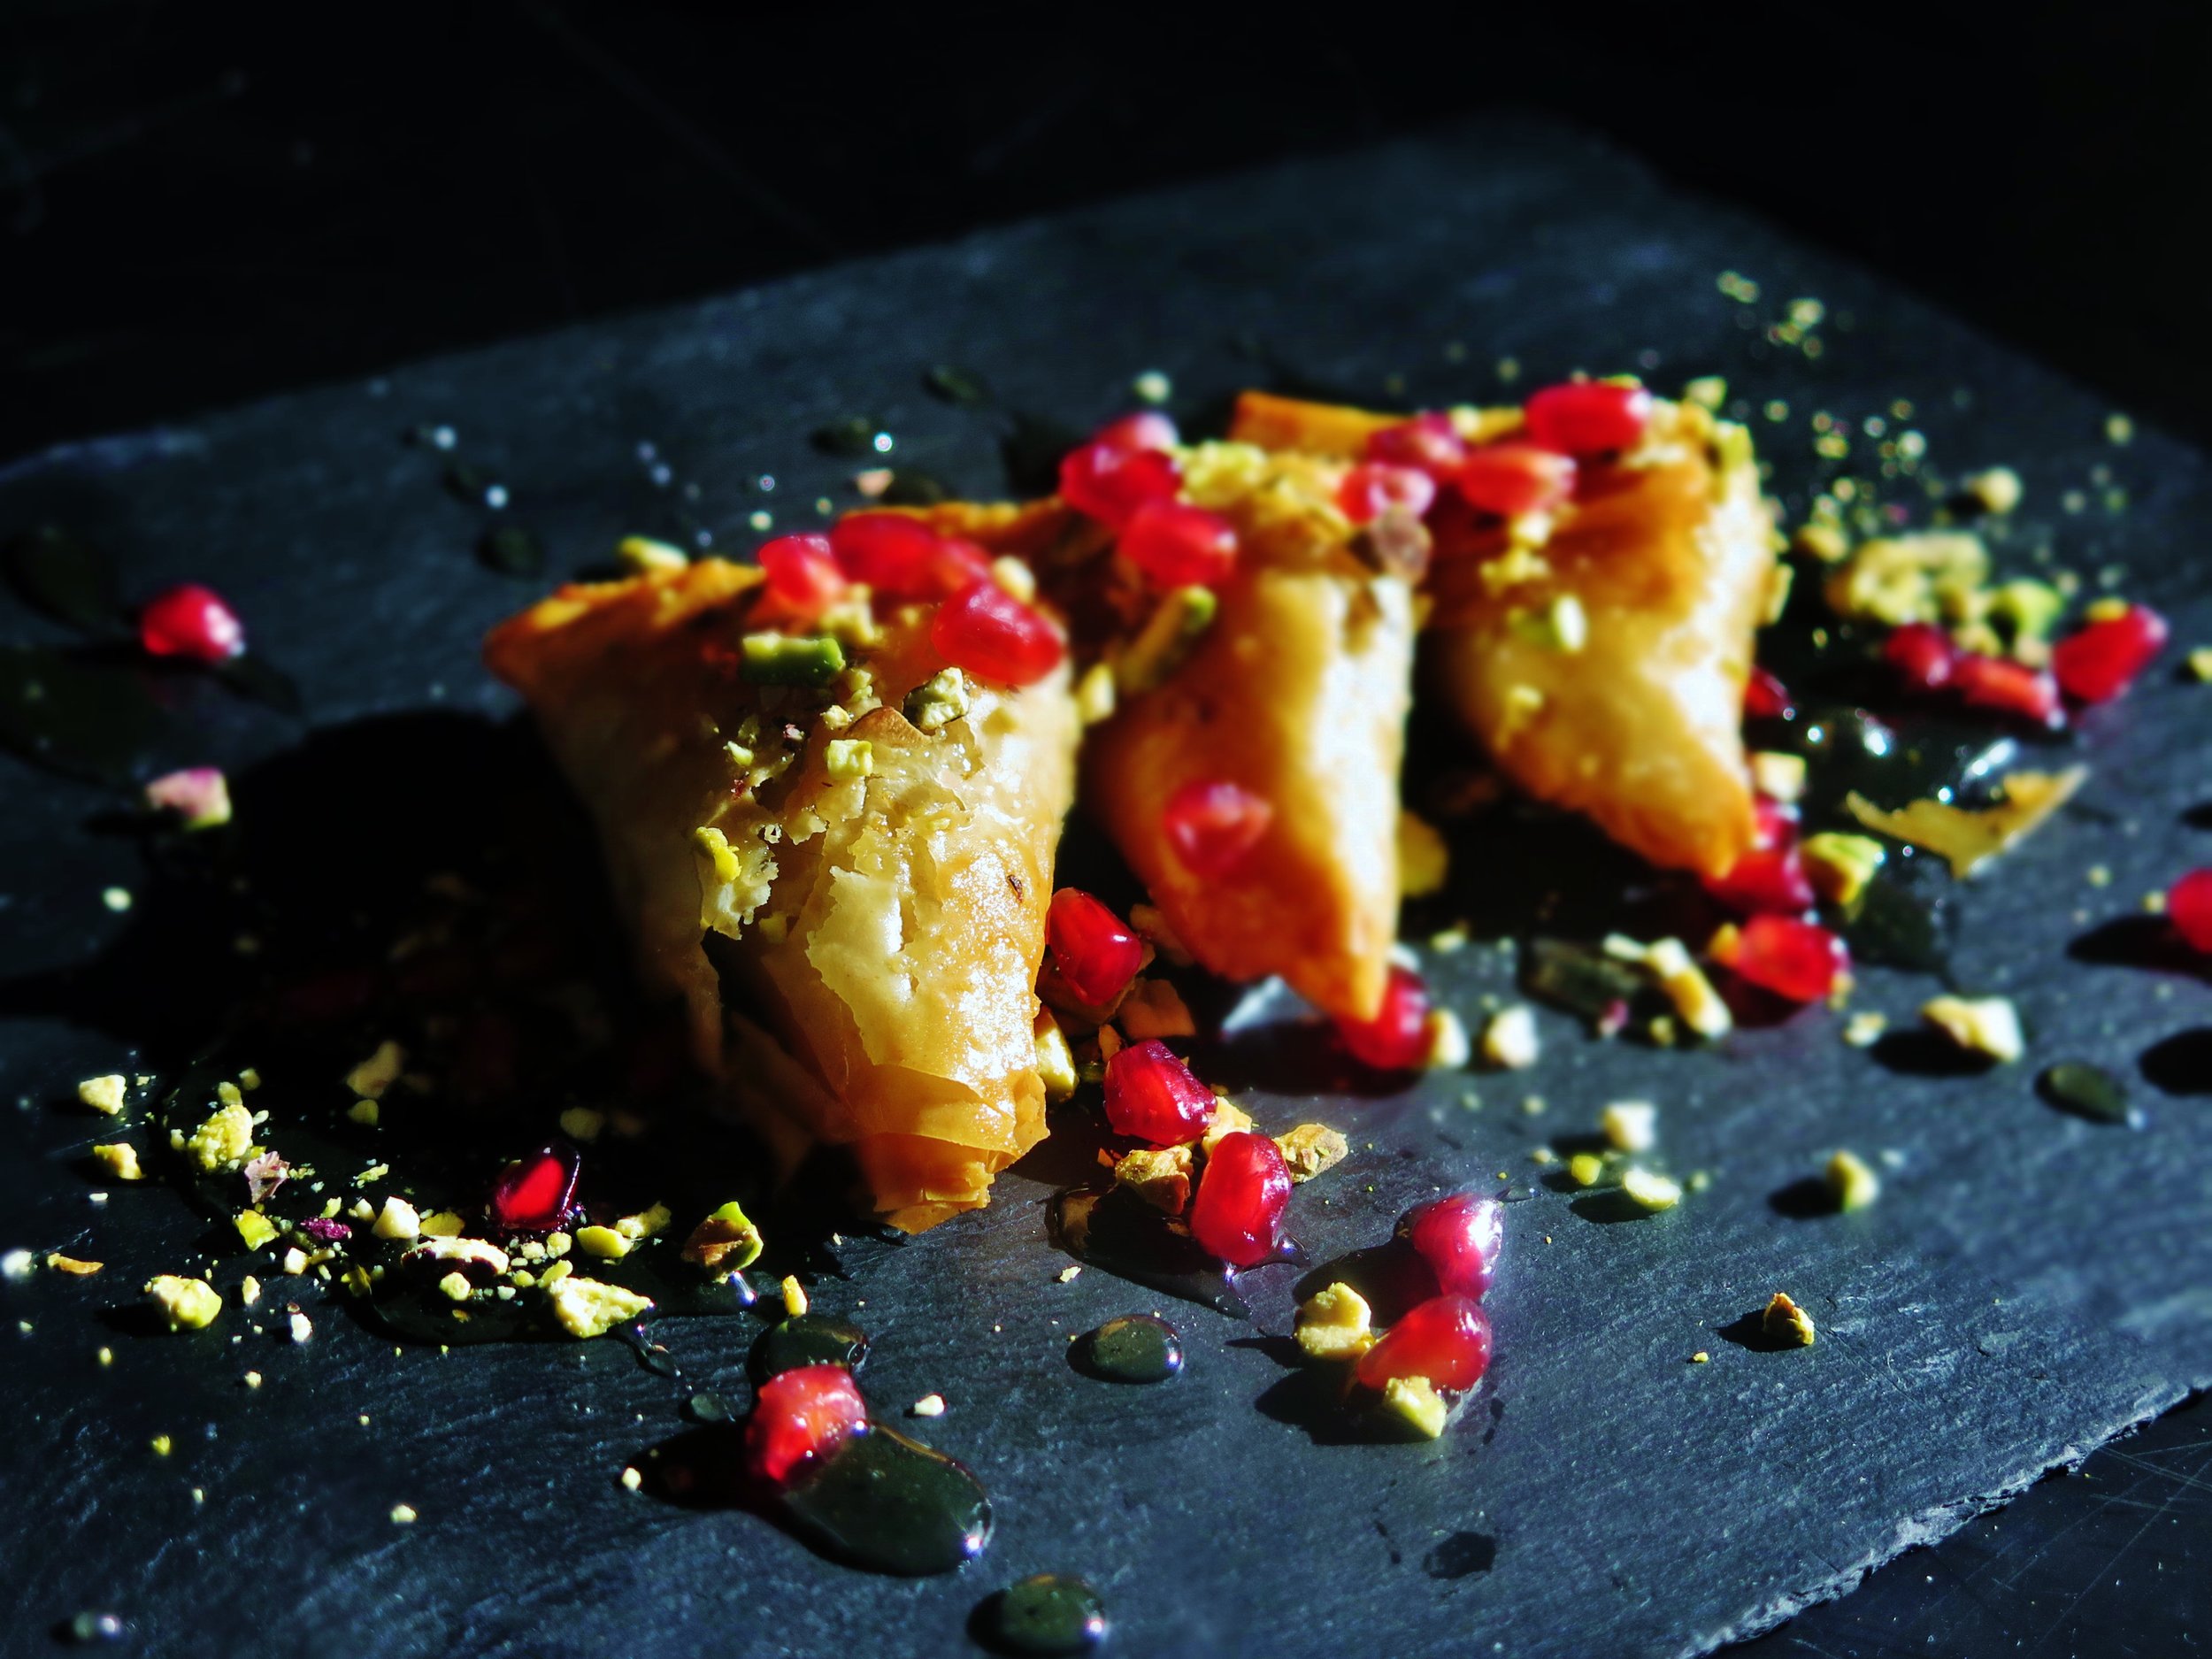
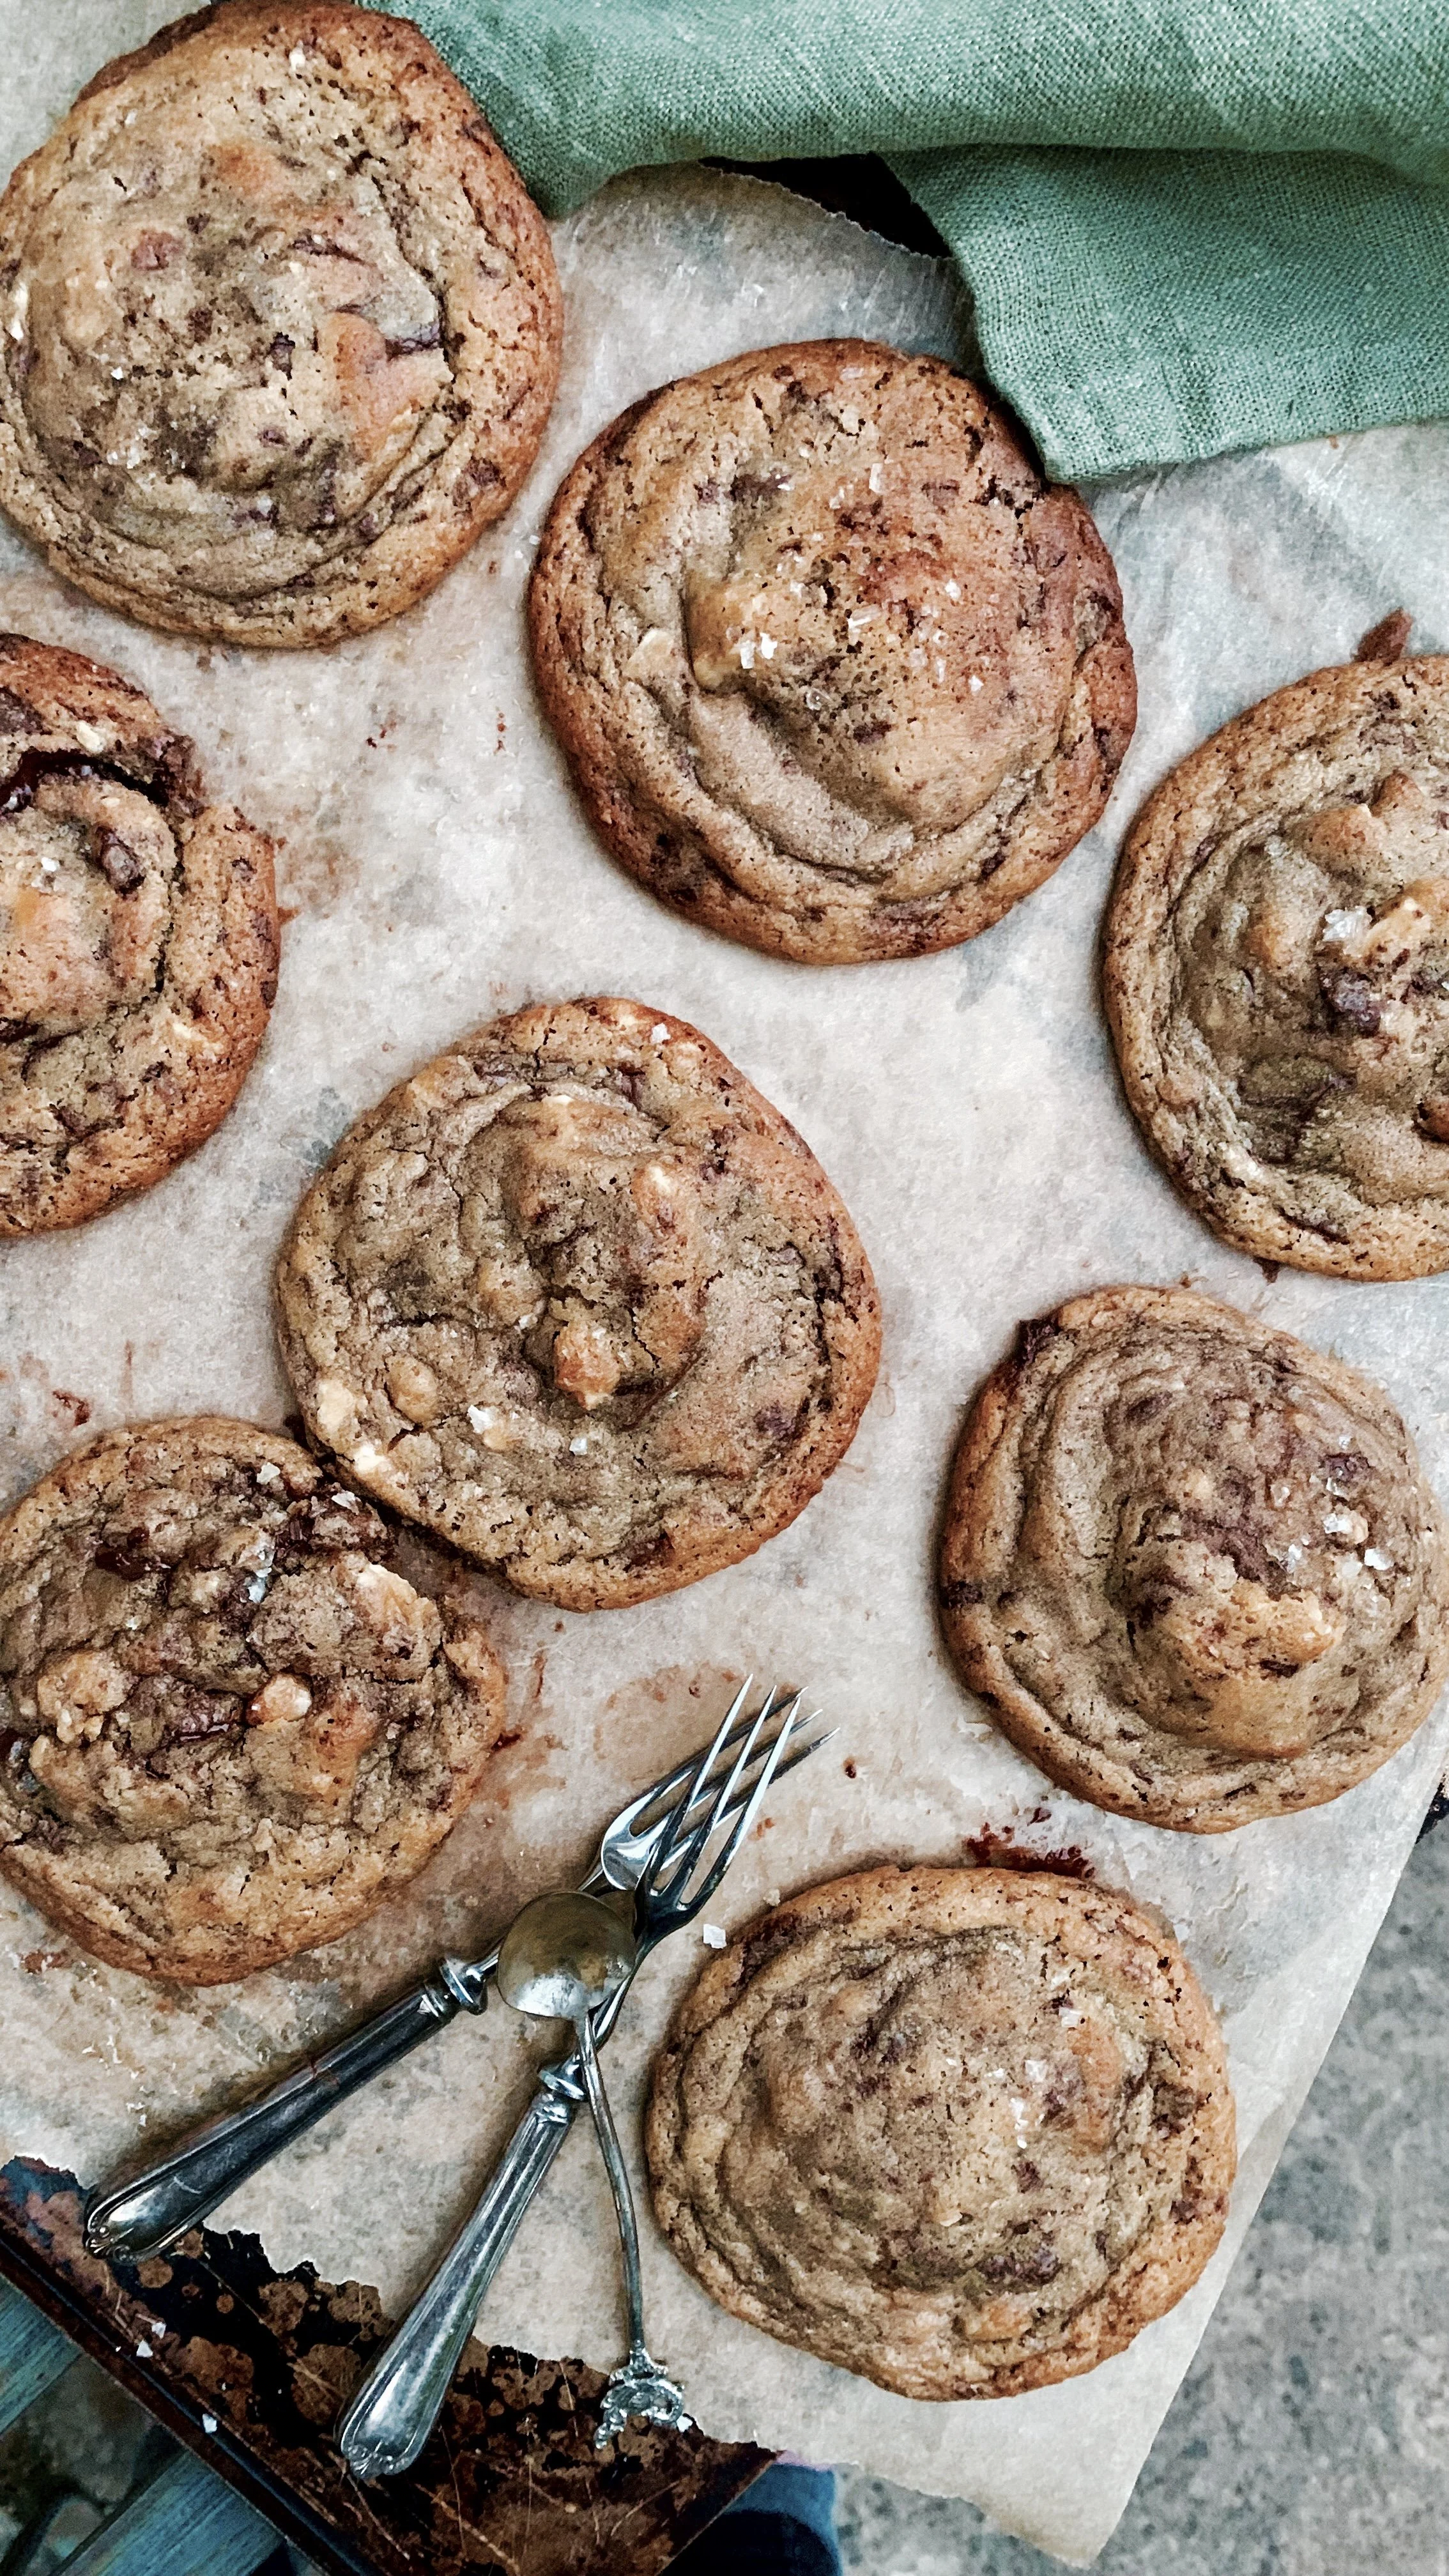
Cantucci (the Tuscan name for biscotti) are typically served with vin santo for dessert. I tend to chuck in whatever nut or dried fruit we have available, and this particular combo worked out exceptionally well: the tanginess and chew from the oranges, the toasty crunch of the hazelnuts, and the plump, wine-soaked sweetness from the figs. I try not to overcook them so as to retain some of that satisfying chewiness.